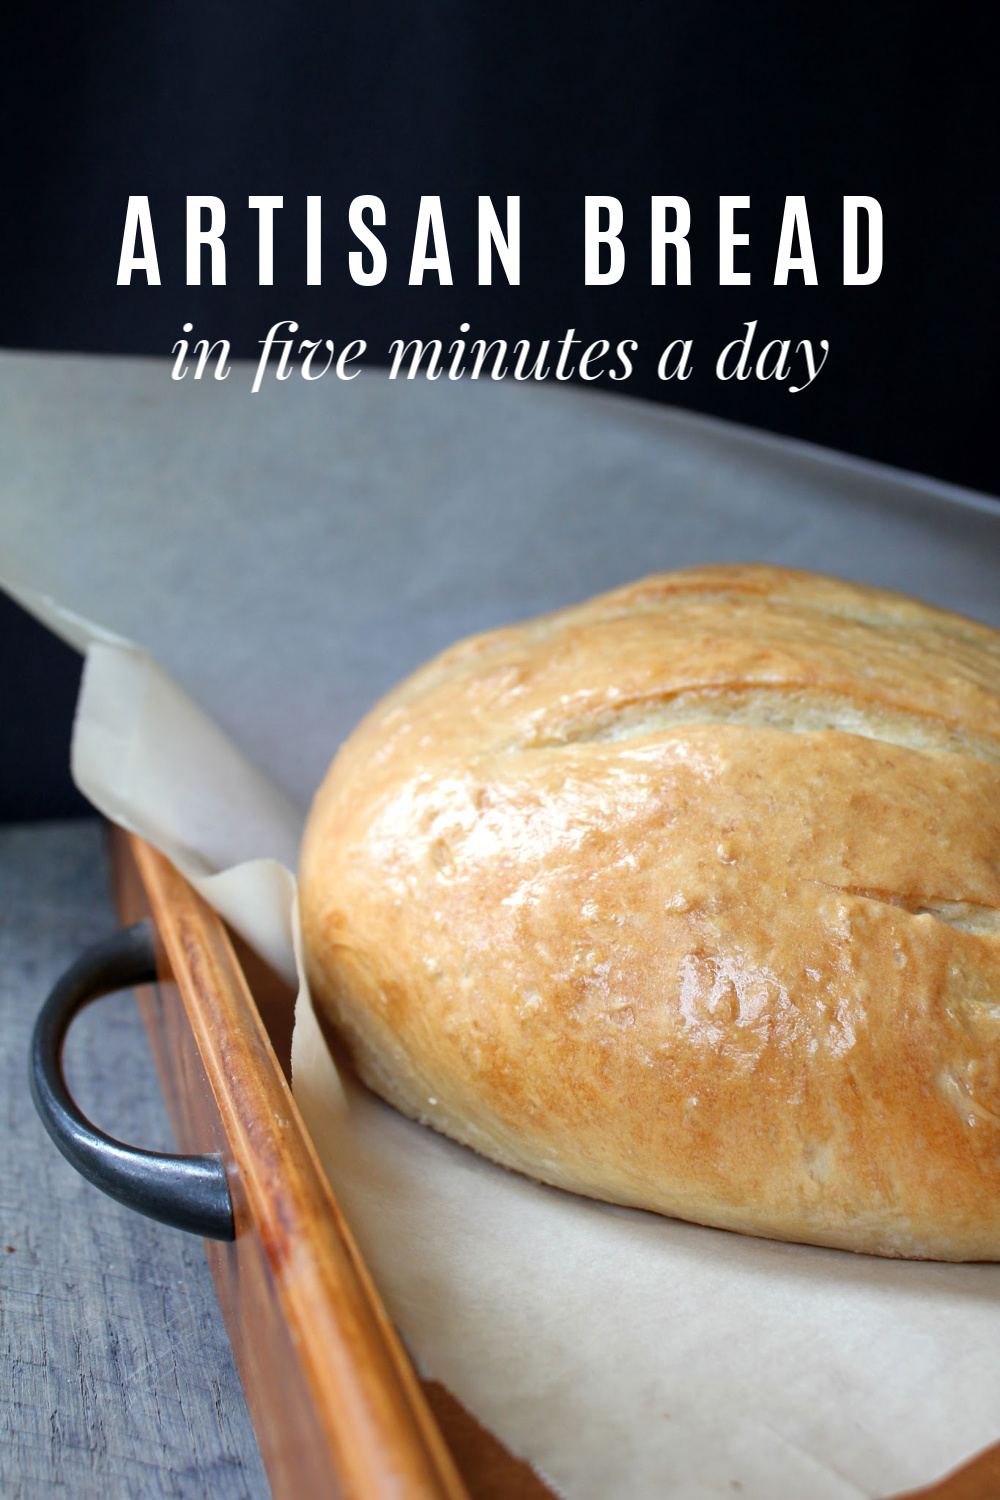
Artisan Bread
30 Days to… 5 Keys for… 7 Steps to… I’ve never been interested in gimmicky fads. So when Artisan Bread in Five Minutes a Day: The Discovery That Revolutionizes Home Baking (Amazon) came along back in 2007, I didn’t pay much attention. After hearing about it everywhere I turned though, I finally borrowed a copy of the book.
I flipped through it, tried the master recipe, and was hooked. If you have baked bread using these steps, you know how brilliant and simple it is. If baking with yeast makes you nervous, this method is a great place to start. Just think, this could be the year you finally conquer baking a loaf of yeast bread from scratch!
Here’s the basic idea: You use four ingredients: yeast, salt, water, and flour. You mix the dough by hand. You store the dough in the fridge in a big container. You bake fresh loaves as needed. The “five minutes a day” refers to the time it takes to shape the refrigerated dough into a loaf and turn on the oven. The rest of the “work” is just letting the loaf rise on the counter and bake in the oven.
I whipped out my calculator and figured that I am making 3 medium-sized loaves of high-quality bread for less than 70 cents. Total. That’s a measly 23¢ a loaf. You won’t be able to beat that price anywhere. Oh, and the smell of fresh baking bread filling your home combined with the satisfaction of knowing you baked it yourself? Priceless.
I have broken the steps into bite-sized pieces. Follow along, and you will soon be cranking out hot loaves of bread from your own oven. I promise, this is easy! What do you have to lose? Five minutes and seventy cents?
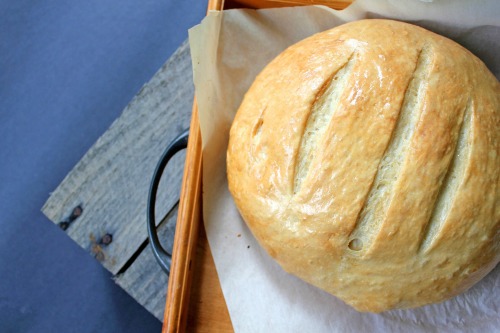
Easy Artisan Bread
Yield : 3 loaves
Recipe from Artisan Bread in Five Minutes a Day (Amazon)
Ingredients
3 c. lukewarm water
1 1/2 T. active, dry yeast
1 1/2 T. coarse or kosher salt or 1 T. regular salt (less, if desired)
6 1/2 c. all-purpose flour (or a combo of white & whole wheat)
Visual learner? Check out the video and directions below:
First, dump all 4 ingredients into a large container. I use a 22-cup lidded Rubbermaid container for my dough. It fits neatly & easily in the fridge. The official recipe directs you to punch a small hole in your container lid (Amazon) to allow the gases from the yeast to escape. I’ve never done this and still get great results so there must be enough gaps around the lid to keep the yeast happy. If your container’s lid fits more snugly, you might need to add a small hole.
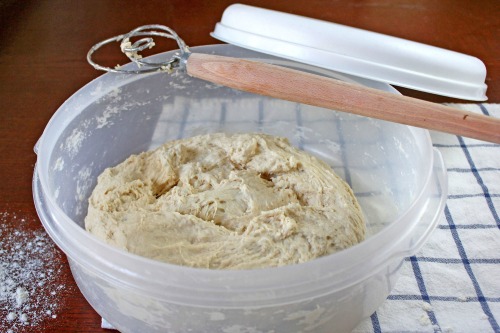
Using a wooden spoon or this amazing Danish Dough Hook, mix the ingredients until the flour is well incorporated. You don’t need to knead the dough or do anything fancy. It will be a wet, shaggy mess, and that is perfect.
Place the lid on the container and leave it in a warm place for about two hours to rise.
Are you still with me? I told you this was easy!
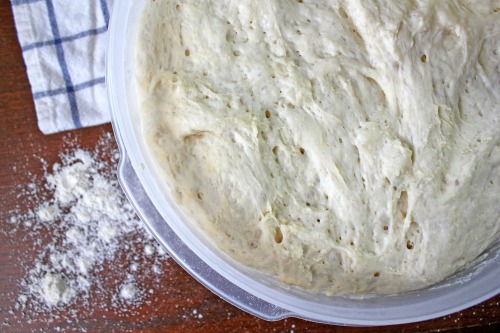
At the end of the rise time, your dough will magically fill the container. It will be flat on top and filled with air bubbles. At this point, you can put the lid back on and stick the container in the fridge to use later. I’d recommend using the dough within 1-3 days as the longer it stays in the fridge, the yeastier it tastes.
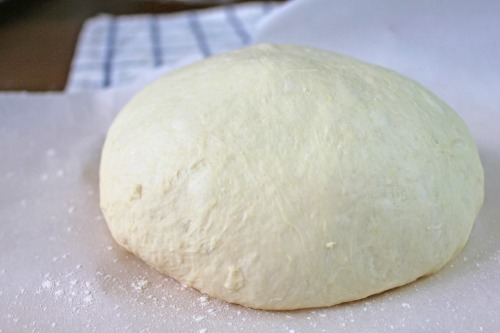
I usually form one loaf right away and save the rest of the dough in the refrigerator for later.
Sometimes, I form and bake all three loaves at the same time, serving one right away and wrapping two in foil and freezing them in large Ziploc bags. When I’m ready to serve the frozen ones, I pop the foil wrapped loaves straight from the freezer into a hot oven.
Follow these directions for all 3 loaves:
Use a sharp knife and well-floured hands (the dough will be wet & sticky) to stretch and cut off a ball of dough about the size of a large grapefruit or small cantaloupe. Keeping your hands floured, shape the dough into a smooth ball. I just keep working the dough around the edges and tuck it under the ball until it is smooth. Don’t worry if it’s not perfect. Any rough spots will just add to the rustic look.
Place the dough ball on a pizza peel or parchment paper dusted lightly with flour or cornmeal. I usually use a pizza peel & cornmeal because then I can slide a formed, risen loaf right onto a hot baking sheet or stone, making the crust nice and crisp.
If you’re just getting started, use parchment paper and a baking sheet. It’s easy, and your loaves will still turn out beautifully.
Let the dough rest for at least 40 minutes (I usually let loaves rest a bit longer if they start cold from the fridge). The dough will spread a bit, but it won’t rise substantially. That’s okay; it’ll do most of its rising in the oven.
While the dough is resting, crank the oven up to 450 degrees. If you have a baking stone, place that in the cold oven to preheat as well. Add a small dish of water to the lower rack to create steam in the oven. I use a stoneware pie plate or a metal cake pan.
Don’t put a cold stone or glass dish into a hot oven as they will shatter. Yep, I’ve been there, done that with both. After shattering my baking stone, I borrowed a friend’s cast iron pizza pan and loved it. That thing weighs a ton and is indestructible. It’s definitely worth the investment if you do lots of baking.
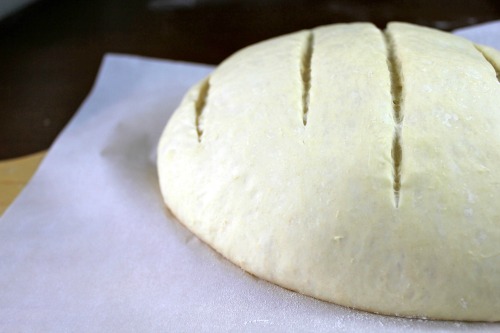
Using a serrated knife slash the loaf, about 1/4″ deep, several times across the top. If you are using a baking stone, slide the loaf onto the preheated stone. If not, simply slide the parchment paper directly onto the rack or a baking sheet. If needed, add more hot water to the dish.
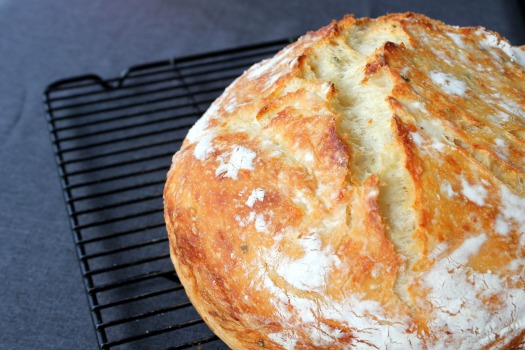
Bake the bread for 30-35 minutes. This is actually the trickiest part of the whole process for me. The biggest mistake I make is taking the bread out too early, resulting in a doughy interior. The exterior should be a golden brown, and the loaf should sound hollow when tapped with your knuckle (For this and any other FAQ, go here). If you used parchment paper, you can remove the paper after 20-25 minutes to bake the bottom crust better.
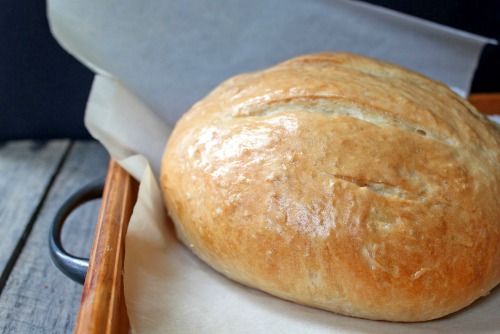
The crust and crumb of this bread turns out slightly different almost every time I bake it, but it is always delicious.
Place the loaf on a baking rack to cool completely before slicing with a sharp bread knife. Store the loaf on the counter as the crust will get soft if you put it in a plastic storage bag.
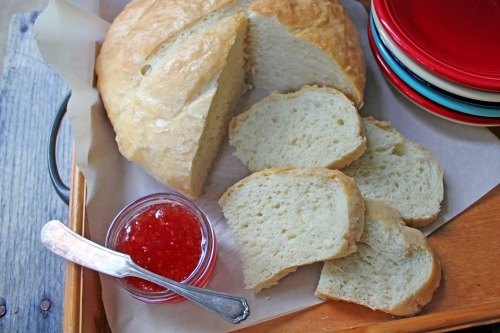
This master dough recipe can be shaped in a bunch of different ways. It also makes great sandwich rolls, pizza crust, and grilled flatbread. Once you have the hang of it, start experimenting. With confidence will come creativity.
You can also check out the companion book, Healthy Bread in Five Minutes a Day for more baking inspiration.
While you’re at it, check out the amazing No-Knead Bread recipe. You’ll never buy bread at the store again!
Looking for delicious soup recipes to pair with your bread?
Looking for more homemade swaps you can make in the kitchen?
Find more delicious recipes on our Recipe Page!
Follow Frugal Living NW on Pinterest!
Fantastic range of boards from best recipes and tips for frugal living to gardening and budgeting help.
This post may contain affiliate links. See the disclosure policy for more information.



So, I’m reading this and I need to know, what is a T? Is it a teaspoon or a tablespoon? It could make a difference. I want to try this but I need to know this first.
T = Tablespoon
t = teaspoon
This sounds like my Mom’s bread recipe, but she always added a little sugar to the dough. Does this sound right to anyone?
Hi, Brenda – Yes, that would be fine! I know some people add sugar for some sweetness. It can also give larger air holes in the interior of the bread.
Hi, tq for the step by step procedure. Your bread looks great. Apart from the flours mentioned above, can i use strong flour? What is the difference?
Made a batch…worked perfectly. Made one loaf and put the rest in fridge? But how do you use the dough in the fridge. When you take it out…what do you do? Thanks!
Hi, Janet! Glad to hear the first loaf turned out well! For the refrigerated part, just take the dough out of the fridge and proceed with the steps as written (pick up at shaping the loaf for the 2nd rise). Since the dough is cold, I usually give it a bit longer to rise. Hope that helps!
I am impressed,I am a 52 yr old male w/out baking exp.I made 1 mistake,if your kitchen is cold,turn on your oven to warm and set the dough on it to rise,I am so pleased with the bread it is delicious!!!
Great step by step. Love the photos and your tips. Can’t wait to try this. And I have that exact container sitting in my basement.
Thanks!
For those of you that are asking why your dough is not rising after you form the loaf. It could be that your yeast is weak or the yeast has used up the available food it can use in the dough so it is starving. You have to keep in mind that Yeast is a living organism and it has to eat and breathe just like any organism. If your dough has stopped rising after you form a loaf, and leave it out to rise you may need to restart the dough. If you are using a commercial yeast you can simple start a new batch, if your using a strain of home grown yeast you will need to try to save the strain be using some of the old starter dough in the new batch.
I’m making this right now! It’s on the last leg of rising, and then I’ll start shaping. My first time really making bread on my own so I’m crossing my fingers. I didn’t check to see I had enough flour before starting so I’m hoping it will still work. Instead of all 1 kind, I used 2 1/2 cups of whole wheat flour, 3 cups unbleached white flour, & 1 cup of ground flaxseed (simply because I’d totally run out of both kinds of flour! oops!) I like a dense bread, so I’m guessing it will be ok even if it turns out a little dense. Thanks so much for posting this in such a easy format…makes it nice for us beginners!
Yay for new kitchen adventures. Good for you! Hope it turned out well!
Help. I tried to make this yesterday and mine was a mess. I let it sit for the 2 hours and then when I tried to make the first loaf it was like trying to turn pudding into bread! How much flour do you add? I added so much flour and it never was smooth. My end product did taste well but since I did not have a smooth ball to start it was super thin (final product was maybe 2 inches tall in center and took up the entire stone). Thanks!
Sounds like you used a baking stone instead of a covered pot? The dough is pretty sticky and wet; it will spread if not confined. Even when you wrap it in the towel for the 2nd rise, if it’s not gathered at the top, it will spread into a flat disk. I’d suggest using the recommended amount of flour and try baking it in a pot next time. Hope that helps!
no knead bred great!,new book great,making bread,good to know how– keep your main pak of yeast in frezer- just warm the water for the dough-happyness is mixing your flours-whole wheat-white whole wheat- we love gold medal flour,the color,texture of product,taste is great-smell is–?,mmmm-the bread formulas on the back of the bag of flour if your stuck–a loaf of bread with a meal-is a home cooked meal- not much to eat- bread helps with a small meal- shows u did your best with what u had. makin bread for70 years ,love the new books too- learn every day- love it- also teach it,– have more ,but no room
Has anyone tried using oat or rice or other gluten-free flours with this recipe? Just curious before I waste the expensive, but necessary flour.
This recipe is wonderful i gave a loaf to my brother and he took it to work the guys at work want more. Thank so much for your recipe =)
Took a while before I had the time/guts to try this, but I have one question:
No sugar? And it still rises?
I’ve got mine in my 22 gal rubbermaid plastic bowl as we speak. I guess I’ll find out when I get back fromworking out!
No sugar, and it still rises beautifull
Yeast will proof fine without sugar, but it will be a bit slower. Sugar gives the yeast a kick of extra “food,” but is not necessary for it to rise.
I believe there are some simple sugars in flour that feeds the yeast. The long rising time also helps out with that.
Wow, not only is this easy, but it’s as delicious as the breads I’ve purchased from our local Artisan bakery! No more paying $6.00 a loaf! I made some today with Italian seasoning in it, and it’s delicious:) I love the look of it too. Made some dinner rolls with it yesterday as well. Thank you for the recipe!!!
Keep in mind that your bread is marinating in plastic, so either choose a BPA free plastic container to make/store your bread in, or choose glass. Pyrex sells really big glass bowls with lids.
Just made some! yummy just put book from library on hold.
Like the photography!
What a timely post because I started using this method several weeks ago…I think before Christmas because of either an old post of yours or one of the sites you also view and I thought I should try it. Like you when this book first came out, I thought No way in heck I ‘m going to do that. Then the idea sort of continued to creep up on me.
Now, I am soooo hooked. I just made a batch on Friday. In fact, I liked this method so much, that I purchased a pizza peel (will have to invest in a better one I think. My current one seems to be splitting) a pizza stone (got for free from a customer) and a Danish Dough Whisk that I got for Christmas from in my inlaws along with the Healthy Artisan Bread in five minutes a day. I later purchased the original one.
I must say that I like the way your loaf looks. I haven’t really shaped mine past the round boule shape.
Question: What container are you using in your pictures above. I ended up finding two bowls (6 quart) at Target for around 4 bucks.
However, If you ever have a chance to go to downtown Portland, stop by Boxer Northwest. They sell the containers that the authors use in the book.
Had planned making another batch tonight but instead I made blueberry scones.
You can also buy the 6 qt. containers on Amazon for about $12 for 2! A great deal. I keep my flour in one (unbleached) and the dough in the other. I haven’t had to poke a hole in the lid either, even though it is pretty tight, just not airtight!
I made it today!!! It was awesome and the kids ate the crust right up. So much for low carb:(
I made this bread today using 5 cups white flour (all I had left in the bag) and 1.5 cups wheat flour. I used 2 packets of yeast, it seemed to measure out to 1.5 T. Salt was Morton’s all-purpose natural sea salt. First loaf was delicious! I am excited to vary it up with added herbs and garlic the next go round.
This dough makes our favorite pizza, now too! I mixed grated garlic and italian herbs in then stretched 2/3 of the dough on an oiled/cornmeal dusted baking sheet. Precooked that for about 5 minutes then topped with pesto, cheese and toppings. Loved it, made my husband swoon!
can you make two larger loaves out of it? And if so, how long do you leave it in the oven?
Definitely! You can make fewer, larger loaves or a bunch of small rolls or breadsticks or… It’s super versatile dough that can be formed in many different ways.
I usually bake it long enough for the outside to be golden brown and the crust to sound hollow when tapped with your knuckle. If you’re nervous about underbaking, try using an instant read thermometer (like you usually use to test meat). The middle should be around 205-210 degrees when it’s fully baked.
Hope that helps!
How large is the loaf supposed to be?
I have this checked out of the library right now! My problem is that it never rises after I form my loaf (even though I leave it out for the 40 minutes+ suggested). At all. So my loaves are tiny, tiny, tiny. Suggestions????
Are you leaving it in a warm room? That really helps yeast breads to rise. You may need to put it near (but not too near) a heat source.
Kelly, it’s in my kitchen and I even leave it on top of the stove while the oven is warming up just to give it a little extra temperature boost. Still stays tiny.
buy new yeast -often that is the problem
I just tried to make this and my yeast is new. I just opened it. I used instant dry yeast, is that an issue. Is the dough usable even if it doesn’t rise?
I just saw this book on the 2 week now renewal shelf at the library 2 days ago and brought it home, how funny you would write about it at the same time as I have it checked out! Just made my dough today. My parents are so into it (and they come over so often for dinner) they purchased a baking stone for me! Yay! Making the actual bread tomorrow to go with the roast I am making!
Make sure your yeast is fresh and your water isn’t too hot. I make this no Knead version often for my family. The kids love it! http://foodwishes.blogspot.com/2009/01/no-knead-ciabatta-bread-you-can-believe.html
Yep, those would be my suggestions, too : fresh yeast, lukewarm water, warm area to rise. If the dough is really cold, give it longer. It won’t rise much on the counter but should rise in the oven to give you a light, airy interior.
I used to have that problem too and learned from this book that it was because I was using too warm of water when I mixed it with the yeast. The water was killing the yeast! Now I use a little warmer than room temperature and it rises every time. I buy yeast in bulk at Costco and keep it in an airtight container!
I love making bread! I am actually making some as I write this, but I didn’t use this method. It is pretty intriguing!
As for creativity…I do several different “flavors” and I get treated differently at potlucks when I don’t bring some! Here are some ideas:
*Honey and Crushed Red Pepper Flake (probably most people’s favorite). I kind of roll out the dough and squirt a good 1/2 a cup or so of honey over it. I do a liberal dusting of flour several times and press it in the absorb the honey. Then sprinkle red pepper flakes over and roll it up. Be careful to keep the honey inside and be sure you use a pan that can handle it if the honey runs out!! I score the top lightly and brush with egg white then sprinkle liberally with sugar and lightly with red pepper flake.
*Pizza Bread. Add pepperoni, mozzerella and Italian seasoning. I also score top and brush lightly with egg white. Then I sprinkle parm cheese and italian seasoning or garlic salt and italian seasoning.
*Basil and Cheddar Cheese (fresh basil minced up)
The possibilities are endless!!
*Stuff it with meat and cheese and some sauteed veggies have dinner all in one!
Thanks for sharing this bread method!!!
I’ve been wanting to try this too but I definitely want to use whole wheat flour… do you know how much of it you can use as compared to the white flour? Thanks!
If I add whole wheat flour, I generally go 50/50 with the all-purpose white. A few weeks ago, I was out of all-purpose and used all whole wheat. It worked but changed the texture, of course. The more whole wheat flour, the denser and heavier the loaf.
Whole wheat pastry flour is a fun alternative because it gives you a bit lighter result.
Experiment with different amounts and let us know what worked best for you!
The whole wheat recipe the authors give in their new cookbook is
5 1/2 cups whole wheat flour
2 cups all-purpose flour
1 Tbs. Kosher salt
1 1/2 Tbs granulated yeast
1/4 cup vital wheat gluten
Follow the same directions above- mixing together and letting sit for 2 hours, etc.
OMG! With this, I am invincible! I am going to feel like wonderwoman! Thank you!!!
great recipe can’t wait to try ! do you have any good recipes for a “sandwich style bread”? my kids eat sandwichese every day at school and i’m looking for a bread without such a hard crust with a little more give – you know, sandwich style but homemade!
thanks!
Here’s a link to the sandwich bread I make every week. It’s excellent and really nutritious. Our family of 4 goes through 4 loaves per week! It’s that good!
http://healthnutnation.com/2010/07/15/multigrain-bread/
Thanks for the recipe – can’t wait to try it! I’ve been using the no-knead recipe that ran in the NY times a few years ago (http://www.nytimes.com/2006/11/08/dining/081mrex.html?_r=1) as well as the quick version run by the Oregonian and my family is hooked on the homemade stuff… so easy and inexpensive. Love mixing in left over fresh herbs or roasted garlic in the summer.
Totally trying this! I recently made a french loaf for the first time. You have to open the oven and spray the bread with water all the time, yadda, yadda. Too much work! This looks like me, quick and simple, but with flair!
my daughter and I make this together all the time and it is so fun to do with kids. We make pizza / calazone, pig in a blanket, bread sticks (twisted of course), but I especially have fun with pita bread (roll and bake really high temps and watch it puff right up) and placing rolled out dough over little oven safe bowls for bread bowls to put soup in. So much fun (if you don’t mind a little flour to clean up later).
Love It!!! My husband and I just decided last week we are not going to buy anymore store bread. We want to save the few dollars a week we spend on bread and know exactly what’s in what we are eating. Thanks for the post.
I actually checked this book out at the library this week, and here you are posting about it!! I guess that is my nudge to actually MAKE some of the bread, huh? YAY!
Hey this looks so easy to do that I will even have time to fit it in between books!
Shellee, that sounds really good! Has anyone added parmesan to theirs, or asiago? Would we add these ingredients before putting the dough in the frig?
I often add minced garlic (Costco) and chopped rosemary. We can hardly wait for it to get out of the oven.
do you add it in the dough or just on top? yum!
Can you explain a bit about how to use parchment paper? I have the cast iron pizza pan and like it, but it takes awhile to heat and I don’t get a crisp crust. Where do you buy it? Are there brands? Is it reusable? What is its upper safe temperature limit?
Some people use parchment paper for the majority of their baking to avoid sticky messes and get a crisper crust. I often use parchment paper for lining baking sheets or cake pans, etc.
For bread, parchment paper is just another option as a baking surface.
It’s definitely not a must. My favorite way to bake this bread was my Pampered Chef baking stone (in its pre-shattered condition. sigh…). If you don’t have parchment paper or a stone, just use a plain old baking sheet. I often do, and it will work just fine as long as your oven is nice & hot.
With a cast iron pan, you could try adding a little oil before placing the dough on it if you’re looking for a crisper crust?
you buy it next to the tinfoil, etc… not reusable…..
I reuse it all the time. Once it gets brown though it gets fragile. Then I get a new piece.
Thanks! I’m feeling inspired to make some bread! I’ve always wanted to try my hand at making Artisan style bread but I have always felt intimidated by it. Thanks for the recipe. I can’t wait to make this!
I think I’ll give my bread machine a break this weekend, and try this recipe. Thank you!
I have been using this method with great success. I just purchased the “Healthy” version of this book, which is relatively new and uses more whole-grain flours, usually enriched with vital gluten. Dough buckets are available through King Arthur web site, and the authors of this book have a very good and active website. Every recipe I have tried from either book has been terrific. Try the semolina bread.
oh my…this looks delicious!!! Can’t wait to try it!
I make this often. I use an old gal size ice cream tub, that way I didnt care that I punched a hole in the lid. works great