No-Knead Bread Recipe
If you have been hanging out around Frugal Living NW for awhile, you know that I am a big believer in making food from scratch at home. With a few exceptions, I prefer creating something in my own kitchen to buying it in the grocery store.
Bread can be tricky, though. There is some stiff competition out there, and it is tough to replicate a commercial oven’s heat and steam in a normal home kitchen.
For the last several years, I thought that Artisan Bread in 5 Minutes was the best thing since, well, sliced bread. It was simple, and we were content with the results. That is, until last summer when our neighbor brought over a beautiful, delicious loaf of home-baked bread. We had to know her secret. One phone call, and she came back with the book, My Bread by Jim Lahey (Amazon).
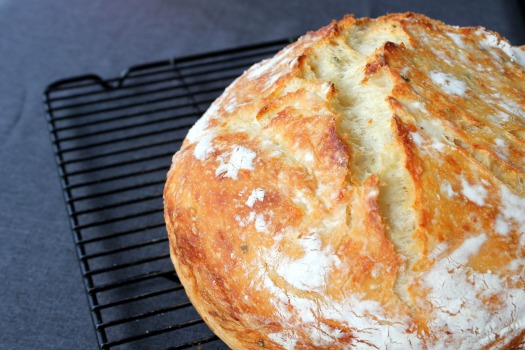
We have been baking bread using this method ever since. I can count on one hand the number of times I have bought bread in the store since then, because I can now make an artisan-quality loaf at home for a fraction of the cost.
I am telling you, this is consistently the best bread I have ever made in my kitchen. Okay, enough gushing. Let’s make some bread.
The only changes I have made to Lahey’s method is to double the amounts and adjust the baking time and temperature to achieve a bigger loaf with a thinner crust.
Oh, and don’t be put off by all these steps. This is totally possible for home bakers at any skill level. I wanted to give you the confidence to do this on your own. A concise recipe can be found at the bottom of this post.
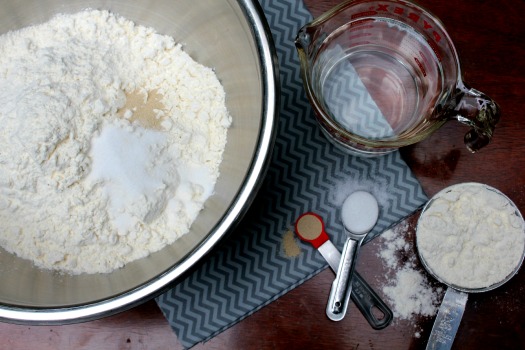
The ingredients are simple: flour, water, salt, and yeast. My husband calculated this bread costs 74¢ per loaf (using Bob’s Red Mill flour & Costco yeast).
Oh, wait! Don’t forget to factor in the roughly 8 cents of energy used to bake it for an hour. No, I’m serious. My husband really does think about this stuff! He’s funny.
So, there you go. A whopping 81¢ for a substantial 2.5 pound loaf of bread. That is crazy cheap.
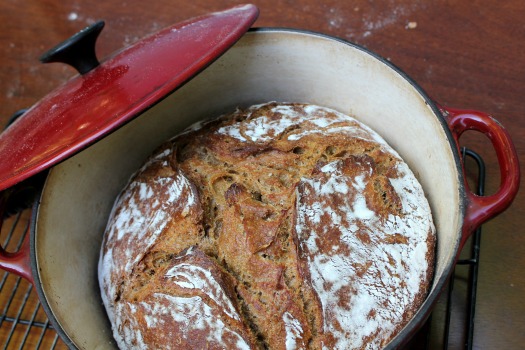
If you want to use some whole wheat flour, substitute 3 cups of whole wheat for 3 cups of the all-purpose flour (3 cups whole wheat and 3 cups of unbleached flour for a total of 6 cups) and add 3 Tablespoons of molasses (optional). This will produce a slightly sweeter, denser loaf of bread. Delicious.
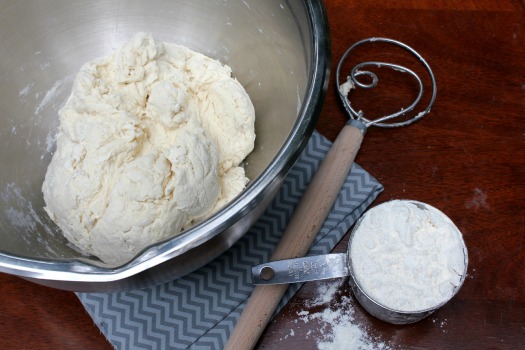
Combine the dry ingredients, add the water, and stir to combine (the funky looking wood-handled item is the amazing Danish Dough Wisk — makes stirring stiff dough a snap). The dough should be wet and sticky. Depending on the temperature and humidity in your home, you may need to add a little more flour or water, 1 Tablespoon at a time. So far, these steps are exactly the same as the 5 Minute method.
The main differences are that you use significantly less yeast (1/2 teaspoon vs. 1 1/2 Tablespoons) and significantly more initial rise time (12-18 hours vs. 2 hours).
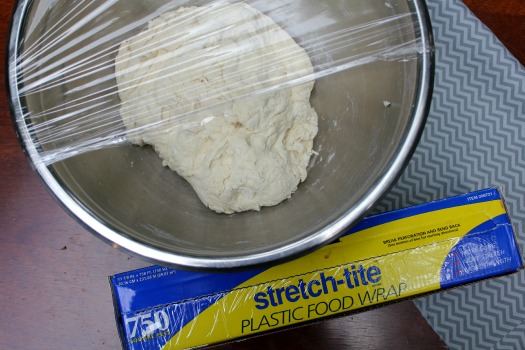
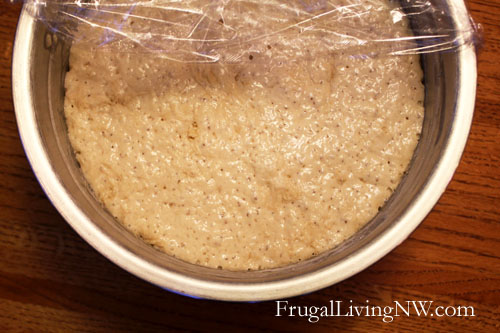
Once the ingredients are completely combined, cover the bowl with plastic wrap and leave it on the counter to rise for 12-18 hours. This slow rise aids in the fermentation of the yeast, giving the bread a better flavor.
Okay, I know what some of you are thinking: 12-18 hours! That’s ridiculous! Who has that kind of time?! I get it.
However, here are two things to consider:
- Once you get into a rhythm of baking your own bread, it’s not a big deal. I start mine in the afternoon or evening and bake it the next morning or afternoon. This would also be an easy weekend routine.
- Just like the title claims, this bread requires no kneading. It is not fussy, temperamental dough. You can produce a delicious loaf of bread with very little hands-on effort & experience.
You’ll know your dough is ready when it has risen in the bowl, smells yeasty, darkened slightly, and is covered with small bubbles.
Using well floured hands, shape and tuck the sticky dough into a rough ball. You can also fold it over a couple times on a well-floured surface. It doesn’t have to be perfect; just keep quickly tucking the dough underneath with your fingertips until you have a semi-smooth dough ball. The dough should be wet but manageable; you don’t want a wet blob so sticky that you can’t shape it into a ball.
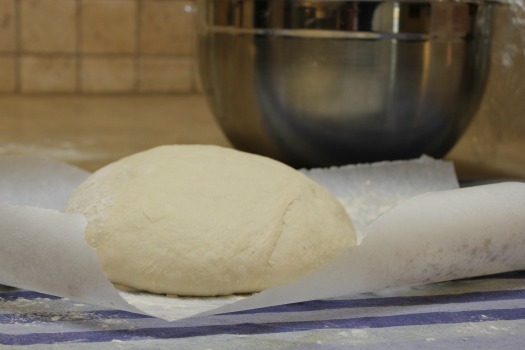
Take a clean linen or cotton tea towel (not terry cloth) and dust it with flour, cornmeal, or wheat germ to prevent the dough from sticking to the towel as it rises. You can also use a floured square of parchment paper on the towel to make the dough ball easier to handle. Place the dough ball, seam side down, in the middle and dust with more flour.
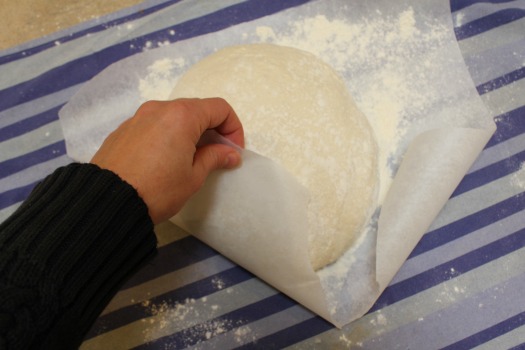
Cover the dough with the (parchment paper and) towel and let it rise for 1-2 hours at room temperature, until doubled in size. During the last 30 minutes of rise time, place a heavy lidded 6-8 quart pot, like a Dutch oven, in a cold oven and preheat it to 425 degrees.
Confession: I own three Dutch Ovens. I use them all the time. They are incredibly versatile and worth the investment. If you don’t own one, you could also make this in any lidded pot, provided it is oven-safe at such high temperatures. Also, check the knob on your pot. If it isn’t rated for such high heat, you’ll want to remove it or cover it with foil. You can also buy an inexpensive replacement knob that is rated for higher temps!
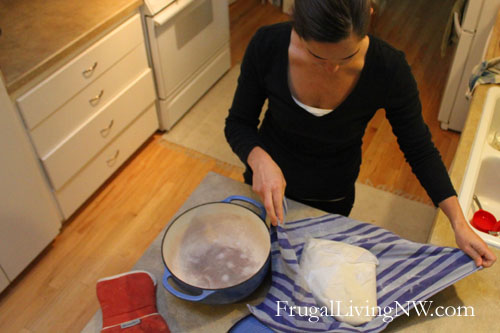
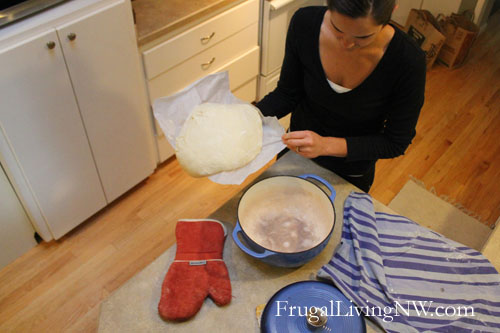
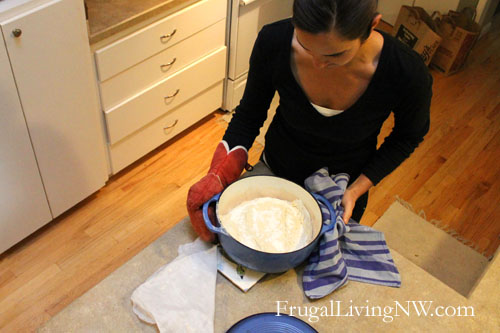
Okay, this is the trickiest part of the entire operation. Remove the lid from the piping hot Dutch Oven, slide your hand underneath the towel or parchment paper, and flip the risen dough (seam side up now) into the pot. Try to flip close to the pot or the flour will fly everywhere. Remove the towel or paper and set aside.
This might take a bit of practice, but again it doesn’t have to be perfect. Some of my worst flips have produced my most beautiful loaves. I love what Lahey writes, “…even the loaves that aren’t what you’d regard as perfect are way better than fine.”
Place the lid back on top and slide the pot back into the hot oven.
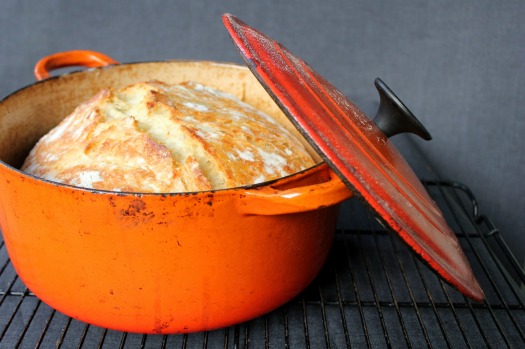
Bake it for 40-50 minutes. Remove the lid. Bake for another 5-10 minutes, until golden chestnut brown. The internal temperature should be around 200 degrees. You can check this with a meat thermometer if you’re nervous about knowing when your loaf is done.
Oh man, your house will smell so good about right now.
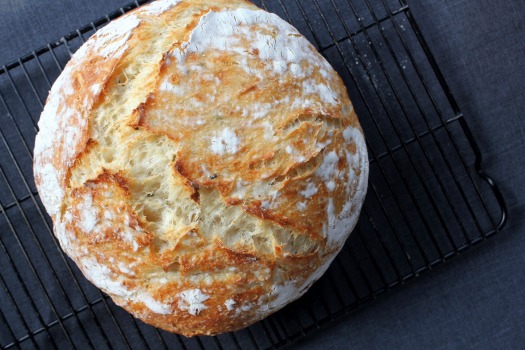
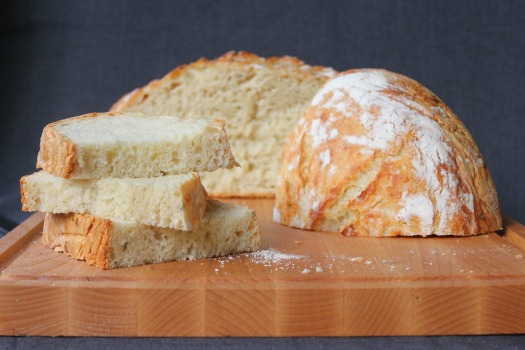
Place the loaf on a cooling rack. You will hear it crackling as it cools. Use every ounce of self-control to resist cutting into it until it is “quiet”; cutting it too soon will make the bread dense and gummy.
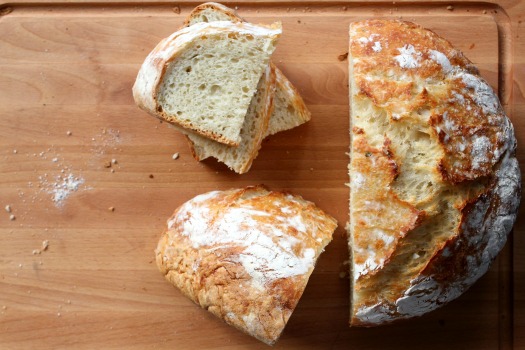
This bread is best the first 2-3 days. I just store my leftover loaf inside the Dutch oven on the countertop. Using plastic wrap will soften the crust. Dry, leftover bread makes great bread crumbs, toast, French toast, or croutons!
Enjoy. And pat yourself on the back. You just baked an amazing loaf of bread!
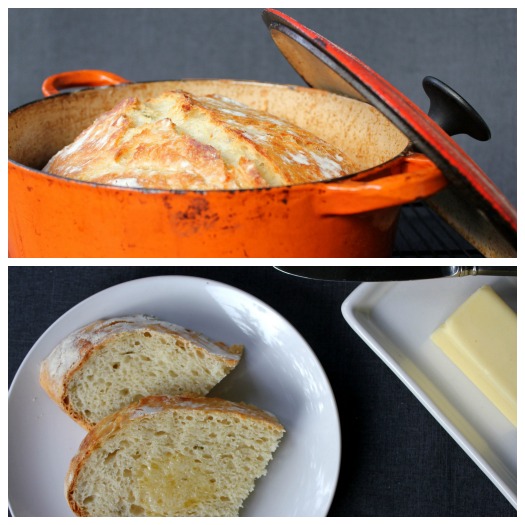
Basic No-Knead Bread
Slightly adapted from Jim Lahey’s My Bread
Ingredients
6 cups bread flour (recommended) or all-purpose flour, plus more for work surface
1/2 t. instant or active-dry yeast
2 1/2 t. salt
2 2/3 c. cool water
- In a large bowl, combine the flour, yeast, and salt. Add the water and stir until all the ingredients are well incorporated; the dough should be wet and sticky. Cover the bowl with plastic wrap. Let the dough rest 12-18 hours on the counter at room temperature. When surface of the risen dough has darkened slightly, smells yeasty, and is dotted with bubbles, it is ready.
- Lightly flour your hands and a work surface. Place dough on work surface and sprinkle with more flour. Fold the dough over on itself once or twice and, using floured fingers, tuck the dough underneath to form a rough ball.
- Place a full sheet/large rectangle of parchment paper on a cotton towel and dust it with enough flour, cornmeal, or wheat bran to prevent the dough from sticking to the parchment paper as it rises; place dough seam side down on the parchment paper and dust with more flour, cornmeal, or wheat bran. Pull the corners of parchment paper around the loaf, wrapping it completely. Do the same with the towel. Let rise for about 2 hours, until it has doubled in size.
- After about 1 1/2 hours, preheat oven to 425 degrees. Place a 6-8 quart heavy covered pot, such as a cast-iron Dutch oven, in the oven as it heats. When the dough has fully risen, carefully remove pot from oven. Unwrap the towel and parchment paper from around the dough and slide your hand under the bottom of the dough ball; flip the dough over into pot, seam side up. Pull the parchment paper off, scraping any stuck dough into the pan. Shake pan once or twice if dough looks unevenly distributed; it will straighten out as it bakes.
- Cover and bake for 40 minutes. Uncover and continue baking for 10-15 more minutes, until the crust is a deep chestnut brown. The internal temperature of the bread should be around 200 degrees. You can check this with a meat thermometer, if desired.
- Remove the bread from the pot and let it cool completely on a wire rack before slicing.
Here are a couple options for Dutch Ovens. Any heavy, lidded 5-8 quart pot (seasoned cast iron or enamel coated) would work with this recipe. Lodge has the best prices/options for dutch ovens on Amazon.
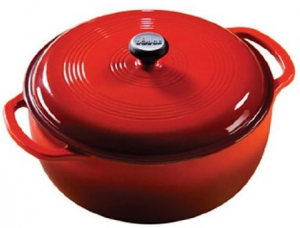
Lodge Logic Dutch Oven in Island Spice Red (6 Quart)
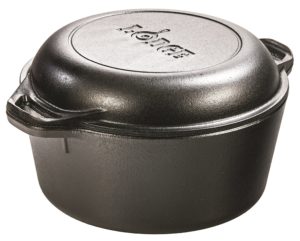
Lodge Cast Iron Double Dutch Oven (5 Quart)
If you already have a dutch oven (or find a deal on a lesser-known brand) that doesn’t have a knob rated for high temps, replace it! There are some really affordable options.
Got questions? You are in good company. Go here for the complete FAQ list.
Looking for more variations to the no-knead bread recipe? We’ve created a list with sweet and savory varieties, including the following:
- Cranberry Orange
- Four Cheese
- Sandwich Bread
- Dark Chocolate Coconut
- Tomato Basil Cheese
- Whole Wheat
Looking for more delicious bread recipes?
Find more delicious recipes on our Recipe Page!
Follow Frugal Living NW on Pinterest!
Fantastic range of boards from best recipes and tips for frugal living to gardening and budgeting help.
This post may contain affiliate links. See the disclosure policy for more information.



Mine is in the oven right now. I’ve been looking for a good bread recipe. We love homemade bread but it’s really a pain to make even if it’s every couple of days. Other than the waiting times, my total invested time is maybe 10 minutes. So easy compared to traditional breads. I too found this on Pinterest. If this comes out half as good as I’m thinking, I can live with making this every couple of days. It’s that easy. My house smells amazing right now.
Oh my word!! This was the best bread ever!! My whole family LOVED it. Thanks for posting!
Here are my answers to your questions, everyone has some different experiences, but…
I put my bowl (any type, I use a 2 qt.stainless steel bowl
into my oven and leave it overnight and well into the morning with the light on, that brings the temp up to near 95 degrees, also, no bugs, drafts, etc.
I cover the bowl with cheap Dollar store shower caps, they come in packs of 8-10, and are reusable.
For the cloth you will need a smooth linen or cotton cloth, color doesn’t matter, just as it is smooth (no terry)
For BEST results you will need a cast iron dutch oven with a heavy lid. It doesn’t matter if it’s domed or flat, but cast iron gives the best results. Others here have used many things and feel free to experiment of course, but the CI does it best. And no, the heat will seal the dough with a crust and it will not stick, so no need to oil (it will only smoke up your kitchen when you take the heated lid off to put in your ball of dough.
Cast iron dutch ovens or CIDOs are expensive. New can be as much as $50, but, compared to Le Crusets at hundreds of dollars it’s a bargain! And it will last a lifetime, several!!
Have fun!!
PERFECT!! Thank you so much!! My towels are terry, so I will pick up some smooth ones. Can’t wait to get what I need to give this a try. Thank you, thank you, thank you, thank you!!
I am SO excited to have found this recipe. I made some sour dough bread @ a friends house earlier this summer & all the kneading just stressed me out too much. I cannot wait to get a dutch oven to give this a try. Do have a few questions though….
1) We keep our AC set around 70-72, that makes for a deliciously cold house (which I love), but might not be best for rising bread. Would that alter the rise time of the bread? We have crickets, spiders, ants in our garage, I’d suggest putting the bread on top of our freezer out there to you, but the bugs. Perhaps inside my mini van?
2) Do you suggest using a metal bowl for the bread to rise in? I don’t own any, can you tell me the size of the metal bowl you use?
3) Should I get a white kitchen towel like the one in the picture to wrap the dough in to rise on the counter? All my kitchen towels are thick & solid colored.
4) Should you use only this kind of dutch oven to bake the bread in, or would one of those Le Creuset kinds work just as well? Also if I bought a black one like yours, does it need to be “seasoned”? Can you tell me the size of dutch oven to buy?
I know, I know, these seem like really strange questions to ask. I just really like to be prepared! Thank you so much. I hope you can help me.
I let mine raise in a plastic bowl covered with plastic wrap. My ac is set on 70. I mixed the dough at 6PM and took it out of the bowl at 1PM the next day-19hours. I don’t have a linen towel so I used a cotton dinner napkin for the second raise. It worked like a charm. I have a Martha Stewart Dutch Oven-the cheap version of Le Crueset. It was perfect!
Thank you very much!
Have you ever tried to make this bread gluten free? If so, what do you change and how does it turn out? I would love a good recipe for GF.
Love this bread! A favorite at our house. Only, the recipie I use has a couple tablespoons of sugar (for a smaller 3 cups of flour loaf) and the bake time is 27 min. with the lid on and 15 with it off. I’m going to try your bake time to see if that helps with the crust thickness…? I do like it with a bit of sugar in it though…:)
My dutch oven can only tolerate 375 degrees because of the handles…could I use a turkey roasting pan with the same results?
Tiffany, I made this bread today using a turkey roasting pan. It worked great! It is the perfect golden-brown.
This bread looks amazing! Fluffy and crunchy and tasty. Wow – I have to try this next weekend!
I made this bread today and followed the recipe exactly. It is fabulous! I just couldn’t believe it would work. The loaf is absolutely gorgeous and it tastes yummy. It popped right out of the pot and Emily was right about how neat it sounds as it cools. I can’t wait to toast it for breakfast in the morning and I think I will make it again next Saturday for a french toast breakfast next Sunday. I am so glad I ran across this on Pinterest!
Im with Sally M .can you make this gluten free ??? thanks so much . its a little hot
here in arkansas 1 02 up !! ygh !this fall for sure if I can make it gf !!
Any suggestion to make this gluten free..which type of GF flour may work best?
Hi! I found this recipe via Pinterest and am really excited to try it because I have made it before, but this recipe doubles the ingredients, which means twice as much bread in one go (mmmmm).
I have made a slight variation of this recipe (that uses 1 T vinegar and 1/3 cup lager beer) that had a very helpful trick: on the second rise, instead of using a floured cotton towel, take about 24″ of parchment paper, place it on top of a frying pan, spray the middle with cooking spray, and then put the ball (seam side down) on the parchment paper. My bread didn’t really turn into a ball – it kind of poured/plopped onto the pan. (the recipe was half of this one and recommended a 10″ pan, so I used a bigger one for this batch). Lightly spray the top with cooking spray and cover with plastic wrap and let rise for two hours. Preheat the Dutch oven as per usual, and when it’s time to put the bread in, take off the plastic wrap, lightly flour the top and using a sharp knife, draw it 6″ across the top and about 1/2″ deep. This will give you a nice ‘seam’ across the top of the bread when it’s done. Take the edges of the parchment paper and use them as ‘handles’ to lift the entire loaf of bread, parchment and all, into the Dutch oven, letting the paper hang over the sides. Cover the lid (the paper should be hanging out) and bake as usual. When the bread is done, use the parchment paper to lift the bread out.
I’m assuming this doesn’t affect the actual baking of the bread – mine turns out wonderfully, albeit sometimes the edges are a little ‘bent’ where the parchment paper pushed in on the bread, but I haven’t had anyone complain about that. 🙂
Thanks for the recipe – mine is on the second rise now, can’t wait to eat it for dinner!
My 9yr old son and I just pulled our first loaf out of the oven. We can’t
wait to taste it! It looks awesome!
I am very eager to try this recipe. What amazes me is that I am not finding any reference to oil in this bread…am I missing something? Do you need to oil the dutch oven?
No oil is needed in the dough or the oven! This will give you a different texture than doughs with butter or oil. It is very similar to an artisan, bakery-style bread. Enjoy!
It is Fahrenheit 🙂
Hi, just discovered this recipe, just one question though, is that 425 degrees fahrenheit or celcius (I live in Europe, we use celsius) ? 425 degrees celsius is extremely high and ovens usually go up to 245 degrees celsius over here.
Fahrenheit. That would be high in celsius! 🙂
that’s what I thought too, but I wanted to be sure, you never know 🙂
thanks!
I wanted to share with those who want a whole grain, wheat-free alternative. Although not gluten free I use whole spelt flour with slightly less water using the Artisan bread in 5 minutes a day recipe and then use the dutch oven method to bake it. I put a piece of parchment in a bowl when it rises (no 2nd rise) and then carefully and quickly lift it into my piping hot cast iron dutch oven. I put the lid on and bake it for 20min at 450 and then uncover it and bake for 15min. It was super moist and tender and 100% Whole grain. Lovely!
Hey.. I tried this recipe yesterday evening, through today and baked it today. It is my first EVER attempt at bread and turned out perfect! Shell is chewy, the inside soft and fluffy with a little density that is just perfect, almost like sourdough. I enjoyed it and got a belly ache after it LOL
Sweet! Glad your first attempt turned out successfully. Keep it up!
i made my bread exactly by the recipe, but the inside was not done, it was sticky, what did i do wrong?
I can’t imagine why it would be doughy in the middle if you followed the baking times & temps. The one thing I am wondering is if your oven is the right temp. Maybe try checking it with a thermometer?
I have loved your recipe and have successfully made several loafs. Today I tried substituting whey from having made yogurt in a 1:1 ratio w/ water. I also changed to whole wheat pastry flour (I didn’t have any white on hand) thinking that the fine grain would work if I just added a couple T of extra liquid. It came out a goopy mess that couldn’t hold together to rise on the counter. Was it the whey or the flour substitution that ruined this?? I guess I can do some trial and error to resolve my question but didn’t want to keep dumping loaves if it doesn’t work.
Oh and another thing…
What about using freshly milled flour? I’ve got soft white & hard red or white. What combo of which wheat do you think would turn out best? 3 cups plus molasses?
Tks!
Tanya – A large lidded pot should work just fine. The tricky part about your pot will probably be when it comes time to pop the loaf out at the end of the bake time. If it’s too narrow at the top, it could be a problem.
We have played around with different flours. You’ll get a different crumb if you substitute something for the white/bread flour, but it is still great. The molasses is just a nice, sweet complement to wheat. Play around with the recipe and let us know what works for you!
Very excited to try this recipe ASAP…but I don’t have a cast iron Dutch Oven :-(.
I DO have a S/S Tools of the Trade pot w/lid – it is slightly wider at the bottom than sides. Will it work? Should I adjust the temp&/or time due to the shiny, lighter weight piece?
Happy to discover your site! Wish I would have 4 months ago when I still lived in Beaverton.
Best baking~
Tanya (now of VA)
I sometimes use a regular loaf pan. I follow the instructions but shape into a loaf shape rather than round shape. I also use a long piece of foil to tent over the bread so it doesn’t get too done for about 45 minutes. Then on for 10 minutes without the foil. Works VERY well and the bread is then sliceable in more traditional sandwich shapes. I prefer this method.
Is there a good substitute if you don’t have a dutch oven?
Tricia & Rachel — Any heavy 4-6 qt. pot with a lid should do the trick. Also, read Traci’s comment below for another variation. Great to know!
I don’t have a dutch oven….anything that would work instead?
I have made this bread before with great success, but always close to sea level. I have started the dough this evening, but am in a location that is approx. 6000 feet above sea level. Do you know if there are any adjustments that need to be made in the rising or cooking times due to elevation, or the ingredients for that matter, however to late for this batch?
Good question! My sister lives at 8000 ft. and has made this recipe without variation. Rise times might be slightly faster, but the recipe gives you a good window of time so you can go with the shorter rise time if it looks like the dough is ready. Hope that helps!
Thanks! I will give it a try without adding the extra water to make it sticky1
I have made two loaves one loaf with the white flour and one following the wheat flour recipe. Both times my dough was very dry.. I needed to add quite a bit more water to make it a sticky, wet consistencey! It did not even have enough moisture to hold together. Is the 6 cups of flour and 2 2/3 cool water correct? I just added more flour to the next step wich made a much larger loaf! Tasted wonderful but I must be doing something wrong!
I have been following the recipe exactly. When you first make the dough it looks strange and doesn’t stick together completely, but when you let it sit, covered, for 18 hours is looks perfect. My loaves come out perfect every time and I make 1-2 loaves each week. LOVE this recipe!
Does this bread freeze well?
I made the bread for the first time today and it came out perfect. I had a small problem, It stuck to my dutch oven and was difficult to get out. I ruin the whole bottom crust. Is there something i should do to prevent this? did i have enough flour on the outside of the dough. Also do you let the dutch over cool for awhile and then move it to the wire rack or do you remove it immediately after taking it out of the oven. thanks for all your help
I have had a few loaves stick, and it is frustrating! The bread is really hard to pry out of the pot without ruining it. Did you preheat the Dutch oven first? It should be piping hot when you flip your dough ball into it. That was my problem. I was in a hurry and didn’t heat the pot hot enough in the oven first. I also know some people who lift their bread into the pot with parchment paper on the bottom. That might work if you keep having this problem. Hope that helps!
Oh, and one more thing: I pop the loaf out of the pot and onto a cooling rack right away so the bread can stop baking and start cooling faster. It also keeps your crust from becoming soft. Happy baking!
I am too excited about this. Not only because the bread looks yummy, but because I got a cast iron dutch oven for Christmas from the hubs and have yet to do anything with it! I absolutely love ALL my cast iron and use my biggest fry pan to make cornbread, but I confess I am at a loss with what to do with this Dutch oven. Thank you for the idea!!!
Do you prepare the dutch oven in any way (oil, grease, etc.?)
No need to grease the Dutch oven. Preheating it in the oven is enough to give the bread a nice crust and a loaf that will pop right out of the pot. I only have problems with sticking when I cut the preheating time short (pot isn’t hot enough).
Would it be alright to request to remove the extra duplicate comments of mine that occurred as a result of the design changes on the site? You might be thinking “it’s about time she asked”. 😉 Thanks-
I love this recipe! I am not a baker, and I have now made 2 amazing loaves. I do find that just the tea towel allows the cut side of the loaf to get very dry quickly, so I cover the cut end with waxed paper then wrap in the towel. Still gets a bit dry, but an improvement without sacrificing the crisp crust.
I made this last weekend because my brother LOVES bread and it was his birthday. Sliced and served it with warm brie. OH. MY. GOSH. So good. The four of us almost ate the entire loaf. I’m tempted to make it again tomorrow but I’m afraid I’d eat every last bite.
I wanted you to know that there is another no-knead bread book that you really should try the recipes from–Kneadlessly Simple, which was written by me! I think that you’ll like the variety, the effortlessness, and the great taste of the breads. I have a few of the recipes posted on my site so you could try them for free.
Thanks so much for this recipe! I made it again and was really worried because although it rose well it did not bubble much at all. I went ahead and did the second rising with sunflower seeds in the flower and it is gorgeous! Came out perfect and my flip was not good 🙂
I have the cast iron pot, but sent the lid to recycling because it was too rusted to use. Is it OK to cover the top with tinfoil?
and…can this recipe live in the ‘fridge so that I can make several smaller loaves over the course of the week?
Thanks!
It’d be worth a shot to try foil, but I kind of doubt it’ll trap the steam the same way a heavy pot with lid would do. Even if the results aren’t quite the same, it should still produce a decent loaf of bread. Let us know how it works!
Also, I have never kept this dough in the fridge, but the process is so similar to Artisan Bread in 5 Minutes, I don’t see why it wouldn’t work.
Ha! Sorry I’m not much help on either question. Time to experiment! 🙂
@Emily, thanks for your reply! I borrowed a lid from a neighbor instead of using tinfoil. The results were so amazing that I’m going to go buy another lid. (Will try not get this one rusted out!)
As far as keeping the dough in the ‘fridge, the loaves I’ve made were eaten up so quickly that it looks as though I’ll keep using the entire recipe at once. Thank you for this site–some great ideas here!
Don’t throw out that lid! Use steel wool to clean it up! Then season again with oil….
Don’t throw away cast iron, even if t’s rusty!!
You can do a quick soak (5-10 minutes) in a white vinegar/water solution then scrub with steel wool, then scrub it down really really well with hot soapy water (else the vinegar can ruin your iron), then reseason. If that doesn’t work, Greg over at blackironblog.com has an AWESOME method of reconditioning cast iron that has yet to fail me, even on some of the most awful looking cast iron pieces.
Also, this bread looks hardcore awesome. I can’t wait to try it!!
I only own two 4 quart dutch ovens. Can i cut the dough in half and bake two separate loaves? If so, do you know how the baking time would change?
Definitely! The original recipe is actually 1/2 of this one anyway. Bake 40-45 minutes with the lid on and 5-10 with the lid off, until the crust is a deep golden brown.
How do your store your 25 lbs of flour?
We use large buckets from bakeries (they give them out for nothing or cheap when they are done) with gamma lids. Works great!
I am so addicted to this recipe!! LOVE IT It turns out perfect all 100% of the time.
Yay! Happy to hear it. It’s pretty much the only bread recipe I make now, too, because the results are so consistent and delicious!
My bread came out just like in your picture….Beautiful…and taste fantastic, just like the bread I grew up on in Luxembourg. I only have one question? Why is it that people alter the recipe and then complain that it did not come out like they expected??….I don’t get it!!
Thank you so much for sharing this recipe. I will never use any other again!
Amen Jeanette!
My bread came out pretty dense and not very fluffy. Is that the consistancy?
I also let the bread rise about about 20 hours then an additional 2 hours on the cloth… was that too long?
Then I let it cool for about 20 mins and didn’t hear any “cracking” but I don’t know if that is possibly a reason for the less fluffy bread.
Your rise times sound great. It depends on the temp of your house, but these times should be just fine.
You might want to let it cool for twice as long, closer to 40-60 minutes.
The interior of this bread should have air pockets — I’d say chewy & light, but not necessarily fluffy.
Here are a couple of fun clips on this amazing bread, including one with Jim Lahey. Of course, nothing can replicate all of the wonderful, vivid experiences you’ve all shared–I’ve almost been to tears just reading the comments pouring into my email feed. It’s almost surreal.
http://www.youtube.com/watch?v=RooswLoL4vE&feature=related
I’ll post the next one in the next post–
The above note was originally written @ 10:51 am Monday morning… for some reason my comment kept going into oblivion. 😉
http://www.youtube.com/watch?v=13Ah9ES2yTU
Here are a couple of fun videos on this amazing bread, including one with Jim Lahey. Of course, nothing can replicate all of the wonderful, vivid experiences you’ve all shared–I’ve almost been to tears just reading the comments pouring into my email feed. It’s almost surreal.
http://www.youtube.com/watch?v=RooswLoL4vE&feature=related
http://www.youtube.com/watch?v=13Ah9ES2yTU
Sorry if this is a duplicate, but I am having a hard time getting my comments to go through lately (specifically the last 4 days) here on FLNW… This was originally written @ 10:51 am Monday morning—would love to know why some are having issues with their comments being viewble.
If this post goes through, it means that this blog is blocking “some” peoples email.
The following is a comment I “thought” I posted on Monday… but is not showing up oddly enough.
Here are a couple of fun videos on this amazing bread, including one with Jim Lahey. Of course, nothing can replicate all of the wonderful, vivid experiences you’ve all shared–I’ve almost been to tears just reading the comments pouring into my email feed. It’s almost surreal.
http://www.youtube.com/watch?v=RooswLoL4vE&feature=related
http://www.youtube.com/watch?v=13Ah9ES2yTU
Sorry if this is a duplicate, but I am having a hard time getting my comments to go through lately (specifically the last three days) here on FLNW… This was originally written @ 10:51 am Monday morning—would love to know what is going on. 🙁
We updated our server and our design. Things are just getting a little bit funky with the transition. It should be back to normal soon.
The following is a comment I “thought” I posted on Monday… but it does not show up oddly enough.
Here are a couple of fun videos on this amazing bread. Of course, nothing can replicate all of the wonderful, vivid experiences you’ve all shared–I’ve almost been to tears just reading the comments pouring into my email feed. It’s almost surreal.
http://www.youtube.com/watch?v=RooswLoL4vE&feature=related
http://www.youtube.com/watch?v=13Ah9ES2yTU
Do you think it’s worth it to purchase the cookbook? I’m considering buying “My Bread” but I’m not sure I need it after using your recipe. Thanks!
The book is really well done. Great photography and writing.
His pizza recipes and baguettes are also really good. Maybe check it out from the library, then decide?
just sliced into my THIRD loaf!!! Better everytime…this is a winner.
Look at Youtube for many variations