No-Knead Bread Recipe
If you have been hanging out around Frugal Living NW for awhile, you know that I am a big believer in making food from scratch at home. With a few exceptions, I prefer creating something in my own kitchen to buying it in the grocery store.
Bread can be tricky, though. There is some stiff competition out there, and it is tough to replicate a commercial oven’s heat and steam in a normal home kitchen.
For the last several years, I thought that Artisan Bread in 5 Minutes was the best thing since, well, sliced bread. It was simple, and we were content with the results. That is, until last summer when our neighbor brought over a beautiful, delicious loaf of home-baked bread. We had to know her secret. One phone call, and she came back with the book, My Bread by Jim Lahey (Amazon).
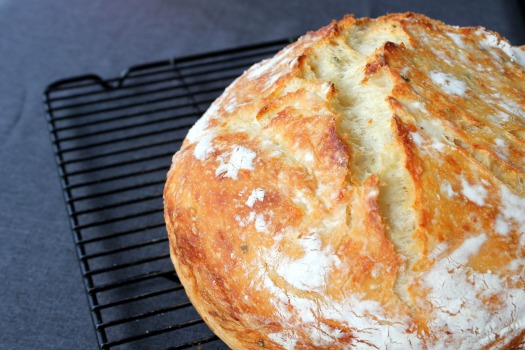
We have been baking bread using this method ever since. I can count on one hand the number of times I have bought bread in the store since then, because I can now make an artisan-quality loaf at home for a fraction of the cost.
I am telling you, this is consistently the best bread I have ever made in my kitchen. Okay, enough gushing. Let’s make some bread.
The only changes I have made to Lahey’s method is to double the amounts and adjust the baking time and temperature to achieve a bigger loaf with a thinner crust.
Oh, and don’t be put off by all these steps. This is totally possible for home bakers at any skill level. I wanted to give you the confidence to do this on your own. A concise recipe can be found at the bottom of this post.
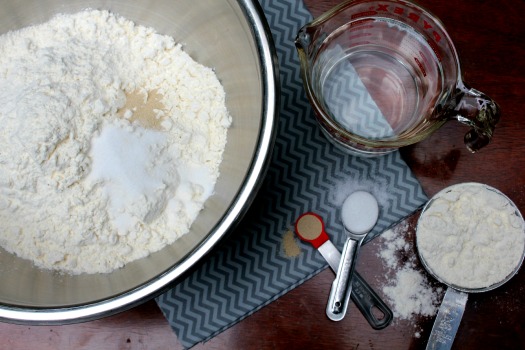
The ingredients are simple: flour, water, salt, and yeast. My husband calculated this bread costs 74¢ per loaf (using Bob’s Red Mill flour & Costco yeast).
Oh, wait! Don’t forget to factor in the roughly 8 cents of energy used to bake it for an hour. No, I’m serious. My husband really does think about this stuff! He’s funny.
So, there you go. A whopping 81¢ for a substantial 2.5 pound loaf of bread. That is crazy cheap.
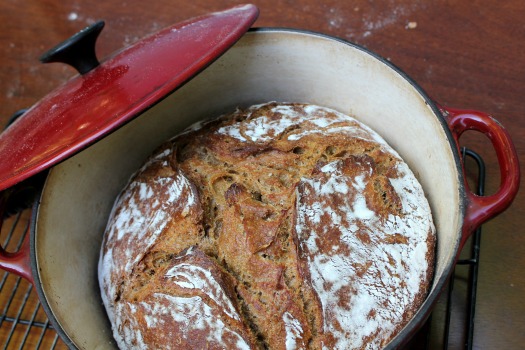
If you want to use some whole wheat flour, substitute 3 cups of whole wheat for 3 cups of the all-purpose flour (3 cups whole wheat and 3 cups of unbleached flour for a total of 6 cups) and add 3 Tablespoons of molasses (optional). This will produce a slightly sweeter, denser loaf of bread. Delicious.
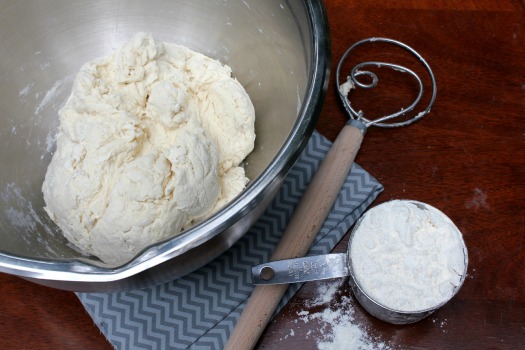
Combine the dry ingredients, add the water, and stir to combine (the funky looking wood-handled item is the amazing Danish Dough Wisk — makes stirring stiff dough a snap). The dough should be wet and sticky. Depending on the temperature and humidity in your home, you may need to add a little more flour or water, 1 Tablespoon at a time. So far, these steps are exactly the same as the 5 Minute method.
The main differences are that you use significantly less yeast (1/2 teaspoon vs. 1 1/2 Tablespoons) and significantly more initial rise time (12-18 hours vs. 2 hours).
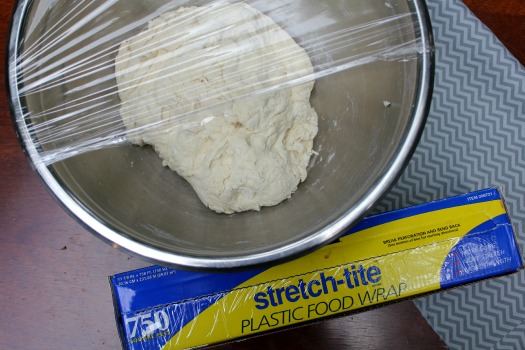
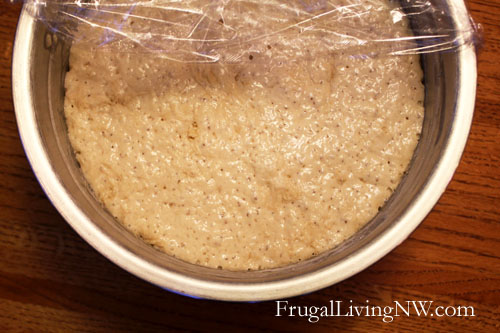
Once the ingredients are completely combined, cover the bowl with plastic wrap and leave it on the counter to rise for 12-18 hours. This slow rise aids in the fermentation of the yeast, giving the bread a better flavor.
Okay, I know what some of you are thinking: 12-18 hours! That’s ridiculous! Who has that kind of time?! I get it.
However, here are two things to consider:
- Once you get into a rhythm of baking your own bread, it’s not a big deal. I start mine in the afternoon or evening and bake it the next morning or afternoon. This would also be an easy weekend routine.
- Just like the title claims, this bread requires no kneading. It is not fussy, temperamental dough. You can produce a delicious loaf of bread with very little hands-on effort & experience.
You’ll know your dough is ready when it has risen in the bowl, smells yeasty, darkened slightly, and is covered with small bubbles.
Using well floured hands, shape and tuck the sticky dough into a rough ball. You can also fold it over a couple times on a well-floured surface. It doesn’t have to be perfect; just keep quickly tucking the dough underneath with your fingertips until you have a semi-smooth dough ball. The dough should be wet but manageable; you don’t want a wet blob so sticky that you can’t shape it into a ball.
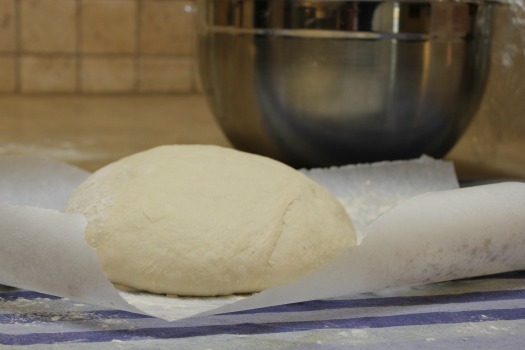
Take a clean linen or cotton tea towel (not terry cloth) and dust it with flour, cornmeal, or wheat germ to prevent the dough from sticking to the towel as it rises. You can also use a floured square of parchment paper on the towel to make the dough ball easier to handle. Place the dough ball, seam side down, in the middle and dust with more flour.
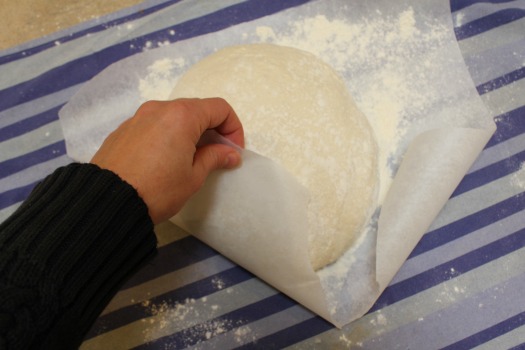
Cover the dough with the (parchment paper and) towel and let it rise for 1-2 hours at room temperature, until doubled in size. During the last 30 minutes of rise time, place a heavy lidded 6-8 quart pot, like a Dutch oven, in a cold oven and preheat it to 425 degrees.
Confession: I own three Dutch Ovens. I use them all the time. They are incredibly versatile and worth the investment. If you don’t own one, you could also make this in any lidded pot, provided it is oven-safe at such high temperatures. Also, check the knob on your pot. If it isn’t rated for such high heat, you’ll want to remove it or cover it with foil. You can also buy an inexpensive replacement knob that is rated for higher temps!
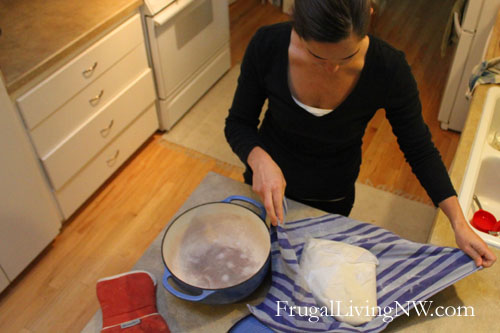
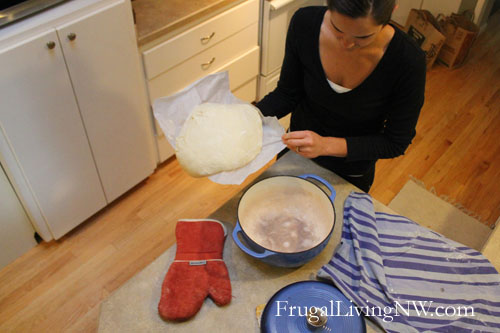
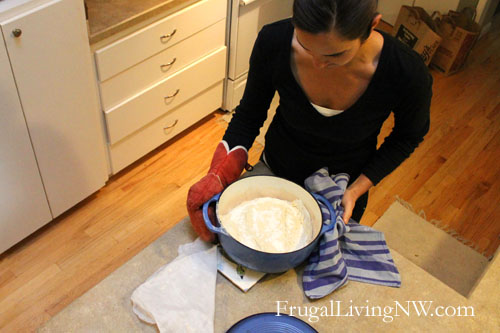
Okay, this is the trickiest part of the entire operation. Remove the lid from the piping hot Dutch Oven, slide your hand underneath the towel or parchment paper, and flip the risen dough (seam side up now) into the pot. Try to flip close to the pot or the flour will fly everywhere. Remove the towel or paper and set aside.
This might take a bit of practice, but again it doesn’t have to be perfect. Some of my worst flips have produced my most beautiful loaves. I love what Lahey writes, “…even the loaves that aren’t what you’d regard as perfect are way better than fine.”
Place the lid back on top and slide the pot back into the hot oven.
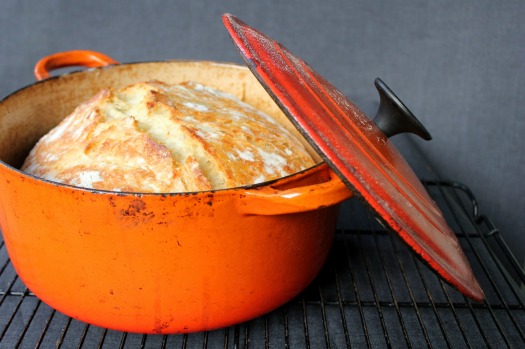
Bake it for 40-50 minutes. Remove the lid. Bake for another 5-10 minutes, until golden chestnut brown. The internal temperature should be around 200 degrees. You can check this with a meat thermometer if you’re nervous about knowing when your loaf is done.
Oh man, your house will smell so good about right now.
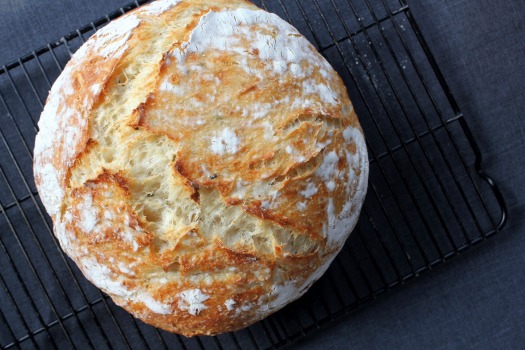
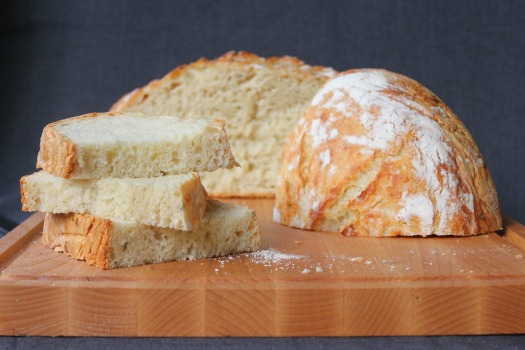
Place the loaf on a cooling rack. You will hear it crackling as it cools. Use every ounce of self-control to resist cutting into it until it is “quiet”; cutting it too soon will make the bread dense and gummy.
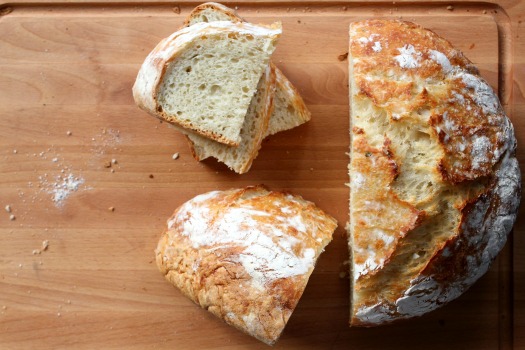
This bread is best the first 2-3 days. I just store my leftover loaf inside the Dutch oven on the countertop. Using plastic wrap will soften the crust. Dry, leftover bread makes great bread crumbs, toast, French toast, or croutons!
Enjoy. And pat yourself on the back. You just baked an amazing loaf of bread!
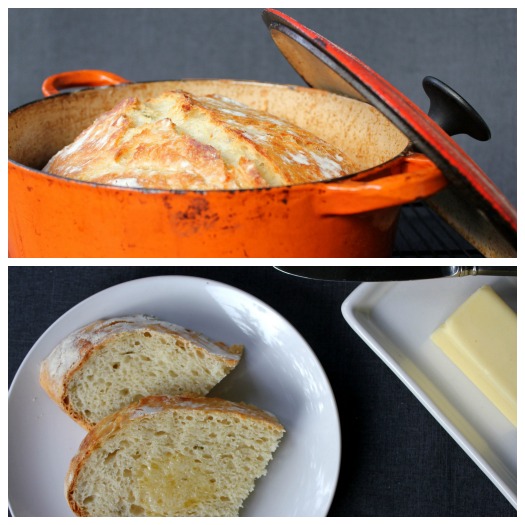
Basic No-Knead Bread
Slightly adapted from Jim Lahey’s My Bread
Ingredients
6 cups bread flour (recommended) or all-purpose flour, plus more for work surface
1/2 t. instant or active-dry yeast
2 1/2 t. salt
2 2/3 c. cool water
- In a large bowl, combine the flour, yeast, and salt. Add the water and stir until all the ingredients are well incorporated; the dough should be wet and sticky. Cover the bowl with plastic wrap. Let the dough rest 12-18 hours on the counter at room temperature. When surface of the risen dough has darkened slightly, smells yeasty, and is dotted with bubbles, it is ready.
- Lightly flour your hands and a work surface. Place dough on work surface and sprinkle with more flour. Fold the dough over on itself once or twice and, using floured fingers, tuck the dough underneath to form a rough ball.
- Place a full sheet/large rectangle of parchment paper on a cotton towel and dust it with enough flour, cornmeal, or wheat bran to prevent the dough from sticking to the parchment paper as it rises; place dough seam side down on the parchment paper and dust with more flour, cornmeal, or wheat bran. Pull the corners of parchment paper around the loaf, wrapping it completely. Do the same with the towel. Let rise for about 2 hours, until it has doubled in size.
- After about 1 1/2 hours, preheat oven to 425 degrees. Place a 6-8 quart heavy covered pot, such as a cast-iron Dutch oven, in the oven as it heats. When the dough has fully risen, carefully remove pot from oven. Unwrap the towel and parchment paper from around the dough and slide your hand under the bottom of the dough ball; flip the dough over into pot, seam side up. Pull the parchment paper off, scraping any stuck dough into the pan. Shake pan once or twice if dough looks unevenly distributed; it will straighten out as it bakes.
- Cover and bake for 40 minutes. Uncover and continue baking for 10-15 more minutes, until the crust is a deep chestnut brown. The internal temperature of the bread should be around 200 degrees. You can check this with a meat thermometer, if desired.
- Remove the bread from the pot and let it cool completely on a wire rack before slicing.
Here are a couple options for Dutch Ovens. Any heavy, lidded 5-8 quart pot (seasoned cast iron or enamel coated) would work with this recipe. Lodge has the best prices/options for dutch ovens on Amazon.
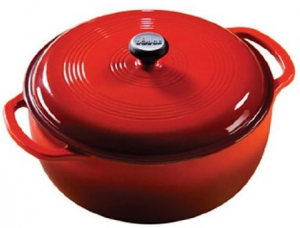
Lodge Logic Dutch Oven in Island Spice Red (6 Quart)
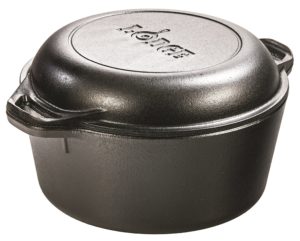
Lodge Cast Iron Double Dutch Oven (5 Quart)
If you already have a dutch oven (or find a deal on a lesser-known brand) that doesn’t have a knob rated for high temps, replace it! There are some really affordable options.
Got questions? You are in good company. Go here for the complete FAQ list.
Looking for more variations to the no-knead bread recipe? We’ve created a list with sweet and savory varieties, including the following:
- Cranberry Orange
- Four Cheese
- Sandwich Bread
- Dark Chocolate Coconut
- Tomato Basil Cheese
- Whole Wheat
Looking for more delicious bread recipes?
Find more delicious recipes on our Recipe Page!
Follow Frugal Living NW on Pinterest!
Fantastic range of boards from best recipes and tips for frugal living to gardening and budgeting help.
This post may contain affiliate links. See the disclosure policy for more information.



I made this recipe today and it is awesome my first time making bread
I made this recipe today in my Dutch Oven and it was amazing it was my first time ever making bread
I made it again this Easter and it turned out beautiful! I added a few drizzles of molasses this time and substituted 2 cups of white flour with fresh ground einkorn. Can’t wait to eat a piece!
Hi, I saw your No Knead Variation and since I happen to have almond flour on hand I would like to give this a try. So do I add 3 cups of almond flour and 3 cups of all-purpose flour? Please clarify the substitution, please. I am hoping to make this soon as we have run out of bread
Thanks in advance,
I’m sorry, I can’t really give you the substitution here as I’ve never made it with almond flour. But almond flour needs an entirely different amount of moisture/liquid, so a one-for-one substitution most likely won’t work.
I actually just went to look at our variations post and a reader mentioned they did sub almond flour, but just one cup. I think three cups would make it super dense and not give it the rise you’re looking for. Maybe start with one cup the first time?
I am the rookiest of bread makers and this turned out PERFECT the first time. I am giddy! The recipe calls for 2-2/3 c water but I needed 3 c to get everything to combine. Other than that, I followed exactly. It’s delicious. I’ve been sending pictures of it to friends and family all morning, lol.
Made this bread exactly as the recipe states. First time making it, so was OCD diligent about following to a tee…came out terribly. Like pudding/gummy bear texture in the middle. Tried putting it back in to cook longer. Just burned the outside, didn’t help the inside. Lost cause. Wasted a lot of time and ingredients on this, super disappointed. Won’t be using this recipe again.
You obviously did it wrong
Is it really cool water? Lukewarm seems to be the norm for yeast…
yes because it is a slow rise. warm water will make it rise faster and possibly cause you to over proof the dough resulting in not so good bread
Does the cast iron pan need to be oiled or sprayed before putting in the dough for baking?
Thanks
What happens it the dough stinks to the parchment paper when I transfer the dough to hot pot?
Kristen: You can just peel it off. Next time, make sure you heavily dust the parchment with flour before putting the dough on it to rise the second time. That should solve the problem!
I think this is the best bread I have ever eaten, and easy enough for a beginner to make. Thanks for a great recipe!
If I have a cast 5qt pan but no lid, would it work to just set a cookie sheet over top of pan?
It should, Julie!
I had the same problem. I just take two pieces of foil and connect them together and tent that over your crock to bake.
I just mixed the ingredients for the first time and had to add TEN extra tablespoons of water to make it just barely wet and sticky (this is with half white, half wheat flour). Does this sound right? My dough doesn’t look like your photo, as in, very wet looking. Mine just looks like a lump of dough.
Same here
So…i only had 3 cups of bread flour left while in quarantine..trying to make a ‘half’ loaf of this. Think I should adjust the bake temp or just the time?
I’m making 3 cup loaves as well. I found the NYT recipe for the 3 cup loaf and it says… Cover with lid and bake 30 minutes, then remove lid and bake another 15 to 30 minutes, until loaf is beautifully browned. Cool on a rack.
Yes, the NYT recipe calls for 3 cups of flour.
Looks delicious
I’d like to make a 7 grain whole wheat bread. If adding 7 grain cereal, how much would you add and would you remove any part of the flour when doing so?
Hi,
If I want to added walnuts and cranberries, at which step do I add these in?
Thank you.
Janet
Did you read through this post? Lots of variations and direction! https://www.frugallivingnw.com/no-knead-bread-recipe-variations/
You add the cranberries and walnuts right at the beginning, before you add water. Otherwise it’s too difficult to incorporate them later.
My bread turned out great – I am not a fan of crusty so I usually butter or olive oil the crust while still warm
Do you have a printable version of the recipe?
If you highlight the text and then right click and hit print it will just print the highlighted area.
I’ve made this recipe twice and both times the bread has stuck to the bottom of the Dutch oven. I cannot even get it out, what am I doing wrong?
I actually lifted it into the dutch oven using the parchment so it got set it on top of the parchment paper instead of flipping it off the paper into a hot pot. The parchment paper didn’t affect the taste of the loaf and it came out of the pot no problem. Bonus because the dutch oven was essentially spotless since it baked with the parchment in place so cleanup was a breeze.
Best Bread Ever!!!!
The dough had risen nicely over 16 hours but was way to wet/sticky to form into a ball. I followed the recipe so not sure what went wrong. Couldn’t be saved so I tossed it.
This happened to me too! I tried to save it by adding flour, and ended up baking it. It did not increase at all during the second rise. It was not great-very dense, but with butter when it was war it was edible. I think that my yeast was too old…just used the packet I had in the fridge from ages ago. I may try sourdough next as I have not been able to find yeast!
You can check your yeast by mixing it in some warm water and seeing if it begins to foam up in 5 minutes. If it does, carry on.
Can this be made in a cast iron skillet? I dont have a Dutch oven and I’ve seen other recipes similar that do this!
I’m not sure this exact recipe could be adapted for a skillet. I bet there’s some good tutorials on Pinterest though!
Made this today and it’s really delicious. Only question I have is regarding the crust. Is it suppose to be a little tough or did I cook it too long? Also I sprinkled a little too much flour on the top..
It’s definitely on the crustier side, but if it’s really tough it may have cooked just a bit too long. Glad you enjoyed the taste though!
I too have Jim Lahey’s first book. I really thought, that mine would not turn out well. It is the most delicious bread I have ever tasted. My family favorite is when I use black Kalmata olives, rosemary and thyme. When it is ready to go in my Dutch oven I sprinkle a small amount of sea salt on top. I usually make a loaf using 6 cups of bread flour. That makes a good size loaf to feed more then just The 2 of us. I made a large loaf as part of my 15 year old grandson’s birthday gifts. He loves it. I just ordered my 2nd Dutch oven, in a smaller size so I will be able to make a loaf using 3 cups of flour for my elderly aunt. She asks for me to bake her bread frequently. This recipe is the easiest and produces the best bread ever. I am hooked and a true believer, that this bread is amazing.
I have tried so many bread recipes, only to have them not rise well, or fall while baking, or taste like cardboard, or have a too dense texture, etc. Oh my gosh, this is the last recipe I’ll ever try. It was so easy and it has a wonderful taste and texture. I’ll have to work a bit on the technique of incorporating just the right amount of flour to make a smooth ball but, I’m in heaven.
We’re so glad you tried it!! It really does make you feel like a magician in the kitchen.
This was soooo good. I’ve always been scared away from making bread, but this was a breeze. Thanks for sharing!
So amazed! Mine looks exactly like the picture.
Thankyou for the recipe!
Can you use Fleischmann’s RapidRise (fast acting) yeast with this recipe? Thanks!
Have you ever made this recipe with white spelt flour instead of wheat? I’m wondering if the difference in glutens will allow it to be as successful.
I just put the dough and the parchment paper in the oven. Paper stops the bread from sticking and dont have to flip anything over. Works great! Win win.
I make this bread quite often. So much so that I haven’t used my bread maker in about 6 years. It’s a wonderfully delicious bread.
I made this bread and it came out exactly like the one pictured. I am so grateful and excited about your blog. Thank you so much for posting.
Thank you for your delightful recipe. My bread turned out perfectly, thanks to you. I am wondering if add ins would be successful. I would like to add cheese and olives. Do you think the bread would turn out just as well ?
Hi Terri,
I’ve cooked up garlic and broccoli, cooled it, and added this with cheddar cheese before the second rise. My family loves it!
I love making this bread! Can I let it rise for 24 hours!
This recipe s very similar to the NYT no-knead bread recipe. I have been making it for a couple of years now. I actually double The NYT recipe and it is the same measures as yours. I bake half at a time, putting the second half in my fridge til I’m ready to bake it. We actually feel like the second loaf tastes better than the first and wonder if he week long rest helps the flavor. Oh! I also use 1/3 whole wheat flour and a bit more yeast than what is called for.
I have tried this recipe 3 times and each time the dough is to sticky to fold under itself and make a smooth ball. I have added up to one half cup of flour but do not dare to add more. The bread came out great however with the dough so sticky and wet it makes a big mess and it is very difficult to place into the Dutch oven. To sticky to flip!
Any suggestions?
Good job,well written.
I made this. Bread two times, came out excellent, I made one with 3 cups of whole weath flouer and 3 cups of white flouer, came out beautiful.
I was just reading through your comments, bread recipe etc. I have made no-knead several times and liked the results. Then I found a regular bread recipe using cooked quinoa (1/2 dry quinoa and 1 to 1-1/2 cups water), one egg, and whole wheat flour, liking the fact that the bread had another layer of flavor plus the added protein. The recipe makes two regular loaves, but they do not rise as much with the quinoa. Have you ever tried using cooked quinoa to a no knead recipe? I think I may try it the next time I make bread! Can you use an egg, or does the longer rise time make that dangerous with a raw egg in the dough? PS: I live in NZ and never get the good rise in bread dough like I did in the drier climate in Calgary, Canada, but I do make all my own bread!
The original Jim Lahey recipe that uses 3 cups of flour also calls for 1/2 teaspoon of yeast. Is there a reason you did not double the yeast when you doubled the other ingredients?
I see now that it’s the whole wheat recipe that uses 1/2 teaspoon in the original size. That makes sense.
I was just reading through your comments, bread recipe etc. I have made no-knead several times and liked the results. Then I found a regular bread recipe using cooked quinoa (1/2 dry quinoa and 1 to 1-1/2 cups water), one egg, and whole wheat flour, liking the fact that the bread had another layer of flavor plus the added protein. The recipe makes two regular loaves, but they do not rise as much with the quinoa. Have you ever tried using cooked quinoa to a no knead recipe? I think I may try it the next time I make bread! Can you use an egg, or does the longer rise time make that dangerous with a raw egg in the dough? PS: I live in NZ and never get the good rise in bread dough like I did in the drier climate in Calgary, Canada, but I do make all my own bread!
In case anyone else is contemplating using theirs for this recipe:
LeCreuset Dutch oven lid “phenolic knob” (black) is only oven-safe to 390F (just checked LeCreuset’s website), while the pot itself is oven-safe to 500F.
So better not to use the lid or remove the knob beforehand if able.
Going through the 12-18hr fermentation process right now…
Thank you! We have a post with replacement knobs for the dutch oven if you need one that is more heat-resistant.
http://www.frugallivingnw.com/dutch-oven-replacement-knobs/
Well I just took the bread out of the oven and it looks like your picture. Only problem is I had a very hard time getting the bread out of the dutch oven. Any suggestions? I didn’t use cooking spray because I was afraid it would ruin the pot being in the oven at such high heat for such a long time.
Thank,
Toni
Tonikozlik@icloud.com
For Toni K !!! Parchment paper is the answer to it not sticking..
I’ve made this bread recently and my family went crazy for it. They want me to make it again, but this time into individual bread bowls for soup. What suggestions or tips and you give for doing that? I need to make about 12 individual bowls. Thanks in advance!
I made it. Mines a little dense and chewy. But here’s a pic