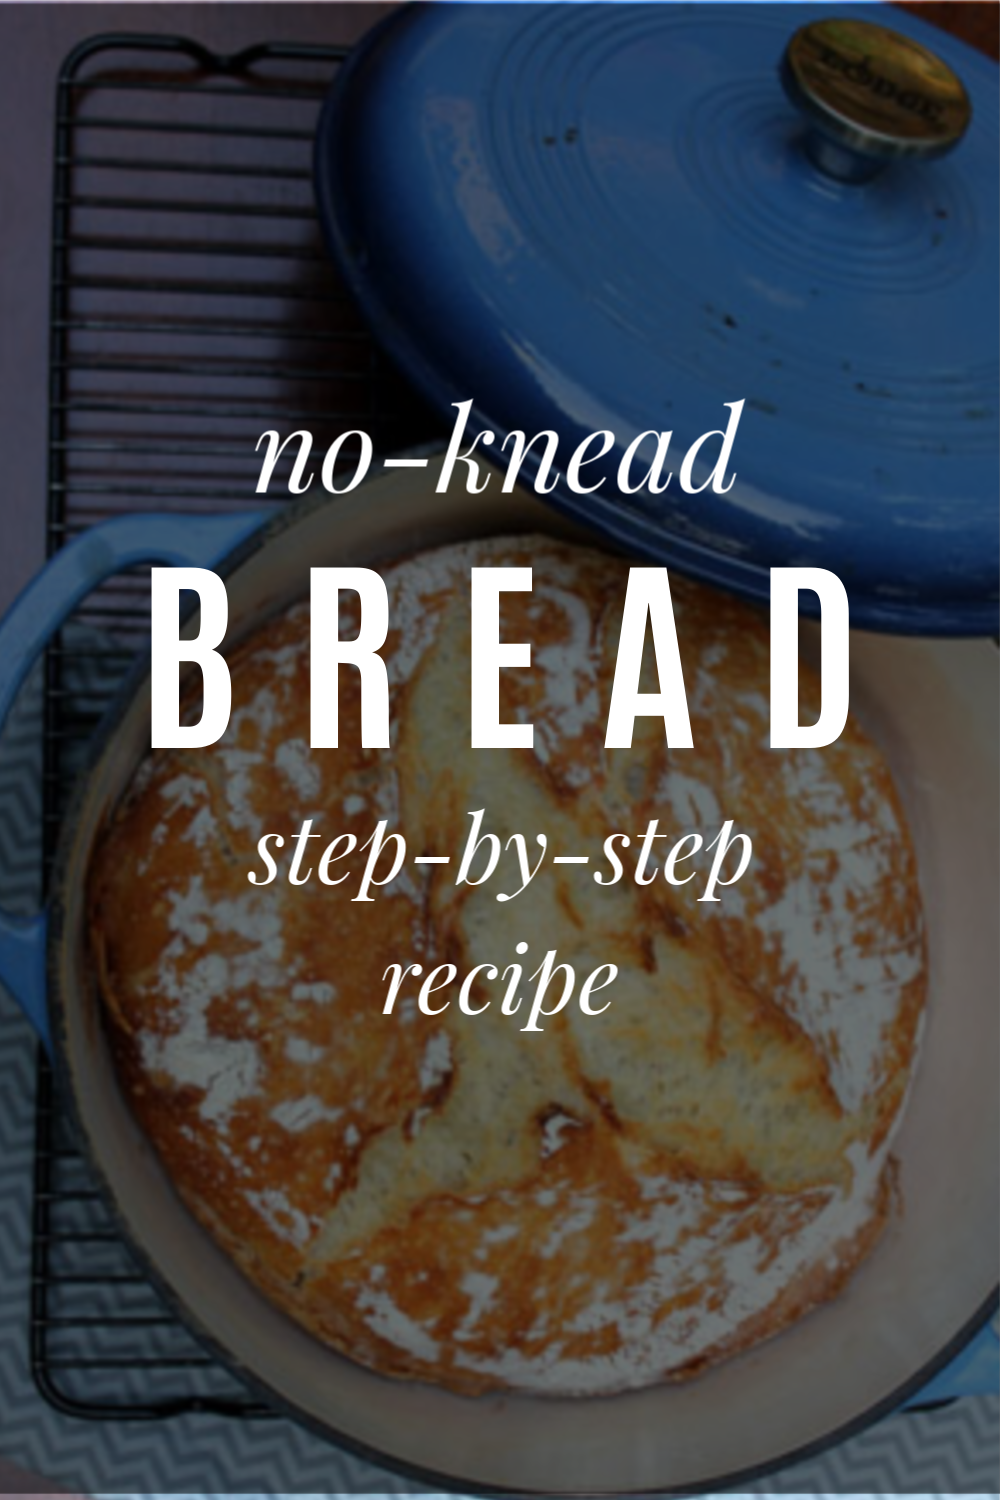
No-Knead Bread Recipe
If you have been hanging out around Frugal Living NW for awhile, you know that I am a big believer in making food from scratch at home. With a few exceptions, I prefer creating something in my own kitchen to buying it in the grocery store.
Bread can be tricky, though. There is some stiff competition out there, and it is tough to replicate a commercial oven’s heat and steam in a normal home kitchen.
For the last several years, I thought that Artisan Bread in 5 Minutes was the best thing since, well, sliced bread. It was simple, and we were content with the results. That is, until last summer when our neighbor brought over a beautiful, delicious loaf of home-baked bread. We had to know her secret. One phone call, and she came back with the book, My Bread by Jim Lahey (Amazon).
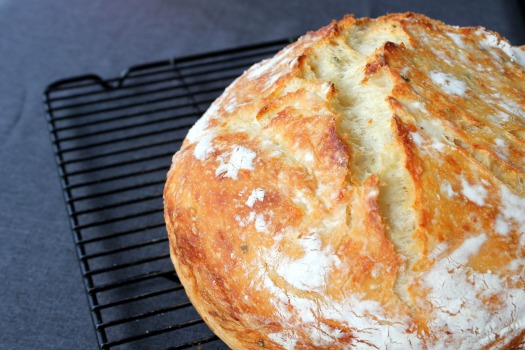
We have been baking bread using this method ever since. I can count on one hand the number of times I have bought bread in the store since then, because I can now make an artisan-quality loaf at home for a fraction of the cost.
I am telling you, this is consistently the best bread I have ever made in my kitchen. Okay, enough gushing. Let’s make some bread.
The only changes I have made to Lahey’s method is to double the amounts and adjust the baking time and temperature to achieve a bigger loaf with a thinner crust.
Oh, and don’t be put off by all these steps. This is totally possible for home bakers at any skill level. I wanted to give you the confidence to do this on your own. A concise recipe can be found at the bottom of this post.
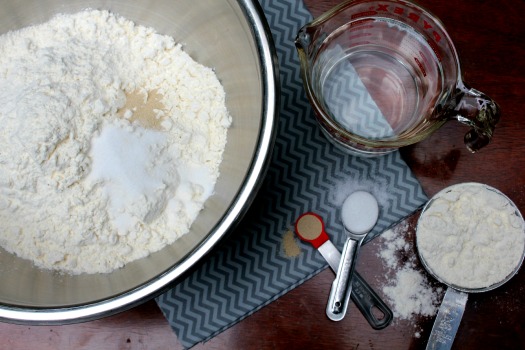
The ingredients are simple: flour, water, salt, and yeast. My husband calculated this bread costs 74¢ per loaf (using Bob’s Red Mill flour & Costco yeast).
Oh, wait! Don’t forget to factor in the roughly 8 cents of energy used to bake it for an hour. No, I’m serious. My husband really does think about this stuff! He’s funny.
So, there you go. A whopping 81¢ for a substantial 2.5 pound loaf of bread. That is crazy cheap.
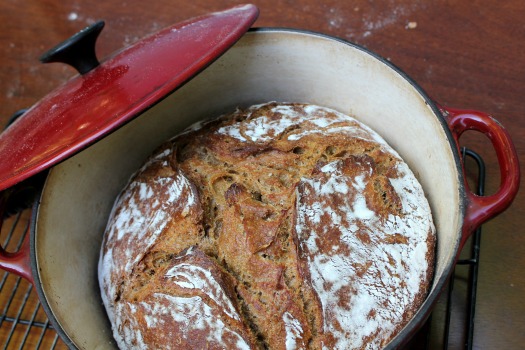
If you want to use some whole wheat flour, substitute 3 cups of whole wheat for 3 cups of the all-purpose flour (3 cups whole wheat and 3 cups of unbleached flour for a total of 6 cups) and add 3 Tablespoons of molasses (optional). This will produce a slightly sweeter, denser loaf of bread. Delicious.
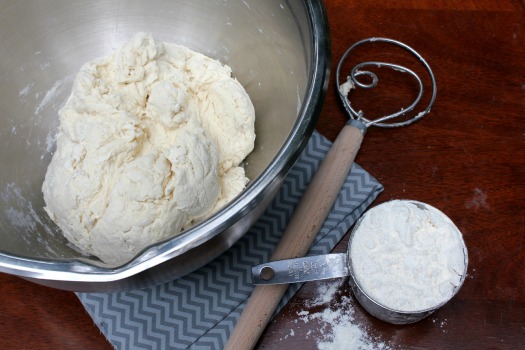
Combine the dry ingredients, add the water, and stir to combine (the funky looking wood-handled item is the amazing Danish Dough Wisk — makes stirring stiff dough a snap). The dough should be wet and sticky. Depending on the temperature and humidity in your home, you may need to add a little more flour or water, 1 Tablespoon at a time. So far, these steps are exactly the same as the 5 Minute method.
The main differences are that you use significantly less yeast (1/2 teaspoon vs. 1 1/2 Tablespoons) and significantly more initial rise time (12-18 hours vs. 2 hours).
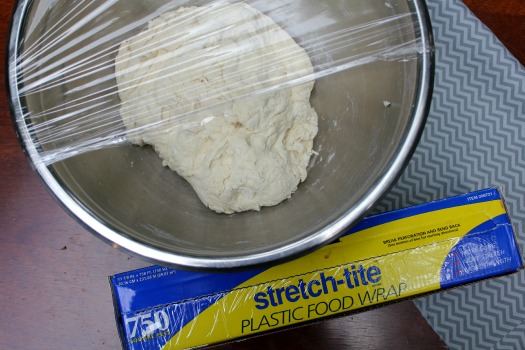
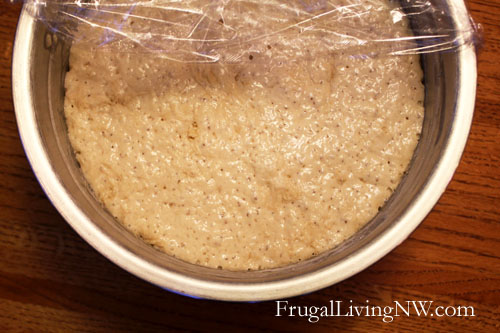
Once the ingredients are completely combined, cover the bowl with plastic wrap and leave it on the counter to rise for 12-18 hours. This slow rise aids in the fermentation of the yeast, giving the bread a better flavor.
Okay, I know what some of you are thinking: 12-18 hours! That’s ridiculous! Who has that kind of time?! I get it.
However, here are two things to consider:
- Once you get into a rhythm of baking your own bread, it’s not a big deal. I start mine in the afternoon or evening and bake it the next morning or afternoon. This would also be an easy weekend routine.
- Just like the title claims, this bread requires no kneading. It is not fussy, temperamental dough. You can produce a delicious loaf of bread with very little hands-on effort & experience.
You’ll know your dough is ready when it has risen in the bowl, smells yeasty, darkened slightly, and is covered with small bubbles.
Using well floured hands, shape and tuck the sticky dough into a rough ball. You can also fold it over a couple times on a well-floured surface. It doesn’t have to be perfect; just keep quickly tucking the dough underneath with your fingertips until you have a semi-smooth dough ball. The dough should be wet but manageable; you don’t want a wet blob so sticky that you can’t shape it into a ball.
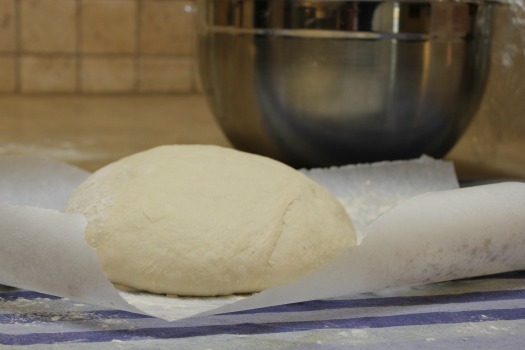
Take a clean linen or cotton tea towel (not terry cloth) and dust it with flour, cornmeal, or wheat germ to prevent the dough from sticking to the towel as it rises. You can also use a floured square of parchment paper on the towel to make the dough ball easier to handle. Place the dough ball, seam side down, in the middle and dust with more flour.
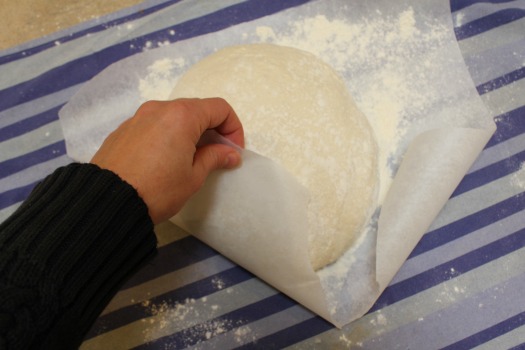
Cover the dough with the (parchment paper and) towel and let it rise for 1-2 hours at room temperature, until doubled in size. During the last 30 minutes of rise time, place a heavy lidded 6-8 quart pot, like a Dutch oven, in a cold oven and preheat it to 425 degrees.
Confession: I own three Dutch Ovens. I use them all the time. They are incredibly versatile and worth the investment. If you don’t own one, you could also make this in any lidded pot, provided it is oven-safe at such high temperatures. Also, check the knob on your pot. If it isn’t rated for such high heat, you’ll want to remove it or cover it with foil. You can also buy an inexpensive replacement knob that is rated for higher temps!
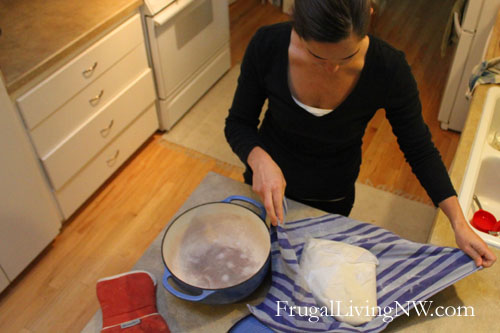
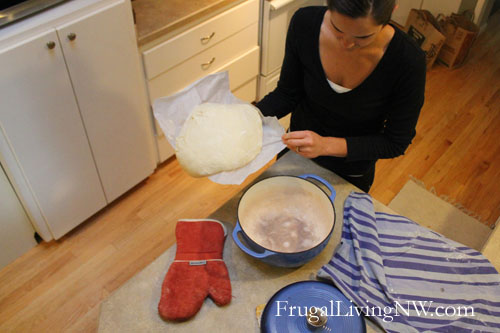
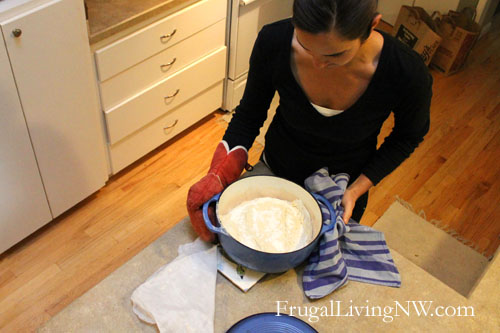
Okay, this is the trickiest part of the entire operation. Remove the lid from the piping hot Dutch Oven, slide your hand underneath the towel or parchment paper, and flip the risen dough (seam side up now) into the pot. Try to flip close to the pot or the flour will fly everywhere. Remove the towel or paper and set aside.
This might take a bit of practice, but again it doesn’t have to be perfect. Some of my worst flips have produced my most beautiful loaves. I love what Lahey writes, “…even the loaves that aren’t what you’d regard as perfect are way better than fine.”
Place the lid back on top and slide the pot back into the hot oven.
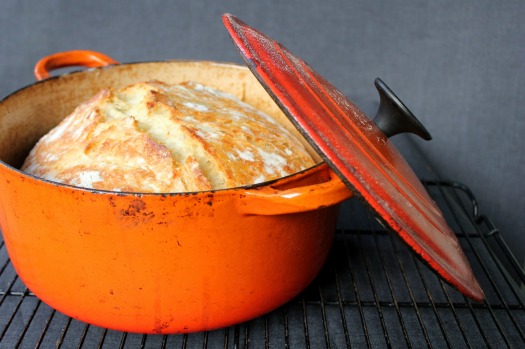
Bake it for 40-50 minutes. Remove the lid. Bake for another 5-10 minutes, until golden chestnut brown. The internal temperature should be around 200 degrees. You can check this with a meat thermometer if you’re nervous about knowing when your loaf is done.
Oh man, your house will smell so good about right now.
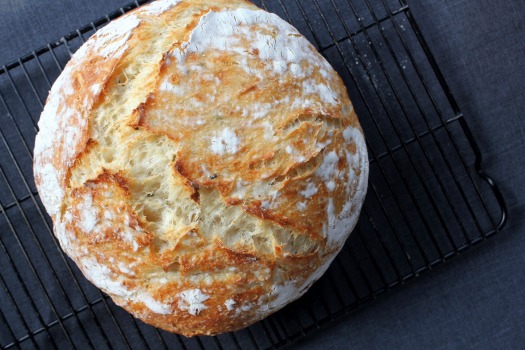
Place the loaf on a cooling rack. You will hear it crackling as it cools. Use every ounce of self-control to resist cutting into it until it is “quiet”; cutting it too soon will make the bread dense and gummy.
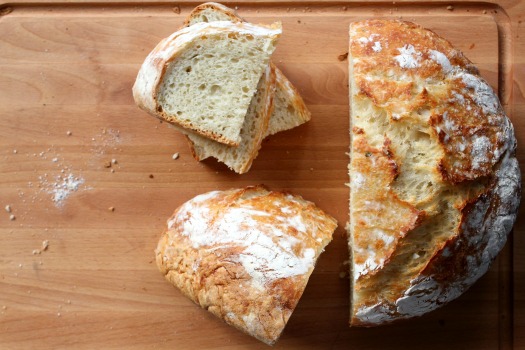
This bread is best the first 2-3 days. I just store my leftover loaf inside the Dutch oven on the countertop. Using plastic wrap will soften the crust. Dry, leftover bread makes great bread crumbs, toast, French toast, or croutons!
Enjoy. And pat yourself on the back. You just baked an amazing loaf of bread!
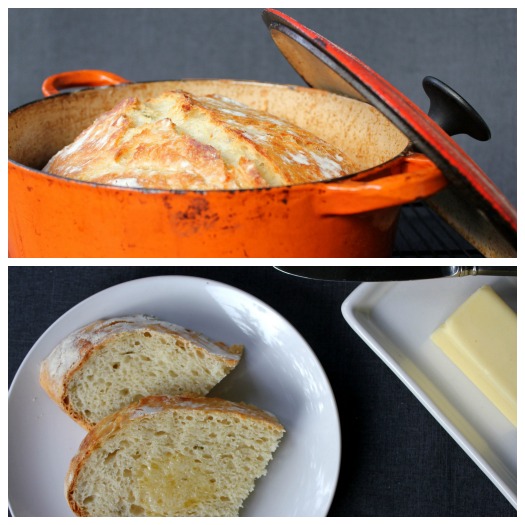
Basic No-Knead Bread
Slightly adapted from Jim Lahey’s My Bread
Ingredients
6 cups bread flour (recommended) or all-purpose flour, plus more for work surface
1/2 t. instant or active-dry yeast
2 1/2 t. salt
2 2/3 c. cool water
- In a large bowl, combine the flour, yeast, and salt. Add the water and stir until all the ingredients are well incorporated; the dough should be wet and sticky. Cover the bowl with plastic wrap. Let the dough rest 12-18 hours on the counter at room temperature. When surface of the risen dough has darkened slightly, smells yeasty, and is dotted with bubbles, it is ready.
- Lightly flour your hands and a work surface. Place dough on work surface and sprinkle with more flour. Fold the dough over on itself once or twice and, using floured fingers, tuck the dough underneath to form a rough ball.
- Place a full sheet/large rectangle of parchment paper on a cotton towel and dust it with enough flour, cornmeal, or wheat bran to prevent the dough from sticking to the parchment paper as it rises; place dough seam side down on the parchment paper and dust with more flour, cornmeal, or wheat bran. Pull the corners of parchment paper around the loaf, wrapping it completely. Do the same with the towel. Let rise for about 2 hours, until it has doubled in size.
- After about 1 1/2 hours, preheat oven to 425 degrees. Place a 6-8 quart heavy covered pot, such as a cast-iron Dutch oven, in the oven as it heats. When the dough has fully risen, carefully remove pot from oven. Unwrap the towel and parchment paper from around the dough and slide your hand under the bottom of the dough ball; flip the dough over into pot, seam side up. Pull the parchment paper off, scraping any stuck dough into the pan. Shake pan once or twice if dough looks unevenly distributed; it will straighten out as it bakes.
- Cover and bake for 40 minutes. Uncover and continue baking for 10-15 more minutes, until the crust is a deep chestnut brown. The internal temperature of the bread should be around 200 degrees. You can check this with a meat thermometer, if desired.
- Remove the bread from the pot and let it cool completely on a wire rack before slicing.
Here are a couple options for Dutch Ovens. Any heavy, lidded 5-8 quart pot (seasoned cast iron or enamel coated) would work with this recipe. Lodge has the best prices/options for dutch ovens on Amazon.
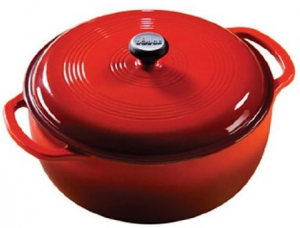
Lodge Logic Dutch Oven in Island Spice Red (6 Quart)
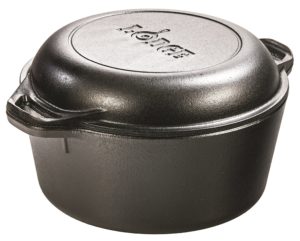
Lodge Cast Iron Double Dutch Oven (5 Quart)
If you already have a dutch oven (or find a deal on a lesser-known brand) that doesn’t have a knob rated for high temps, replace it! There are some really affordable options.
Got questions? You are in good company. Go here for the complete FAQ list.
Looking for more variations to the no-knead bread recipe? We’ve created a list with sweet and savory varieties, including the following:
- Cranberry Orange
- Four Cheese
- Sandwich Bread
- Dark Chocolate Coconut
- Tomato Basil Cheese
- Whole Wheat
Looking for more delicious bread recipes?
Find more delicious recipes on our Recipe Page!
Follow Frugal Living NW on Pinterest!
Fantastic range of boards from best recipes and tips for frugal living to gardening and budgeting help.
This post may contain affiliate links. See the disclosure policy for more information.



I love this bread and have been making it for a while- I would love to know if there is a way to make it more into sandwich bread shape- if I break in up into several batches and just cook it in a loaf pan or something maybe sitting in a pot with a lid- any advice?
I made this and I’m so impressed with myself! Thanks for an easy, delicious recipe for such an impressive looking loaf of bread!
Ok First things first. Thank you for this post, it was enough to intrigue me and simple enough that I found no excuse not to proceed. Since then however I have moved on to the Tartine old country loaf recipe. ITS AMAZING! The concept is the same, and unless you decide to make your own starter (WHICH I DID AND RECOMEND link for that at the bottom) it is just as easy. Do give it a googles! Thank you again for this post! It has opened a door that my stomach and family are glad for.
http://tartine-bread.blogspot.com/2013/02/9-days.html
=] D.R.
This recipe is awesome, it works out really well!
One thing I have issues with is that when I make the dough and then cover it with plastic wrap, the next morning it has risen and pressing against the plastic wrap which has been cinched down. This is a problem because the dough is sticky and now is stuck to the plastic wrap. Every time I end up slowly peeling off the plastic wrap and taking a layer of dough with it.
Is there a solution to this? I guess I could get a lager bowl…
Hey, I tried my hand at this for the first time. No luck. I used yeast that had been opened a week and white wheat flour. Did I go wrong w thee yeast. The dough has not risen. I also misread the water and b didn’t use enough. Thanks not an avid baker.
Edith – You could still try baking it and see what happens. I would try it again with fresh yeast and the correct amount of water. Don’t give up! This bread is totally possible for new bakers.
Once you’ve opened your yeast are you storing it closed tight in the fridge?
I have failed miserably at yeast breads my entire life, and that’s a BIG deal because I’ve baked quick breads, cakes, cheese cakes (NY style that never cracked), hand made pastas … PROFESSIONALLY for stores, hotels, restaurants and private clients yet I could NEVER do yeast bread.
What temp is your house? I live in Alaska so I keep my dough on top of the dvr player in the entertainment cabinet. Sometimes for the second rise I turn the oven onto warm (175*) when I do the kneading then turn it off when I put the dough in. But our house is REALLY cold and I’ve been seeing y’all in the PNW are having beautiful weather. It snowed all day here and our girls had to do softball practice in snow boots… sigh!
This one I can do, and you can too!
Yes, I store my opened yeast in the fridge or freezer.
We have had beautiful weather lately! My husband is from Alaska so we keep track of the crazy weather up there with his family. Normally, my house is around 67-degrees. I just change the rise time based on the temp of my house (warmer = shorter, colder = longer). I try to go mainly on the look/smell of the dough.
That sounds quite easy to make but can we make it on stove??? And at which flame level??
I made this bread again yesterday, but the crust is as hard as a rock. Could this be because I handled it to much? What else could cause this? I cooked it the same as I did the others. Thanks, Anna
Hi Marie First, I do freeze a loaf and Emily has some good advice for this in her FAQ section. I use a cup of a mix of seeds and ground flaxseeds and at first replaced a cup of flour with this mix. Now I don’t bother and throw it in with all the flour – just keep the consistency moist. Honestly, I’ve never had a dud loaf and now have lost count of the number of loaves we’ve made and enjoyed. My advice is, just put in what you fancy and see how you enjoy it.
Is it possible to make bread without salt or with very little salt. I have to be on a low sodium diet, and store bought bread has a lot of sodium in it.
Thanks,
Marifran
Hi Marifran – I forgot the salt in the last loaf I baked and we were pleasantly surprised. Absolutely no effect on the quality of the loaf, and I used part white, part wholemeal flours with chia and sunflower seeds and ground flaxseeds. So go for it – put as little salt in as you’d like. Taste was good, because the main reason I forgot the salt is I rarely use it in cooking.
I love the idea of using ground flaxseeds and sunflower seeds! How much of each did you add? Do you need to decrease your flour any?
Also, this is an unrelated question, but I wonder if you could freeze this bread. Has anyone tried?
great recipe, photos of my attempt is here
http://abimakes.blogspot.co.uk/2013/04/crockpot-no-knead-bread.html
I was wondering if you can refrigerate the dough after the first rise? If so, for how long? I was hoping to be able to make a loaf every few days? Would this work? Thanks!
Just checking…1/2 tsp. yeast and 2 1/2 tsp. salt? Thx.
Correct! t. = teaspoon
Anna – I flour a piece of parchment paper large enough to encase the bread, fold it over the top for the second rising then cover the paper with a cloth. When my casserole is heated I cut the paper around the bread leaving a 1-2 inch margin all the way around and long tabs on either end. I lower the bread, paper and all, into my dish and later from the dish to a cooling rack using the tabs. It never sticks to anything.
I made this bread a few days ago, I was a bit intimidated when I first began, but just kept following the recipe and it turned out great. I have another batch rising now, and am going to add roasted garlic and rosemary to this loaf. I do have a question, on step #3, can I use something else to keep the dough from sticking to the cloth, like millet? I have millet and don’t have any of the other things mentioned. On the first loaf I used un-toasted wheat germ, but it burned on the bottom of the bread, fortunately I didn’t use much, so the bread was still delicious. I’m hooked on baking bread this way, now! Thanks.
I have made this bread once, I was a bit intimidated when I first began, but just kept following the recipe and it turned out great. I have another batch rising now, and am going to add roasted garlic and rosemary to this loaf. I do have a question, on step #3, can I use something else to keep the dough from sticking to the cloth, like millet? I have millet and don’t have any of the other things mentioned. On the first loaf I used un-toasted wheat germ, but it burned on the bottom of the bread, fortunately I didn’t use much, so the bread was still delicious. I’m hooked on baking bread this way, now! Thanks.
These are the hardest posts for me to see and smell, seeing as I have Celiac… I would love to find something like this in GF. Enjoy my friends!!!
I have asked our readers and Googled around several times. So far, no one has had rave reviews on a gluten-free loaf of artisan-style bread.
However, if you are just looking for a good recipe for homemade GF bread… A friend of mine who is gluten-free, dairy-free bakes this bread regularly. After trying many recipes, this is her favorite. She brought it over to my house the other day, and it was beautiful. She hasn’t had great success with the loaves of bread so she usually shapes it into rolls. http://gfrealfood.com/2009/06/10/kims-gluten-free-dairy-free-whole-grain-bread/
We would love to hear back from you if you try it out!
This is my first attempt at bread making….I do not usually post…but hey this worked and it was delicious…thank you thank you!!!!
I’ll definitely be trying this! It look so delicious!
One question, if I don’t have a dutch oven, can I use the container that comes with a slow cooker?
Thanks!
Another technique from an Artisan Bread maker is to stretch and the dough four turns. This is done over 15 min intervals for 1 hour. It is done to incorporate more air into the dough. More salt is added and also a 1/2 tsp of wine vinegar for flavor!
I’ve had this recipe pinned on my “food!” board (on Pinterest) for ages and finally got round to making it this weekend.
It’s amazing! I still can’t quite believe how simple it was to do – and it works! Thank you!
First of all I’d like to thank you so much. I made my first two loaves of bread last night and they were amazing. I made one in my new cast iron Dutch oven and the other in a clay cooker that I bought at a yard sale and have only used once. I’m sure they will both be getting a lot of use now.
I have one question though… Last night the bread crust was crisp and crunchy. I stored them in the Dutch oven and clay cooker COVERED and this morning the crust is a bit softer. Not terrible, but not crunchy. Should I store them opened??
THANK YOU SO MUCH. I have a new obsession. I have some dough rising as we speak!
Yes, Antonia! Do it! I add mine when I take it out to divide into balls to rise under a towel. Just pull it open over and over and add in whatever before you fold it under in a ball. It always comes out delicious and I haven’t noticed any negatives to its texture.
I make this almost daily. Whenever I visit family, they need me to bring them loaves of it. They call it “Chelsea bread”, and they think it’s worth traveling for. I can’t get any of them to realize it is incredibly simple and easy to make with no effort or fuss, even though I’ve shown them, written it down, and explained it verbally. It just seems too delicious for them to compute that they can make it, too! I divide the batch into two loaves , each with their own flavorings, and cook them in the inner pot from my little slow cooker, with my cookie sheet as a lid. I have done so many different flavorings, my favorite being fresh cracked black pepper, but I’ve also done herb and garlic, minced onion, honey, and even a spicy crushed red pepper wheat loaf to go with a mild full of veggies cream-and-broth based mushroom soup. This bread has become a staple in my life. I share it with everyone!
I have made this bread at least 100 times. I have given it for a hostess gifts and I love it. I am obsessed!! It is sooooooo easy and DELICIOUS!!! I will never buy a loaf of bread again. I also use Spelt flour and it is good!! Would like to add nuts or something like flax seed in my dough, but don’t know if it will be as good….Anyone out there added stuff to their dough????
I added 1/2 a teaspoon of raw sugar
and 2 tablespoons of fresh rosemary.
Mine is currently in the oven and it is looking really good!
I can’t wait!
Antonia, do you use 100% spelt flour or do you mix it with bread flour? I’m wondering how it would do with 100% spelt.
Thanks!
Help… My dough doesn’t seem to be rising during the 1-2 hours before baking. It certainly hasn’t doubled in size… Should it be wrapped to contain moisture or warmth I just laid the cloth on top.
Hi, Daniel! Doubled might be generous, but it should definitely increase in size.
Yes to wrapping. If you follow the directions as written, it should work! You could let it rise for longer if your house is cool. Sometimes I let my dough go for 3 hours on the second rise. I would definitely bake your loaf anyway. It will rise more in the oven.
Thanks Emily.
Had lots of things going on. First my yeast was past its best by date, second my house is at about 70 degrees, and third my dutchoven seems to be too small. I’ve made three loafs since All much better… Still lacking in taste but I have a starter going that should help.
Thanks for the post and the help!
Daniel, if you want something a bit more flavorful, I’ve done variations. After the first rise, I added sauted garlic and brocolli to the dough. Just kneaded it in a bit at a time. It was amazing. Also my friend has done a sweet version with dried cranberries and nuts. This recipe is so amazing and versatile!
Make sure your yeast is fresh and not outdated. Old yeast doesn’t rise well. Good luck!
I have made this bread for years and it is soooooooo easy!!! It’s delicious!! I have family members asking to make them some lol I don’t have a dutch oven at all so I break it up into 3 balls and put on a huge cookie sheet and let raise, etc. Works just as good…The author is right… It doesn’t matter what it looks like because it’s so good that just adds to its uniqueness.
You don’t have to grease the Dutch Oven (mine is cast iron….couldn’t live without it!)? Also, instead of plastic wrap couldn’t you just put the pot lid on it? Thanks.
No, you don’t have to grease your Dutch oven. Check out our FAQ page for more on that.
You could wrap your loaf in plastic wrap which makes the crust softer or just keep it in the lidded pot which will dry it out faster. I usually store leftover bread in my Dutch oven now and just use it for toast by day 3.
Madeline, I have the same question as you. Do we have to use plastic wrap? If the function is to serve as a simple air barrier, would any basic covering (like a lid or plate over the top of a bowl) work for the rise period? Thanks all.
Success! I’m sitting here drooling while I hear it cool… pic at http://instagram.com/p/XWPpcRyC-a/
NOT SUCCES. It looked great and sounded great but had only the faintest amount of flavor and was very very compact… any idea why? I did use bleached all purpose flour, could that have been it? Also this may have done something but I concotioned a little spoon out of aluminum foil to hold some water and perhaps create extra steam?
Any sort of help or advice would be appreciated thank you.
It could have been the extra steam. It isn’t really needed with this bread. I would try again with unbleached all purpose and nix the steam.
I found it’s really important to use the instant yeast and NOT the active dry. In those small quantities at least. If you do use active dry use A LOT more. I quadruple it usually.
Shira – Either instant or active dry yeast works for this recipe. Lahey’s book lists either option. I always use active dry, since it is so inexpensive at Costco. Even though it is a small amount, it gets the advantage of a long rise time!
OK, so I screwed up big-time on my first loaf. I misread the measuring cup and added way too much water. When I “poured” the dough out onto the floured cloth, I had more than a little liquid flow from the bottom of the bowl. I did as well as I could, dusting liberally with more flour and folding it in, and repeating the process until I finally had a manageable dough. From there, I followed the instructions and still created the most fantastic loaf of bread I’ve ever made. Tonight, I begin my second attempt, this time with the right measurements. Great stuff!
I am so freaking excited about this… I will be thinking about this for the next 18 hours. The wait will be worth it though I’m sure, and it’ll be a nice way to end midterms… Thanks.
I tried this recipe last week and it was a little bit of trial and error. It tasted a little salty but I think that was operator error. I started a new batch yesterday and it was PERFECT!!! Rose just the way it should and even the DOUGH smells delish! I’m so impressed already at how easy it is to have delicious, homemade bread in my house EVERY DAY! We also make home crafted beers, do hydroponic gardening and make our own cheese so in no time at all we will be totally self sufficient! Thank you for this fabulous addition to my recipe book!
Has anyone ever tried making this with rice flour? My neighbor’s daughter is allergic to gluten and almost never gets bread as it’s a pain to make. I’d like to know if it’s possible before I go spending the money as rice flour can be pretty expensive. Thanks in advacne!
I’m not sure if I have ciliac disease or not but I do feel better if I stay away from wheat. Is ther a gluten free/wheat free bread recipe out there that actueally tastes decent?
This recipe is incredible – LOVE it! I’ve made it about 4 or 5 times now and it’s always come out great. My family gets together fairly regularly for dinner and they really look forward to this bread being part of the meal. One gathering got cancelled after the bread was already started. When it was done (and after I cut off a small hunk for my husband and I), I wrapped it in foil and froze it (I didn’t have a ziploc bag large enough). It was still good a couple of weeks later when I took it for the next family meal. This recipe is definitely worth the price of my new dutch oven!
I love, love, love, this recipe! Have made it several times, given it out to friends who helped clean out our driveway due to snowstorms, and they loved it too!
Took it to our ‘cowboy church’ (Open Range Fellowship, held at the Ransomed Heart Ranch in Lone Jack, Mo.) last night for our weekly pot luck. It was a success, left several copies of the recipe, and have been asked to put the recipe in our upcoming Open Range Cookbook!
@ Tony, it works well in almost every pan if you can cover it and can take the heat. But look and think, can you handle it easy when it is hot, take away the cover safely etc. An old Dutch oven from a yard sale will do as great as a verry nice shiny expensive new one I use a verry low budget real dutch oven so I can use it in my oven, on my woodstove in winter and in the summer outside with coals under and on top of it, cost me about 30 $ new.
@ Heather. Most realy whole wheat breads are verry dense because of the weight of the particels and the moisture they capture. If you want to have some more fibers in your bread, just do the 50//50 whole wheat and bread flower, add some wheat bran and or seeds (quinoa, sesame, pumpkin, sunflower etc) to it. Also do some of the bran and the seeds into the mixture of flour etc you use to cover the breaddough. It realy tastes verry good and gives it a beautifull appearance.
Kind regards
Danuta (Austria)
My sister recommended this recipe to me. She loves it! I don’t have a dutch oven though. I do have regular Pyrex Casserole dishes as well as metal bread load pans. I see some people have used the Pyrex, but then it would be in a square. Any idea if it would work in the metal pan if it was covered?
Trying this right now….Bread is in the oven, I’m just worried that my 5 qt dutch oven (didn’t realize the size until it was too late) is too small for the recipe….fingers crossed.
Patricia – I live alone so the full recipe is a bit much and I also find the dutch oven hard to handle when hot so I always halve the recipe and cook it in a covered Pyrex casserole. I cut everything in half and proceed per directions although I do use an instant read meat thermometer to make sure it is done as it seems to brown a little more quickly than the one time I made it in a dutch oven and want to make sure it is truly done. At 200 degrees internal it is always perfect.
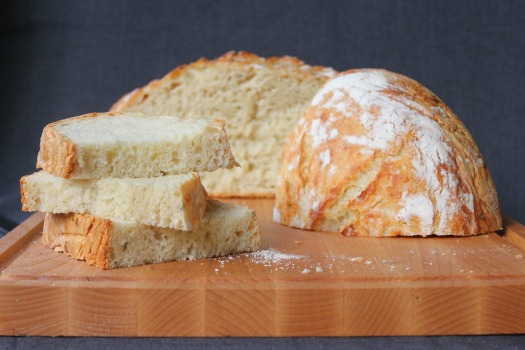
This is a great recipe and one that actually worked for me! I tried this recipe a few days ago with white spelt flour and I thought I would need more than 6 cups of flour but I didn’t. I was worried it would be too loose but when I put it on the counter to raise 2 more hours but it felt good and was raised well (didn’t look it in the pan much). When I took the lid off after 40 minutes I couldn’t believe how good it looked! When I took it out afterwards it looked exactly like the picture above! I have been trying to find a good recipe for bread for a long time so I was pretty excited even calling my husband in to come look and he liked the taste of it as well. Will try it with wheat next time maybe…need a good wheat recipe.
I tasted this bread at a friend’s house and it was so yummy! My dutch oven is 3.5 qts (i think), so I’m thinking I’d better half the recipe. Have you already tried halving it? I’m wondering if I simply divide everything in half, or if there are any tips or tricks I should be aware of! Thanks!
I have a 5 qt, and instead of halving it, I make two loaves. I do everything just like the recipie says to, until the 2nd rise time. The 2nd time I split the dough in 2, and let it rise. One will continue to sit while the first one cooks, but I’ve never noticed a difference in the texture between the loaves. Hope this helps!