No-Knead Bread Recipe
If you have been hanging out around Frugal Living NW for awhile, you know that I am a big believer in making food from scratch at home. With a few exceptions, I prefer creating something in my own kitchen to buying it in the grocery store.
Bread can be tricky, though. There is some stiff competition out there, and it is tough to replicate a commercial oven’s heat and steam in a normal home kitchen.
For the last several years, I thought that Artisan Bread in 5 Minutes was the best thing since, well, sliced bread. It was simple, and we were content with the results. That is, until last summer when our neighbor brought over a beautiful, delicious loaf of home-baked bread. We had to know her secret. One phone call, and she came back with the book, My Bread by Jim Lahey (Amazon).
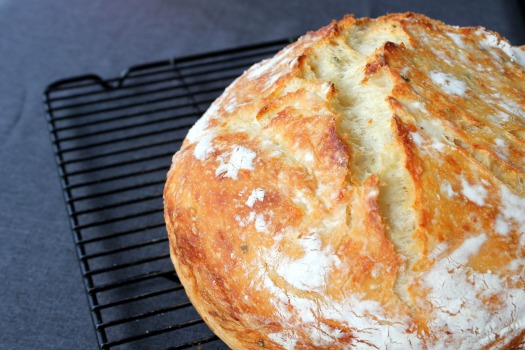
We have been baking bread using this method ever since. I can count on one hand the number of times I have bought bread in the store since then, because I can now make an artisan-quality loaf at home for a fraction of the cost.
I am telling you, this is consistently the best bread I have ever made in my kitchen. Okay, enough gushing. Let’s make some bread.
The only changes I have made to Lahey’s method is to double the amounts and adjust the baking time and temperature to achieve a bigger loaf with a thinner crust.
Oh, and don’t be put off by all these steps. This is totally possible for home bakers at any skill level. I wanted to give you the confidence to do this on your own. A concise recipe can be found at the bottom of this post.
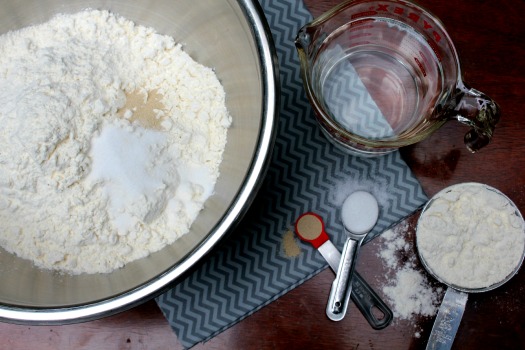
The ingredients are simple: flour, water, salt, and yeast. My husband calculated this bread costs 74¢ per loaf (using Bob’s Red Mill flour & Costco yeast).
Oh, wait! Don’t forget to factor in the roughly 8 cents of energy used to bake it for an hour. No, I’m serious. My husband really does think about this stuff! He’s funny.
So, there you go. A whopping 81¢ for a substantial 2.5 pound loaf of bread. That is crazy cheap.
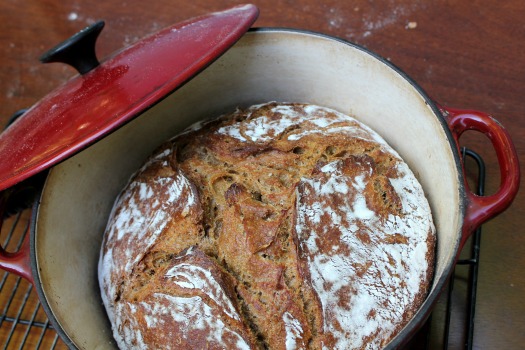
If you want to use some whole wheat flour, substitute 3 cups of whole wheat for 3 cups of the all-purpose flour (3 cups whole wheat and 3 cups of unbleached flour for a total of 6 cups) and add 3 Tablespoons of molasses (optional). This will produce a slightly sweeter, denser loaf of bread. Delicious.
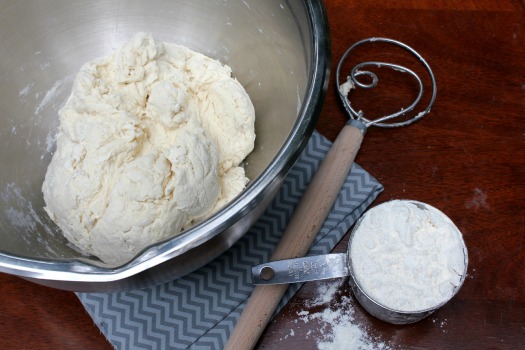
Combine the dry ingredients, add the water, and stir to combine (the funky looking wood-handled item is the amazing Danish Dough Wisk — makes stirring stiff dough a snap). The dough should be wet and sticky. Depending on the temperature and humidity in your home, you may need to add a little more flour or water, 1 Tablespoon at a time. So far, these steps are exactly the same as the 5 Minute method.
The main differences are that you use significantly less yeast (1/2 teaspoon vs. 1 1/2 Tablespoons) and significantly more initial rise time (12-18 hours vs. 2 hours).
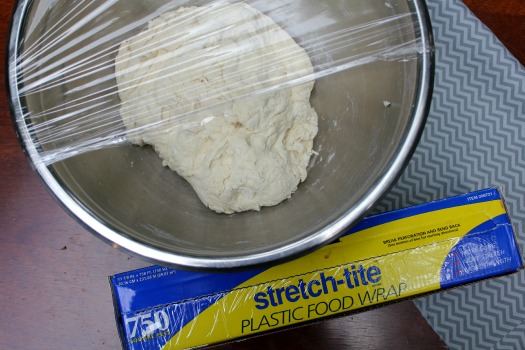
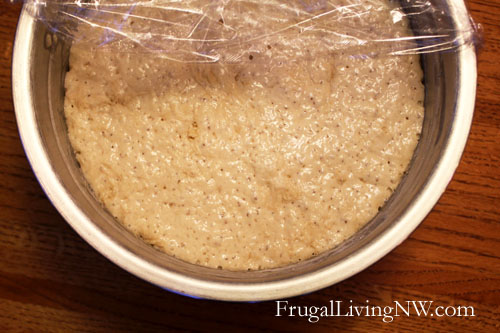
Once the ingredients are completely combined, cover the bowl with plastic wrap and leave it on the counter to rise for 12-18 hours. This slow rise aids in the fermentation of the yeast, giving the bread a better flavor.
Okay, I know what some of you are thinking: 12-18 hours! That’s ridiculous! Who has that kind of time?! I get it.
However, here are two things to consider:
- Once you get into a rhythm of baking your own bread, it’s not a big deal. I start mine in the afternoon or evening and bake it the next morning or afternoon. This would also be an easy weekend routine.
- Just like the title claims, this bread requires no kneading. It is not fussy, temperamental dough. You can produce a delicious loaf of bread with very little hands-on effort & experience.
You’ll know your dough is ready when it has risen in the bowl, smells yeasty, darkened slightly, and is covered with small bubbles.
Using well floured hands, shape and tuck the sticky dough into a rough ball. You can also fold it over a couple times on a well-floured surface. It doesn’t have to be perfect; just keep quickly tucking the dough underneath with your fingertips until you have a semi-smooth dough ball. The dough should be wet but manageable; you don’t want a wet blob so sticky that you can’t shape it into a ball.
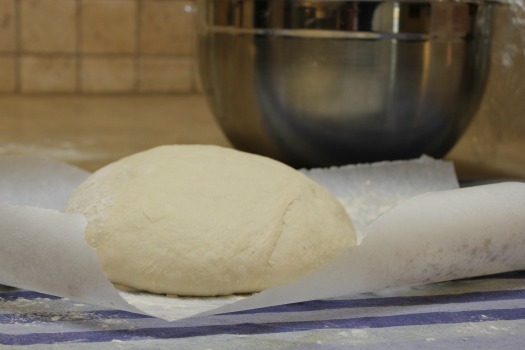
Take a clean linen or cotton tea towel (not terry cloth) and dust it with flour, cornmeal, or wheat germ to prevent the dough from sticking to the towel as it rises. You can also use a floured square of parchment paper on the towel to make the dough ball easier to handle. Place the dough ball, seam side down, in the middle and dust with more flour.
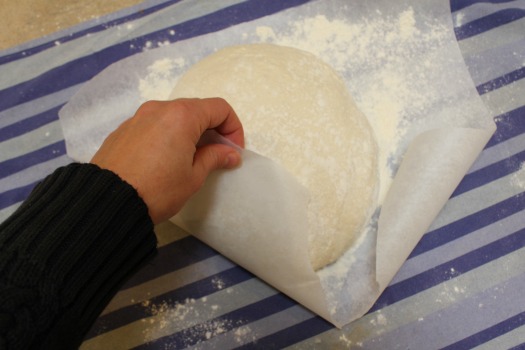
Cover the dough with the (parchment paper and) towel and let it rise for 1-2 hours at room temperature, until doubled in size. During the last 30 minutes of rise time, place a heavy lidded 6-8 quart pot, like a Dutch oven, in a cold oven and preheat it to 425 degrees.
Confession: I own three Dutch Ovens. I use them all the time. They are incredibly versatile and worth the investment. If you don’t own one, you could also make this in any lidded pot, provided it is oven-safe at such high temperatures. Also, check the knob on your pot. If it isn’t rated for such high heat, you’ll want to remove it or cover it with foil. You can also buy an inexpensive replacement knob that is rated for higher temps!
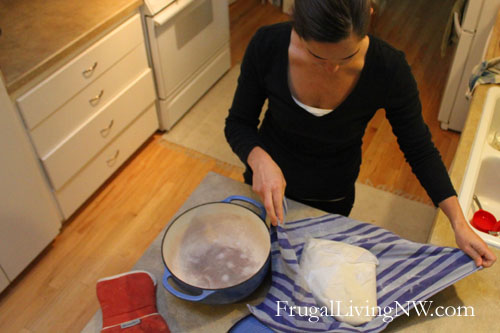
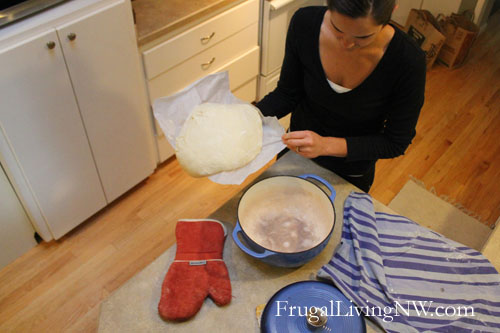
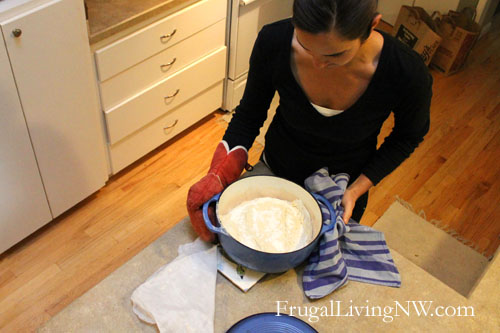
Okay, this is the trickiest part of the entire operation. Remove the lid from the piping hot Dutch Oven, slide your hand underneath the towel or parchment paper, and flip the risen dough (seam side up now) into the pot. Try to flip close to the pot or the flour will fly everywhere. Remove the towel or paper and set aside.
This might take a bit of practice, but again it doesn’t have to be perfect. Some of my worst flips have produced my most beautiful loaves. I love what Lahey writes, “…even the loaves that aren’t what you’d regard as perfect are way better than fine.”
Place the lid back on top and slide the pot back into the hot oven.
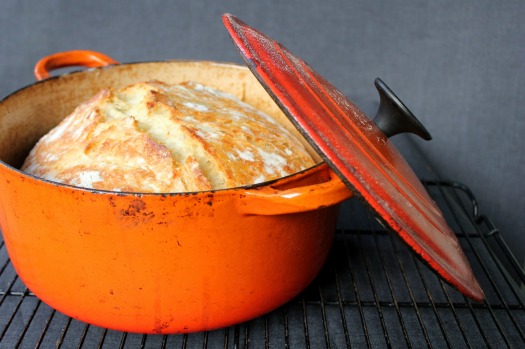
Bake it for 40-50 minutes. Remove the lid. Bake for another 5-10 minutes, until golden chestnut brown. The internal temperature should be around 200 degrees. You can check this with a meat thermometer if you’re nervous about knowing when your loaf is done.
Oh man, your house will smell so good about right now.
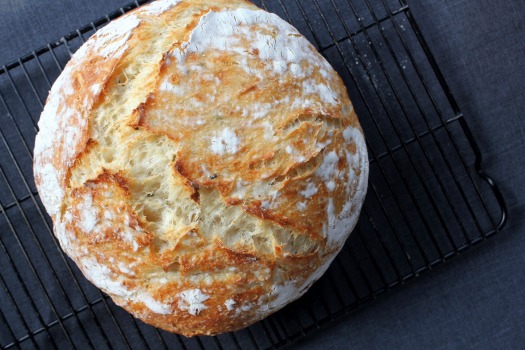
Place the loaf on a cooling rack. You will hear it crackling as it cools. Use every ounce of self-control to resist cutting into it until it is “quiet”; cutting it too soon will make the bread dense and gummy.
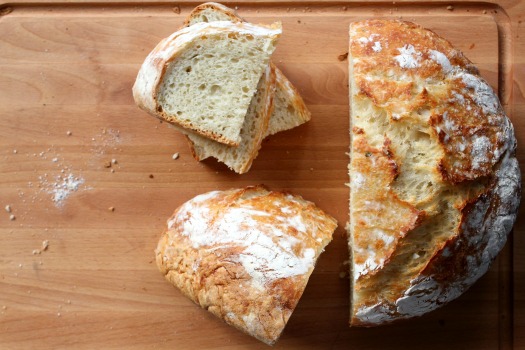
This bread is best the first 2-3 days. I just store my leftover loaf inside the Dutch oven on the countertop. Using plastic wrap will soften the crust. Dry, leftover bread makes great bread crumbs, toast, French toast, or croutons!
Enjoy. And pat yourself on the back. You just baked an amazing loaf of bread!
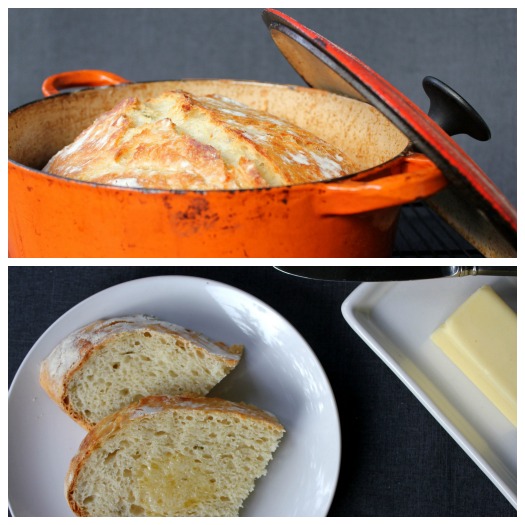
Basic No-Knead Bread
Slightly adapted from Jim Lahey’s My Bread
Ingredients
6 cups bread flour (recommended) or all-purpose flour, plus more for work surface
1/2 t. instant or active-dry yeast
2 1/2 t. salt
2 2/3 c. cool water
- In a large bowl, combine the flour, yeast, and salt. Add the water and stir until all the ingredients are well incorporated; the dough should be wet and sticky. Cover the bowl with plastic wrap. Let the dough rest 12-18 hours on the counter at room temperature. When surface of the risen dough has darkened slightly, smells yeasty, and is dotted with bubbles, it is ready.
- Lightly flour your hands and a work surface. Place dough on work surface and sprinkle with more flour. Fold the dough over on itself once or twice and, using floured fingers, tuck the dough underneath to form a rough ball.
- Place a full sheet/large rectangle of parchment paper on a cotton towel and dust it with enough flour, cornmeal, or wheat bran to prevent the dough from sticking to the parchment paper as it rises; place dough seam side down on the parchment paper and dust with more flour, cornmeal, or wheat bran. Pull the corners of parchment paper around the loaf, wrapping it completely. Do the same with the towel. Let rise for about 2 hours, until it has doubled in size.
- After about 1 1/2 hours, preheat oven to 425 degrees. Place a 6-8 quart heavy covered pot, such as a cast-iron Dutch oven, in the oven as it heats. When the dough has fully risen, carefully remove pot from oven. Unwrap the towel and parchment paper from around the dough and slide your hand under the bottom of the dough ball; flip the dough over into pot, seam side up. Pull the parchment paper off, scraping any stuck dough into the pan. Shake pan once or twice if dough looks unevenly distributed; it will straighten out as it bakes.
- Cover and bake for 40 minutes. Uncover and continue baking for 10-15 more minutes, until the crust is a deep chestnut brown. The internal temperature of the bread should be around 200 degrees. You can check this with a meat thermometer, if desired.
- Remove the bread from the pot and let it cool completely on a wire rack before slicing.
Here are a couple options for Dutch Ovens. Any heavy, lidded 5-8 quart pot (seasoned cast iron or enamel coated) would work with this recipe. Lodge has the best prices/options for dutch ovens on Amazon.
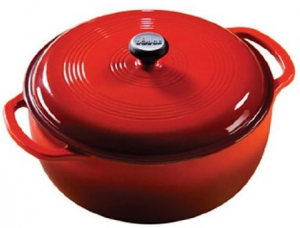
Lodge Logic Dutch Oven in Island Spice Red (6 Quart)
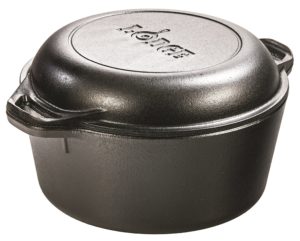
Lodge Cast Iron Double Dutch Oven (5 Quart)
If you already have a dutch oven (or find a deal on a lesser-known brand) that doesn’t have a knob rated for high temps, replace it! There are some really affordable options.
Got questions? You are in good company. Go here for the complete FAQ list.
Looking for more variations to the no-knead bread recipe? We’ve created a list with sweet and savory varieties, including the following:
- Cranberry Orange
- Four Cheese
- Sandwich Bread
- Dark Chocolate Coconut
- Tomato Basil Cheese
- Whole Wheat
Looking for more delicious bread recipes?
Find more delicious recipes on our Recipe Page!
Follow Frugal Living NW on Pinterest!
Fantastic range of boards from best recipes and tips for frugal living to gardening and budgeting help.
This post may contain affiliate links. See the disclosure policy for more information.



Okay, I followed the entire process without deviating and am ready to report my results.
1. Making the dough is a snap, just like the “5 minute” method.
2. When I upended it into the dutch oven, the excess flour from the dusting flew everywhere in a 2 foot radius around the pan. A bit of a mess to clean up.
3. It made one big-honking loaf of bread. I expected this from the recipe ingredients. It is about the size and shape of a mildly deflated soccer ball.
4. The crust is overdone, especially on the bottom. It is too dark and too thick.
5. The crumb is quite good. Moist and better texture than the “5 minute” method.
Conclusions: This loaf is edible, but it is not my best creation. I like the crumb so I may try this dough recipe again, with the long initial rise time (12-18 hrs.). But instead of cooking the whole thing, I’ll make a loaf out of 1/3 of it and refrigerate the rest for future baking. This big of a loaf is just too much for my family.
I will certainly lower the temperature and/or baking time until I get a crust I like. I’ll probably go down to 450 degrees and 40 minutes and see what it looks like.
I would also like to compare and contrast the “5 minute” technique of using a baking stone and pan of water for humidity, vs. this method in the dutch oven, but using this dough recipe.
Thanks for posting this. It gives me some ideas to play with, but I am not yet ready to abandon the “5 minute” method.
Great observations! Thanks, Charlie. I edited the baking temp & times in the recipe. Maybe my oven isn’t as hot? Hmm. I really have found every loaf is slightly different so have fun playing around with it!
Here’s 5 Minute + Lahey’s method: http://www.artisanbreadinfive.com/2009/03/11/baking-bread-in-a-dutch-oven
I agree, though, I prefer Lahey’s flavor of less yeast + longer rise time.
This was after 50 min…
Seems to be a bit too long/hot for many people. I am going to edit the directions to reflect this. Thanks for the feedback!
I’d play around with both until you find something you like. Start with 450 for 40 min then uncover for 10. Once the internal temp of the bread hits 200 (you can check with a meat thermometer), and the crust is a deep golden brown, it’s done. Ovens/loaves/pots all vary slightly.
If you check out Jim Lahey’s book, you’ll see he bakes his loaves much darker – almost a charred crust. Definitely not my preference!
Hope that helps!
Ok…just came out of the oven and the bottom stuck a little and was totally burnt. Should I shorten baking time or turn down oven or both? It is singing now…
What does seam side mean. When you say seam side up and down…
When you tuck the dough under to shape it into a round ball, it will create a “seam” underneath where the dough comes together. Like a rough crack or line in the dough. Hope that helps!
I have been making homemade bread for over 10 years and have never gotten the desired chewey outer crust. I tried this recipe and used the dutch oven. (I borrowed the one from our camping gear.) The results were amazing! The dutch oven made all the difference: ) Yeah for me and thank you so much for sharing your expertise with us!
We made this today and had grilled cheese sandwiches on the bread (not to mention a little snacking on the bread before hand!). I love it!! We want to experiment with adding garlic cloves next.
I used 6 c. bread flour instead of all-purpose and it was great. Baked it at 450 for 50 minutes and the last additional 10 minutes w/out the lid wasn’t necessary – it burned our bread slightly. Next time we won’t do that. This is a keeper recipe. Takes a long time but the level of energy put into it is minimal for such a gorgeous and yummy loaf of bread!
THANK YOU!
Mine is in its last ten minutes and it looks beautiful!!
For over 10 years, our family had been baking all our bread in a bread-machine… that is until it broke. A friend had just shared her recipe for “Peasant Bread” (aka: Artisan or No-Knead) so I gave it a try. Five years later we’ve never replaced the bread-machine!
This bread really is the EASIEST, FUSS-FREE bread I’ve ever made!!!
(Measure, stir, ignore, shape, ignore, bake!)
Essentially a quick-sour, the small amount of yeast kick-starts the fermentation process & natural yeasts do the rest of the work. As a result, the rising times are not as rigid as with conventional bread recipes so you complete the bread-making steps as it suits YOU.
I’ve added seeds, alternate grains, baked it in loaf pans, made it into pizza crust, shaped it into baguettes… all turned out great!
I’ve also used parchment paper: after shaping the loaf & dusting the parchment w/ cornmeal, set the dough on the paper & set the whole shebang into the dutch oven to rise. Then to bake place dutch oven in a COLD oven, turn on the oven and bake as usual. A piece of parchment paper can be used repeatedly until it becomes too fragile & falls apart.
I’d like to know more about using this for pizza dough, shaping in baguettes or baking in loaf pans.
I’d like to give this to friends but it’s alot of bread in 1 round ball. Please tell me more.
Just wondering if anyone has ever tried to freeze this? It would be nice to make a bunch at once and then have it frozen but not sure it would work.
Bread freezes very well. Just thaw at room temperature and toss into the oven at 350 for 5 minutes our so to recrisp.
Just finished baking this – it is awesome and so impressive. It seems like a long time getting it from start to finish but it’s well worth it. I’m already wanting to start another batch to take to friends tomorrow :). I told my husband that this is so good I could see us giving this to neighbors at Christmas. Now if I only had more pots?????
My mom gave these loaves to neighbors for Christmas! You could wrap it in a cool towel or fabric & pair it with jam or honey.
Also, I have frozen these loaves wrapped in foil & placed in a plastic freezer bag. Then I slide the foil-wrapped, frozen loaf into a 350-degree oven to re-heat while I make dinner.
My 23 year old son introduced me to this recipe this Christmas holiday. Now I’ve made it at least eight times, and introduced it to my neighbor.
My son uses weight to measure, so that’s how I’ve been doing it. And I’ve experimented with varying the amount of water from between 340 grams to 370 grams, which is the original amount in his recipe. Less water makes it much easier to handle and shape; more water makes the crust more delicate and crackly, but the loaf is hard to shape and stays more flat.
I also sprinkled a generous handful of cornmeal in my Le Cruset to prevent sticking – sticking has been a problem on two occasions.
I’d love to find the perfect balance of water to have a loaf that was easier to handle but still had delicate crackly crust. I am wondering if there is a way to enhance the benefits of the steam – I thought I saw on a blog somewhere the idea of slipping one ice-cube into the Le Cruset after the dough has gone in, just before putting it in the oven. Has anyone heard of that?
In general, the crust really comes from steam during the first 10-15 minutes of baking. Bakers have steam injected ovens which are incredibly expensive. This is where ice cubes comes in — it creates steam for a short amount of time then evaporates. However, inside of a closed environment like a dutch oven, it might not work as well, because with the moisture trapped, the crust may become too thick and just never get that nice crackly texture we look for.
In “normal” bread making, you generally try not to add flour to the dough after it’s been mixed… the common hydration level for a typical french baguette is 62% (so, for 1000 grams of flour, you’d use 620 grams of water). For all other dealings, you’d use pan release spray in the bowl… The key to handling the dough at that level is to be fast, the slower your movements, the more chance the dough has to stick to your fingers.
However, the perfect crust in a home oven is the quest of the holy grail. 🙂
One technique is, if you bake on a baking, stone also have a cast iron pot in the bottom of oven and, when you go to bake off your bread, toss some ice cubes in there. In addition, every 30 seconds for the first two minutes, take a spray bottle of water, open the oven just a crack and spray around the sides of the oven to create more steam.
I’ve yet to be able to get that perfect razor-thin crust in a home oven, though. 🙁
Fascinating to hear the hydration levels. While I wrote my first comment, my loaf was out of the oven and cooling. Now I’m eating it, and the crust is really quite nice and crackly – my ratio was 400 grams flour to 365 grams water (I was going for 360 but overpoured) – which is quite a lot more hydration than you’re giving here for a baguette – 91%. But my son’s recipe called for 370 grams of water to 400 grams of flour – 92%!
The loaves I’ve made with 340 grams of water (85%) are far more aesthetically pleasing – I can shape it and even slash the top – but the crust is only nice, not delightful.
Does the bowl matter? It looks like you are using a stainless steel bowl.. Does glass or ceramic work just as well?
The mixing bowl doesn’t matter. Use whatever you prefer.
I really wish you’d come to my site and try my crusty white no-knead pot bread (or one of my other breads). The crusty white one is a bit similar to Lahey’s but easier, and many people who have tried it feel the flavor is better. It is from my cookbook, Kneadlessly Simple, and it is designed for people who are either newbies or just too busy to mess around with the usual muss and fuss of traditional doughs. I have also posted an oatmeal bread and a cheddar bread.
Just pulled mine out of the oven. Pretty dark on top, and the bottom is burnt. Baked mine at 475 for 50 min, in a stoneware baker.
I’ll wait to cut into it, and post how the inside turned out.
Inside was ok. We just cut the bottom off of each slice.
I just sliced a piece of this fantastic bread to pair with some Minestrone soup and it is SO GOOD! I can’t believe how easy it was, thanks so much!
I don’t have a dutch oven, so I just used a casserole dish and it turned out amazing.
It’s great to read everyone’s success stories! And, Diane, that’s exactly how I felt the first time. Too funny!
Rob, beautiful loaf of bread! I think you can play around with the oven temps and baking times a bit. My husband prefers a lighter crust so I might switch to 425-450 or decrease the baking time slightly.
I’m trying mine with spelt flour this morning keeping as close to the recipe as possible (I had to add a little extra water)…will keep you posted!
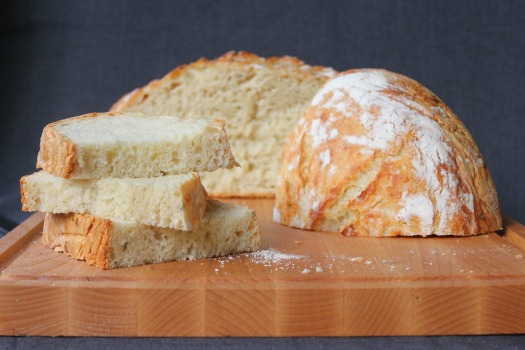
Just pulled my absolutely GORGEOUS spelt loaf out of the oven. It looks exactly like the one in the picture at the top of this blog! It stuck a little to my cotton tea towels (my bad, not enough flour as I didn’t think it would rise, think spread, so much), but it is a huge perfect, bring tears to your eyes crispy golden crust voluptuous bread. I followed the recipe above just substituting. I added a teeny bit extra water for my dough. I know you wheat-free folks are doing a little dance with me right now! Yay! Will it taste good? I will let you know in about an hour…
As good as it looks-it have lovely big holes in it too! A total success! We call this “dipping” bread in my house. This bread is good enough to dip in olive oil, garlic, and herbs. I’m having mine right now with unsalted butter.
I went out to Kitchen and Company to buy a cast iron dutch oven JUST for this ($45 for a 5 quart, by the way… very reasonable.)
Did the dough yesterday around 4:30 in the afternoon and let it ferment in my KitchenAid bowl, since it’s the biggest one I have. I degassed it last night because I was worried it might spill oven while I was sleeping.
I woke up this morning around 6:00 and formed it using cornmeal for the dusting (I’m very partial to the appearance and texture it gives the crust) and popped it into the oven at 8:00. An hour later, I was rewarded with this:
http://tinyurl.com/7zpfj2m
It was also the first time I’ve heard the “bread song”, or the crust crackling as it cools and contracts. It still has another hour or so on the cooling rack before I can cut into it — I’m really looking forward to seeing how the crumb turned out and what the flavor is like.
very nice
It turned out great! The crust is to die for…very rustic! perfect to go with a hearty winter soup…I’m heading out to my garden to get some leeks and potatoes……this one’s a keeper!
This recipe looks wonderful! I definitely want to try baking homemade more often. Bread I heard is a great place to start…and the smell I’m sure is to die for!
Does anyone know of a way to substitute gluten-free flour fairly easy to this recipe? Darn sensitivity :/ I’m sure the consistency, taste, etc. will differ significantly!
Here is a link to a gluten free recipe and video from Artisan bread in 5 Minutes a Day website.
http://www.artisanbreadinfive.com/2010/10/25/gluten-free-crusty-boule-the-video
I forgot to mention I used the recipe plus a cup or so of my sourdough starter I had already….
It turned out so beautiful I wanted to cry… So lovely, I may decide to varnish it and turn it into a wall decoration. Ever so simple!! Impress your family and friends! I simply can not wait to try different things with it
I just plopped my dough (well…note to myself, put more flour/cornmeal on towel next time) into my dutch oven, it’s kind of scary…you sure it’s to be in for 50 minutes at 475? I’m picturing it burnt to a crisp!! lol…..here’s hoping it works……
@Adrienne – I just baked mine (1st time) at 475 for the 50 minutes … I have a enamel cast iron pot and it came out nicely browned (I didn’t take the lid off and bake the additional 10 minutes though as once I removed the lid the bread was already nicely browned) … not sure about the texture as I haven’t cut it yet … its currently cooling.
Hey Melissa! Mine’s cooling too! Can’t wait to cut it open!!
I baked mine in a cast iron (virgin voyage for it!) my oven was dirty so it smoked a bit (time to clean it) but it popped up without sticking at all….waiting, waiting, waiting…..
Where can we post photos????
I’m willing to create a Facebook page for us breadaphiles 🙂
I didn’t reread the recipe when I woke this morning and did mine at 425 for 50 minutes, then I did another 10 minutes with the lid off.
The internal temperature was well over 200… the crust looks amazing, but we’ll see how the crumb turns out once it cools all of the way.
I’m so excited to try this. But where is a good place to find one of those towels? Would Fred Meyer have them??
The one in the picture was .79 at Ikea, although you should be able to track down linen towels in any kitchen department.
I was so inspired by your article yesterday that I have a batch sitting on my counter right now (i started it before bed last night) and today I will do the 2 hour raise and bake it … can’t wait to try it!
Why all-purpose flour and not bread flour?
The actual recipe does call for bread flour (higher protein = better gluten). I use Bob’s unbleached white which I think is pretty close; commercial brands can really vary, though. True bread flour is supposed to produce the best, most consistent results.
I cannot wait to try this! Your step by step tutorials are awesome, Emily! I still blame you for leading me into the world of canning with your peaches tutorial. And by blame, I mean….cannot thank you enough!
I am very skeptical. But I am dying to try this technique out and will do so at the earliest opportunity.
I have been doing the “Artisan bread in 5 min.” thing for over a year, and I bake almost every day and I and my family and friends love it.
One of the reasons for my skepticism is that the “artisan” recipe yields approx. 4 x 1 pound loaves. This recipe with almost the same amount of flour yields 1 X 2.5 pound loaf. I would think that this loaf would either be the size of a small Winnebego or very dense indeed.
Anyhow, lovely article. I can’t wait to try it for myself.
First of all, there is nothing better than freshly baked bread. It’s worth the time knowing that a)it’s tasty and b) there are only 4 ingredients, not a laundry list of weird stuff.
I have a question – do you have to prep/grease the dutch oven? I don’t have one but I might pick one up at QFC before tomorrow, they are only $39.99.
No, it’s good to go! The light dusting of flour on the dough + the hot pot will prevent the bread from sticking.
I make this bread (very similar recipe) really frequently. My recipe calls for me to raise it in a bowl on the counter for two hours, then cover and place in the fridge for at least two hours, and up to seven days. You can choose how much dough to pull off and let it rise at room temp in the dutch oven before baking. It cuts down on the time since I usually mix it the day before…
I have an enamel dutch oven, does that work or does it have to be all stainless?
That should be just fine, as long as it’s rated for a 475-degree oven. And don’t forget to check the knob to make sure it can handle the heat.
I’m wondering, your husband counts the cents the energy the stove uses, but what is your time worth? $10/hr? $20/hr? Not so cheap bread anymore…
Yes, time is money!
Consider this, though: This loaf would easily cost around $6 at somewhere like New Seasons. By making it myself, I am actually saving/making $5. Not bad for 5 minutes of actual hands-on labor.
I make this bread everyday. The containers that I use are 4-5qt ice cream containers for each batch. I never wash them. The little bits of dough adds a nice taste. Also, my dutch oven isn’t rated as high for heat, so I use my pizza stone. If I don’t wants lots of cornmeal on the bottom of my bread then I use my baking mat. I take my dough out cut out half the dough and shape it with flour. I also have a pizza peel (I’m sure you can use a cookie sheet or whatever as long as it doesn’t have a lip) and put a baking mat on top. I then put the loaf on top of the baking mat and when the oven is at the correct temp. slide the baking mat and dough onto the preheated baking stone. Also, I have a disposable tinfoil baking dish on the bottom rack that I put at the same time as the baking stone. When I put in the bread I also put in 1 cup of water into the baking dish. It helps to crackle the crust and to get a harder crust, but keeps the dough chewy inside. When it is done I take out the stone and the bread slides off the baking mat right onto the cooling rack. I also vary the shape by using a bread pan. Which makes great sandwich shape bread. I would suggest using a good bread knife to cut the bread. My boys eat this everyday.
You can also do whole wheat with seeds and such, gluten free, pizza, bagels, pita bread, whatever.
I would suggest checking the Artisan Bread in 5 Minutes book at the library. The authors have come out with two other types of books. A whole wheat one and a pizza and flatbread one.
Also, I found Red Star yeast works much better than Fleshman’s yeast and it is a great price at Costco. Just freeze it.
Yum!!
Okay, this is a real coincidence. Today, for the first time ever, I made Artisan Bread.
My family LOVED it!!! I am trying to figure out what is so much better about this bread.
Could you explain a little further as to why you think it’s better than Artisan Bread. It does seem a bit more complicated and definitely more time consuming. Thanks so much!
You could do a blind taste test with your family and see what they think! 🙂 Here are two reasons I’ve switched methods:
The flavor is better.
The texture is lighter & chewier. The crust has that crisp crackle to it, closer to what I think of as “artisan” style bread.
I used a stainless steel stockpot for a few years before I got an enameled cast iron dutch oven. It made a beautiful loaf of bread.
After a lot of experimentation, I have adapted the recipe to make it with some whole wheat and using sourdough starter instead of yeast. I uses 1.5 cups whole wheat and 2 cups white bread flour, 1.5 t salt, 1.75 cups water and 1/4 cup starter. Still only takes 5 minutes of actual hands-on time.
When using sourdough starter in your bread, how long did you let the bread rise? I made my loaf with starter but only let it rise for 90 minutes. So I am wondering if I should let it rise longer. Thanks
I’ve been doing the artisan bread recipe for a year or two (though I just call it no-knead bread), and I’ll try this one next week.
Think it will work ok with whole wheat flour but without the molasses?
We will definately be trying this…it looks soooooo yummy! Thank you for sharing:-)
Lori, you can try searching Amazon for a Dutch oven
I looked at amazon. I might get it from there seems to be a good deal. I know that World Market Explorer has some too. Just looking for a great deal. I am moving my family to most cast iron right now. Gets expensive for the whole move. Doing piece by piece.
This looks amazing and we’re totally into making our own bread to save money these days. If you make it with whole wheat flour do you have to add in Gluten?
Thanks!
No, we just swap flours and add a little sweetener. The texture will be slightly different but still good!
Being Frugal…. where do you find the best deal on your dutch ovens ?
I found my Le Creuset for $5 at a garage sale. Definitely a steal! I also have one from Target and a Lodge from Fred Meyer. Amazon is a good option. Maybe a Kohl’s deal?
Emily, you TOTALLY scord with a $5 Le Crueset. truly blessed. =]
If you find a Le Creuset it is well worth the investment. They are made in France and not China (where the regulations on what goes into the enamel are not as strictly monitored). They also have a lifetime warranty. Which means ( and I have done so myself!) if your enamel chips you can return the pot for free and they will replace the pot for free!
I found mine at the Homegoods Store at 50% off. I also find that they are thinner and thusly lighter than Martha Stewart’s and Cuisinart’s which makes cleaning a bit easier.
We found dutch ovens at WinCo for $25. Not the pretty enamel that can wear and chip, but just basic cast iron. Even checking garage sales last summer, I couldn’t find one for less than $35; then my mom spotted these at WinCo.
I’m SO trying this recipe this weekend. I have a Dutch Oven but rarely use it – woohoo.
I have a stoneware roasting pan with stone lid. Would that work as well as a dutch oven?
Yes, I use my clay cooker all the time.
Hmm, don’t have a dutch oven (am I hearing gasps LOL) so will have to find something else that might work but sounds so YUMMY
Your baking vessel just needs to be airtight and heat proof to 475 degrees. I have heard of people using pyrex bowls with a pyrex pie plate on top. I use an old le creuset dutch oven I found at a yard sale. After several years of use it is only good for bread – the enamel is wearing on the inside and is discolored on the outside.
Jill I too don’t have a dutch oven-so you aren’t the only one. I do have a glass baking dish with a lid-does that sound like it would work Shannon? It is smaller so I am thinking 1/2 a recipe would work-we are a small family so would be enough for us anyway.
Thanks Emily for the inspiration-don’t think I have ever made bread, but think I could do this!
Lahey has said in other segments (I got this one from a Martha Stewart show) that any “6-8 qt. heavy lidded pot, such as cast iron or Pyrex” works so you should be fine!
Thanks!
Oooh…so I bet my Pampered Chef Deep Covered Baker stone ware would work great! It’ll just make an oval loaf.
How many loaves does this make? Have a dutch oven, but was curious if they could be baked in a loaf pan as well?
It makes one large loaf. Cut the ingredients in half for a smaller, narrower loaf.
I’m not sure how the results would compare when baked in loaf pans? The purpose of the lidded pot is to lock in the steam. It is kind of like an “oven within an oven.”
Do you have a good bread slicer? Every time I try to slice homemade bread it’s so thick and uneven. I would love to slice it thin to use for sandwiches.
I would like a great answer to this too! Love thick slices with butter, but would love to know a great way to slice it thin.
I was given an electric (battery operated) knife for my wedding, i LOVE using it for all the breads I make, dessert and everyday bread. Cuts through like better and helps me get consistent slices! I have seen them at Wal-Mart and Bi-Mart, it’s not a fancy brand but has lasted for me!!! That is all i use it for, but it is worth owning one.
I’de love to third this curiosity as I refrained from asking this on the last bread post by Kate. I had an experience many years ago trying to cut anything with an e-knife, perhaps you need a certain brand to get good results?
I once heard Andy Rooney joking about having several bread knives in his kitchen that he never used. So I would be wondering what’s a good one. Especially since sometimes I buy whole loaf of bread on clearance in a local store only to discover later that I had forgotten to have it sliced in the store. 😉
Sounds crazy and gimmicky, but I actually bought one of those DeliPro knives. Yes, the one from the infomercial : ) I use mine all of the time and get wonderful (and consistent!) results. It has an adjustable slicing guide on it so you can slice your bread (or whatever) as thick or thin as you would like. The nice thing about that is, every slice you make will be the same size!! I have an electric knife, too, that I love for meats (think Thanksgiving turkey), but the slices are only uniform if your hand is steady and you have a good eye…
I think I got mine at Fred Meyer in their “as-seen-on-T.V.” end cap that they usually have somewhere in the store, but they have it on Amazon too, for $6.51 (as of today) and eligible for free super saver shipping.
If you do try it out, let me know what you think! : )
I just ordered the DeliPro knife (I was wondering the same thing about evenly slicing too). Should be here on Tuesday! Thanks for the idea. (And it was only $5.00!)
Looks gorgeous! Has anyone tried this with Spelt flour?
Ack! I want to make this right now. Or this weekend when I’m not so tired thinking of all the steps. Can’t wait!
Ha! I always hesitate giving so much detail because I’m afraid it’ll make the steps look complex when in fact they are really not. I promise — very little hands-on time (maybe 5 minutes?). A great weekend project. Let us know how it turns out!
I just need to get myself a Dutch oven, and I’m all over this! Sounds great!
i LOVE my le crueset
Me too!! Any suggestions on where to get a good deal?
What else do you use a dutch oven for?
Le Creuset is available for less at the Homegoods Store!
You can scrounge thrift stores for abandoned but otherwise fine Dutch ovens. I use a metal Le Crueset for small, half-recipe loaves and a bigger, ceramic Dutch oven for the full-sized recipe.
I love this bread! I do one step differently to make it a little easier to get the bread into the pot. After the dough is done with the long rise, and I shape the bread into a ball, and instead of putting it onto a towel, I take a skillet that is the same size around as my dutch oven, and line it with a long piece of parchment paper and drop the dough ball on to that for the final rise. I rub the dough ball w/ olive oil, and then cover w/ plastic wrap. After the final rise, I grab the sides of the parchment and lift the dough out of the skillet and drop it into the hot pot along with the parchment paper, slide the lid back on the dutch oven and bake as normal.
Thanks, Jazmine. I am going to give that a shot next time. It would definitely help with the flour-all-over-the-floor problem…
Does the parchment paper bake into the bottom of the bread?
I use parchment paper, too. It is significantly less messy than a towel! It does not bake into the bread… sometimes if there are folds in the parchment it creates more texture in the sides of the bread, but to me thats just more crispy pieces to pull off and snack on. It does add a few cents onto the cost.
I sometimes use the Cooks Illustrated version of this recipe. They felt like the bread needed more flavor. They add a little beer and white vinegar to the initial recipe, everything else is pretty much the same. I have made hundreds of loaves of this bread over the last few years! It changed my life!
Just so I understand correctly, the towel remains under the dough in the dutch oven when you flip it?
Oh, sorry that wasn’t clear. You’ll dump the dough in the pot and toss the towel in the washing machine.