Growing up, my family took growing and eating produce seriously. It ran in the family. Acres of melons. Rows of beans. Boxes of nectarines. We’d grow our own food or buy it from a local farmer, often a family friend.
While normal people would just eat a slice of melon or buy a fat cucumber and move on with their lives, my siblings and I grew up in the garden and kitchen, tasting and thinking about what we were eating. It never occurred to me that it was odd to have an entire vocabulary devoted to fruits and vegetables.
Cucumbers were either bitter or sweet, seedy or crisp. A green watermelon was too young to leave its mother or not fit to eat. An overripe cantaloupe? Definitely punky or musty. Sub-par tomatoes would be labeled bum, mealy, dry, bland, or a disappointment. Only the very best produce made the cut, earning an overall stamp of approval.
Corn was a big one. You didn’t want overripe ears, where the kernels were gummy and tough. So we’d pick and shuck and eat corn all through August, tasting and critiquing like mini corn connoisseurs, looking for that perfect ear of sweet, crisp, juicy corn.
Picking & Pricing Corn
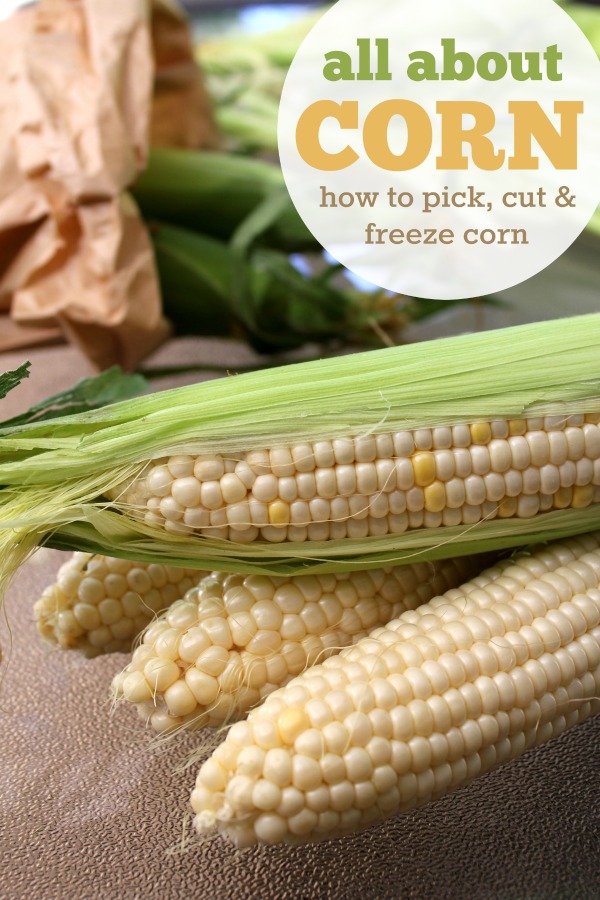
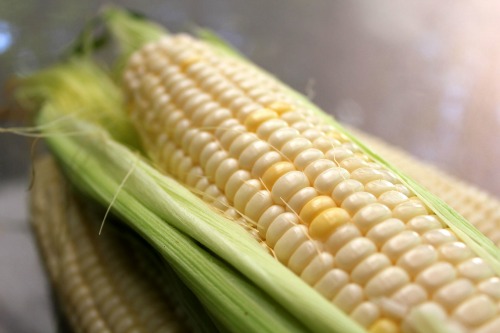
Pull back the husk slightly to make sure the kernels are full and fresh. Avoid overripe or shriveled ears of corn. Also, corn earworms typically hang out at the top so it’s an easy way to check for pest damage. They aren’t harmful; just cut out the bad section.
What should you pay for sweet summer corn? Anywhere between 20¢ and 50¢ per ear of corn is typical during the late summer and early fall.
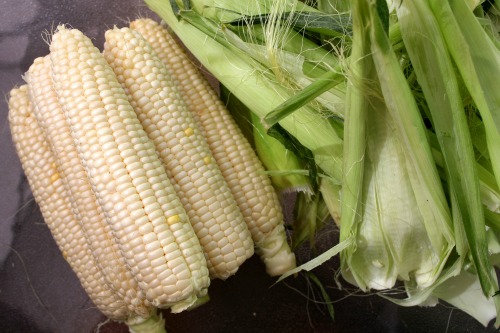
Most methods for cooking & freezing corn call for blanching full ears in hot water, shocking them in ice water, then cooling them before cutting and bagging for the freezer. That’s how I grew up doing it. It requires a large stockpot full of boiling water and lots of time to wait for the corn to cool.
I decided I wanted an easier method. I considered the merits of blanching and steaming, before settling on this method for Frozen Summer Corn in the August 2012 issue of Sunset magazine. It works beautifully. I love that you do not need to squeeze full ears of corn into a big stockpot or boil a huge amount of water. Another benefit is that you are cutting the corn before it is cooked, making it much faster (you don’t have to wait for it to cool) and easier to handle.
Cleaning the Corn
First of all, shuck the corn by removing the husks and silk. I love this part. As if using the word “shuck” in a sentence wasn’t enough, there is something deeply satisfying about pulling back those green jackets to reveal the beautiful rows of neat yellow corn kernels underneath.
Maybe it’s a personal thing, reminding me of summer evenings as a kid, where we would pick and husk dozens of ears at a time. Now my kids love this job. I set them up on the deck with a bucket for the husks and a plate for the ears. A wet paper towel can help remove corn silk.
Cutting the Corn
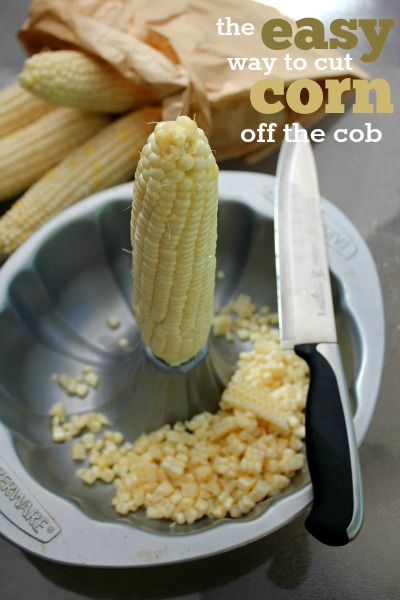
While there are numerous tools available (Amazon), from zippers to cutters to strippers to de-silkers, I am happy just using a sharp knife.
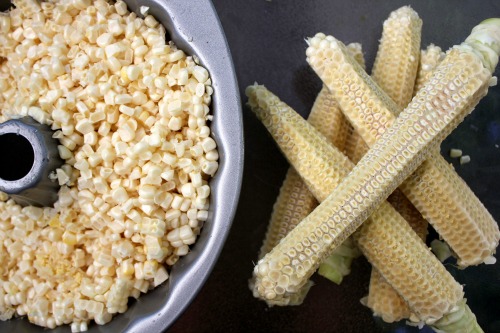
But! This method rocked my corn cutting world. By placing each ear of corn in the middle of a Bundt pan, the kernels are easy to remove. Then simply hold the top with one set of fingers while you cut strips of kernels off with the knife. Having a longer stalk on the end of the ear actually allows it to stand all by itself! Rotate each ear as you cut around it. The kernels will collect neatly in the pan.
I prefer whole kernel corn. If you like cream style corn, simply run the back of the knife firmly along the cobs to scrape the juice and inside of each kernel.
Cooking the Corn
Bring a large pot of water to boil over medium heat. Drop the kernels in the water and cook for one minute.
If you are just cooking corn to eat immediately, you can:
- microwave it in the husk
- bake it in the oven
- throw it on the grill
- boil it in a pot of water on the stove top
Draining & Freezing the Corn
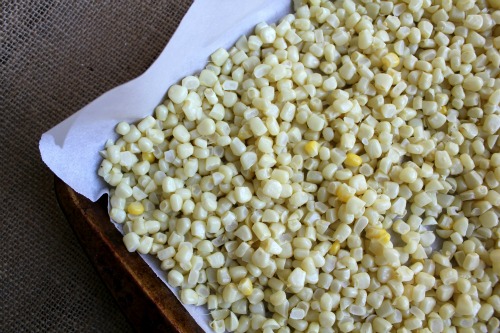
Pour the corn into a colander, draining well. Transfer to a rimmed baking sheet lined with parchment paper, spreading out evenly to form a single layer. This will ensure you end up with individually frozen kernels instead of blocks of frozen corn.
Freeze the corn until firm, at least 2 hours.
Storing the Corn
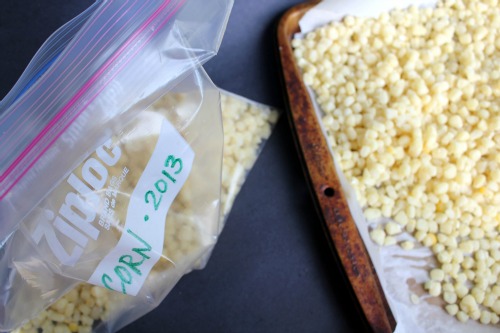
Remove the sheet from the freezer. Gather the two long sides of parchment paper together to create a funnel. Tip it up and slide the frozen corn into food storage containers or bags. Return to the freezer.
Leave a comment! Share your tips and tricks (or recipe links!) with us.
******************************************************
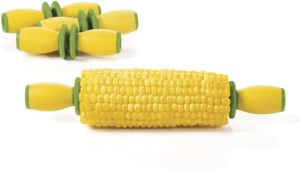
I love these simple OXO Good Grips Corn Holders. Even if you prefer the hands-on approach to eating corn, these holders are great for kids! Amazon carries this set of four, along with many other options.
Looking for more ideas for preserving produce?
Find more frugal homemaking posts here and a list of amazing recipes here.
Follow Frugal Living NW on Pinterest!
Fantastic range of boards from best recipes and tips for frugal living to gardening and budgeting help.
This post may contain affiliate links. See the disclosure policy for more information.


So does it taste better than the organic costco corn?
Do u have to blanch the corn before freezing? I froze 106 ears of corn. I cut the kernels and then put them into freezer bags. But I didn’t blanch them.
Blanching improves the flavor & texture of vegetables when frozen. Apparently it stops the enzymes that break down the sugars and destroy the color, flavor, and texture in corn. Anyway, your frozen corn will still be perfectly edible. Let us know if you notice a difference!
Thanks!! I will let u know!! I usually make corn bread or corn tamales. I’ve never made them with frozen corn. So hopefully they won’t be too much of a difference in taste!!
Thanks again.
The Pumpkin Patch on Sauvie Island has several different varieties of corn now at 5/$1.00 and not organic but not GMO. They are a sustainable farm and do sell lots of local Sauvie Island produce also.
What is the approx. yield for corn? If I wanted 2 gallon bags frozen, how many ears would I need?
12 ears will yield about 10-11 cups. That comfortably fills 1 gallon-sized freezer bag. So I’d say 2-3 dozen ears of corn (depending on how full you want your bags) would be a good number for you!
Do you think you could save your corn water/broth? I’ve been reading recipes that use corn broth for soups and such. I’m always up for a two for one!
Yes, corn water works great for chowders.
I also read of people who were cooking/freezing large batches of corn that re-used the water. They cooked, drained the corn into a colander and the hot water into another pot, then reused the hot water for the next batch. That would probably give you an even stronger corn broth for other uses!
Near us we have a farm that sells a dozen ears for $4.50 and it is picked daily. Best corn I have ever had. Now I know I can have it year round.
Chucks produce in Vancouver has corn 5 for $1.00 this week and its super fresh and juicy!!! I also have the corn cob cutter from Pampered chef, easier than a knife!!
I bought some and it IS really good! They even supply huge garbage cans so you can shuck it right there if you want to.
We should have corn ready in a couple of weeks. LOTS of it! We grew a large garden this year.
You are making my life easier once again. This method sounds a lot easier than what I’ve done in the past!
I am gearing up to freeze a big batch of corn for the year. Just one question…has anyone seen any organic/non-GMO corn for sale?
You could try Organics To You. I know the sell certain items by the case. Yay for GMO Free!!!
So, when you’ve done all the work and it’s frozen what do you do when you want to eat it? You don’t have to cook it- just heat it up in the microwave with some water??
Jill
Yes, for a simple side dish, I’ll just pour the desired amount in a bowl and microwave it for a few minutes, stirring occasionally. Add some butter and salt to bump up the flavor and you’re set! The most common way I use frozen corn is adding it to soups in the winter. Just sprinkle it in the pot during the last few minutes of simmering it on the stove. This corn is also delicious added to any Mexican dish.