Water Bath Canning Guide
(This is an updated repost from a previous year, it’s just a super helpful guide!)
There are 160 pounds of peaches ripening on my dining room table, waiting to be packed into jars. Another 160 pounds of apples is headed my way tomorrow, with boxes of tomatoes following closely behind. My counter tops will be covered with rings and pots and my floor will be sticky for the next four weeks. Cold cereal for lunch. Scrambled eggs for dinner. I don’t see much of my husband. Or kids. Or bed. (Read more on that here.)
Dealing with this much produce in such a short amount of time is nuts. Every August I wonder what in the world I was thinking. But every January as I pop open a jar of tomatoes or watch my kids slurp up peaches, I feel this surge of satisfaction that comes with preserving food at home. I made that! And rest assured, you don’t have to deal with insane amounts to preserve food. 10 pounds here, 20 pounds there. That’s great! That’s what’s referred to as normal. Ease into it. Then you’ll get hooked, and next year you’ll be waiting for your 160 pounds to ripen, too.
Now, I am no expert in the world of canning. I’m just a determined amateur. I’m motivated by the quality, flavor, and savings of canning my own fruits and vegetables. Nothing on the grocery store shelves compares with home canned goods. If I can figure this out, you can, too. I promise. Pun intended.
Here are the basic steps of water bath canning. Some of these steps are just my own natural preference and rhythm, while others are important to food safety. The key is following a current, tested recipe, but hopefully this will give you some added confidence with some of the basic steps.
Checking & Cleaning the Jars
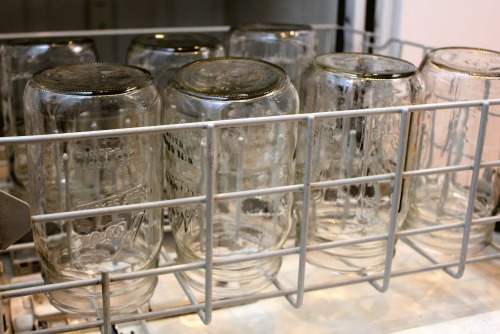
Check the rims of the jars for nicks or cracks (I re-use slightly damaged jars for food storage or home decor.) before washing them by hand or in the dishwasher.
Heating the Jars
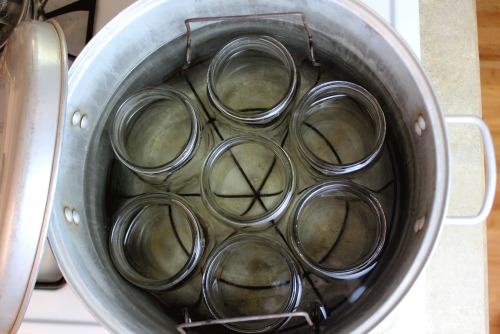
Submerge the clean jars in a canner (or any large pot) with just enough water to cover the rims. Bring the water to a simmer for 10 minutes. Heating jars before filling prevents them from breaking. It also speeds up the whole canning process, as you do not have to wait for a full canner of water and cold jars to heat to up to a rolling boil, which takes forever.
You may also use your dishwasher to heat jars. Simply wash and dry them on a normal cycle, keeping them in the closed, hot dishwasher. Then remove the jars one at a time as you are ready to fill them. I prefer this method, but I sometimes find it harder to time everything correctly.
Preparing the Lids & Rings/Bands
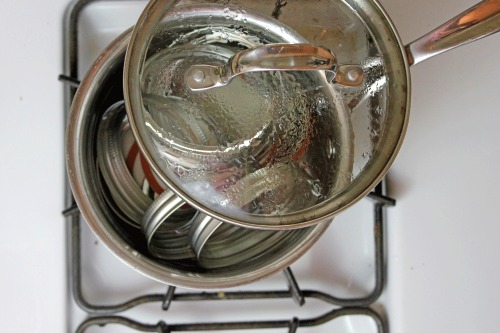
Choose the right size lids for the jars you are filling. I try to fill my canner with 7 jars of the same size at a time (all regular or all wide-mouth) to keep things simple. Place the correct number of lids in a small saucepan and cover with water. Bring to a simmer (180-degrees) for 10 minutes to soften the seal around the edge of the lids. Keep the lids in the hot water until you are ready to use them.
While not necessary, I usually toss the rings in as well just to have everything clean and in the same spot.
Filling the Jars
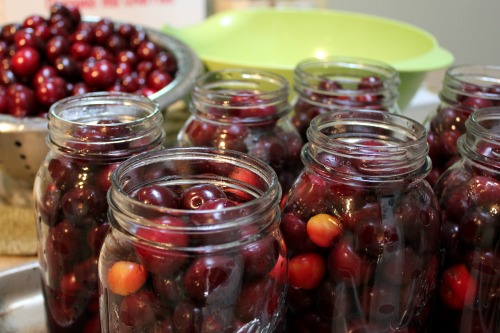
Obviously, this step will look different whether you are canning pickles or jam, salsa or sweet cherries. Follow a tested recipe, which will walk you through the steps of mixing and cooking your ingredients.
There are two different methods for packing jars: hot and raw pack. Hot pack simply means you precook or heat the food before filling the jars. This allows less processing time, as the food is already hot when it is placed in the canner. It also gives you a tighter pack. For example, because hot packed pears are warm and pliable, I can fit more into a jar than cold, firm raw packed peaches.
Raw packed foods, as the name implies, are placed in the jar while they are still raw. Hot syrup, juice, or water may be added. Sometimes the food shrinks as it is being processed in the canner, causing the fruit to float to the top of the jar.
When you read the term “headspace” in canning recipes, that simply refers to the space between the top of the food and the top of the jar (or inside of the lid). This could range anywhere from 1/4″ to 1″ and will be noted in the recipe. This is key to your jars sealing correctly. After a few rounds, you will have these measurements memorized.
Removing Air Bubbles
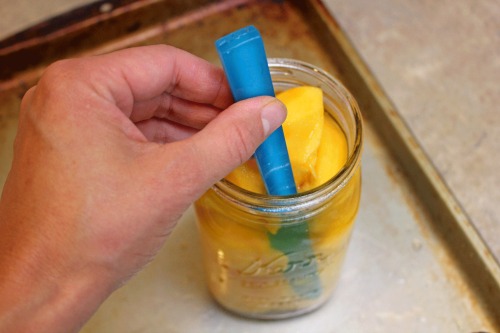
Once you have packed the food into the jar, you need to remove any air bubbles. Using a nonmetallic utensil or Bubble Remover (Amazon), slide it in between the food and the side of the jar. Gently press into the food to release the bubbles to the top. Repeat this process, working your way around the jar.
Cleaning Jar Rims and Adjusting Lids & Rings
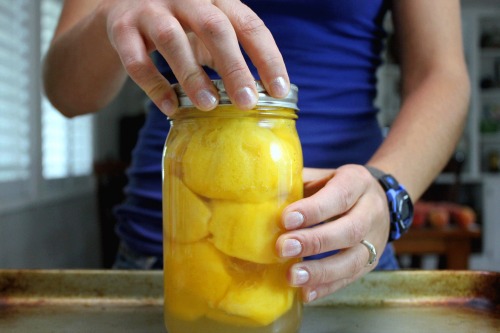
Once the jar is filled, wipe the rim with a wet towel to clean off any bits of food. Place a lid on the jar rim and place a ring over the lid. Screw on until firm and secure, or “fingertip tight.”
Processing the Jars
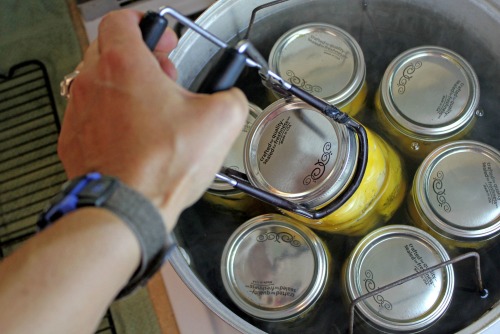
Place the filled jars into the canning rack resting on the edge of the canner using a Jar Lifter (Amazon). The canner should be half-full with water at a simmer. Make sure both the water and jars are hot to avoid jars breaking. Carefully lower the rack into the canner. The water should cover the jars by 1-2 inches. Add more boiling water, if needed.
Place the lid on the canner and bring the water to a rolling boil. You will start timing or processing, according to your recipe, once the water is boiling. Keep the water at a rolling boil for the entire processing time. Keep an eye on your pot and adjust the heat as needed.
When the timer rings, turn off the heat, remove the lid, and let the canner cool for five minutes before removing the hot jars with the jar lifter.
Cooling the Jars
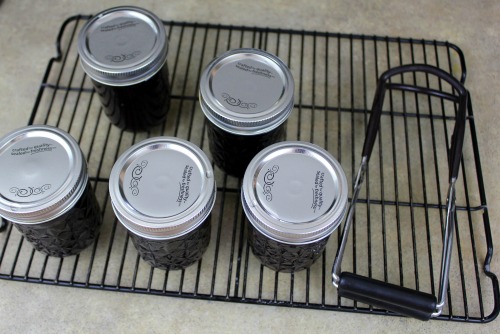
Using the jar lifter, remove the hot jars from the canner to a cooling rack, towel, or cutting board. Allow space between the jars so they will cool evenly. As the jars seal, you may hear a satisfying “pop!” Some jars seal quietly, though, which is totally fine.
Leave the jars at room temperature for 12-24 hours. After they have cooled, test the seals by running your finger lightly over the lid. It should be sucked in, preventing the center from flexing. Also, you should not be able to lift the lid off with your fingertips. If a jar doesn’t seal properly, you can refrigerate, freeze, or reprocess the contents of the jar.
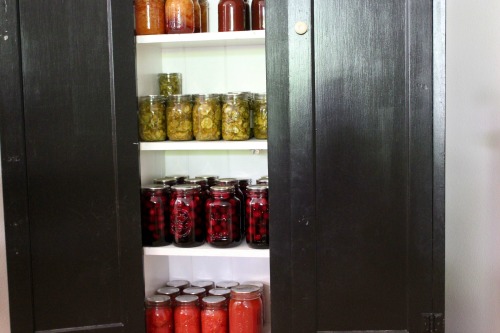
Storing the Jars
Remove the rings from the jars (rings may be reused) and rinse them to remove any sticky residue. Home canned food should be stored in a cool, dark place for up to one year. After this time, the food should still be good but you will probably notice a decrease in the quality or texture.
There you have it! Once you get into your own rhythm, you’ll find this is one skill that is not as intimidating as it seems at first. You can do this!
Wondering what in the world you are supposed to actually be canning? Here are some great ideas!
- Canning Applesauce
- Canning Peach Vanilla Bean Jam
- Canning Peaches
- Canning Sweet Cherries
- Canning Tomatoes
- How to Can Pears
Are you new to canning? Be sure to go through our Home Canning Guide posts for equipment suggestions and recipes!
*************************************************
Whether you are interested in learning to preserve food for the first time or have been doing it for years, the Ball Blue Book Guide to Preserving (Amazon) should be in your cookbook collection. It is the must-have guide for canners of every skill level, as it walks you through the tried-and-true steps and recipes to ensure you end up with a safe, delicious end product every time.
Looking for more canning resources?
Follow Frugal Living NW on Pinterest!
Fantastic range of boards from best recipes and tips for frugal living to gardening and budgeting help.
This post may contain affiliate links. See the disclosure policy for more information.


I was wondering if anybody has experience canning on a ceramic top stove. I have made jam in my large dutch oven with a coil of twisted foil to lift the jars off the bottom of the pot, but still I could only process like three or four small jars at a time.. Normal canners don’t work on the ceramic surface…
I use the wok section on my bequest
Sorry barbeque
Where do you get so much produce at once? Isn’t it a little early for apples? I am curious because I want to stock up myself and live in the vancouver area. Thanks!
I used to u-pick nearly everything. We’re just in one of those crazy times of life where that isn’t a good fit right now.
So… I go through local farmers or farm stands where I can order large amounts, often at a discount. Many deliver to a central location. You place your order and pick up on a set day/time. I ordered my peaches through Zaycon this year and apples from a local grower. I have ordered tomatoes and peaches from Growers Outlet in Portland for the last 4 years and have always received great rates and service. A bit far from Vancouver but maybe an option?
There are early apple varieties ready now, but you’re right, more varieties will be ripening this fall.
I’d love to hear more about the merits if water bath canning vs pressure canning. I don’t have ANY canning supplies but would like to get into it. My sister swears by her pressure canner. My friend uses water bath and is perfectly happy. Help!
A pressure canner is for low-acid foods, such as vegetables (carrots, green beans, beets, etc.), meat, poultry, and seafood. These foods need to be heated to 240-degrees and held there for whatever time called for in the recipe. The pressurized steam brings the temperature above boiling and destroys the bacteria.
A water bath canner is for high-acid food, such as tomatoes, fruit, jams, pickles, etc. A maintained temperature of 212 is hot enough to safely process these foods.
If you are new to canning, I would recommend starting with water bath, but it depends on what types of foods you are interested in preserving. I personally don’t do any pressure canning, as my family isn’t interested in eating those foods canned. Hope that helps!
Yes, that helps. Thank you!
Oh bother, I just posted a comment on a 2 year old post…I thought I clicked on the new one from the email…ha ha, here is what a posted:
I would love to know what your method for canning tomatoes is….honestly, I made 5 quarts last night….took the entire night and one of them didn’t even pop. I have decided that I don’t really like pressure canning. Even if I have to water bath can for 80 min, then I’m not babysitting a pressure canner for multiple steps and about an hours worth of time. I know that they have raised the canning times over the years, my mom only does hers at 5 pounds for 10 minutes, but the new regulations say 11 pounds for 25 minutes….and that doesn’t even count the 10 minutes that it has to steam, the time that it takes to get up to pressure and the time that it takes to let the pressure out after the 25 min is over.
So, do you water bath can your tomatoes or pressure can them???
I water bath can tomatoes. I haven’t made the investment into a pressure canner because my family isn’t into eating the list of low-acid foods canned.
But you’re right, the new regulations on canning tomatoes takes forever! Because of this, I have switched to canning fewer batches of whole tomatoes. I plan to do 14-21 quarts this year. Then I am going to freeze and can marinara sauce and can salsa. Those were two of the main things I was using canned tomatoes for anyway. Now they will be done, and I can save my whole tomatoes for soup, chili, etc.
Canning tomatoes: http://www.frugallivingnw.com/frugal-homemaking/canning-tomatoes-step-by-step-guide/
Roasted Marinara Sauce for the freezer: http://www.frugallivingnw.com/frugal-homemaking/how-to-make-roasted-marinara-sauce/
Last year was my first time canning. We made many kinds of jam, and pickled garlic!!!! Pickled garlic is not what it seems. I thought well, it will be good for cooking with.Not!! Pickled garlic is amazing. We eat it right out of the jar and don’t share with anyone. Very easy to can.
Now the only problem is not raising enough garlic.
This year we’re doing dilly beans, their supposed to be just as good
That’s so great! Pickled garlic sounds delicious. I could totally see eating it right out of the jar. And then cancelling all social engagements for the day. Thanks for sharing!