DIY Drip Irrigation
With beautiful weather in the forecast (and lots of time at home these days), my husband and I are planning to get our hands dirty and our garden planted.
Several years ago, some green thumb friends of ours installed a drip irrigation system in their garden. They raved about how easy it was to set up and how effortless it was to use.
As with most new things, I was skeptical. So, after thinking about it for, oh, two years, we finally took the plunge and installed our own backyard drip irrigation system.
And guess what? Our friends were right. It was easy to set up and effortless to use.
If you’re looking for a project to work on over the next few weeks (and can make it to the hardware store or order online), this would be such a great addition to your garden and yard!
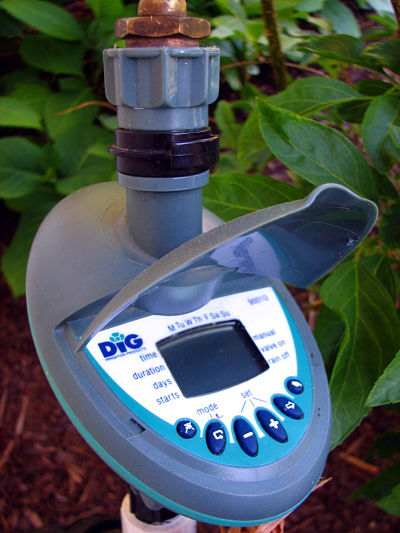
The entire system is hooked into our hose, set up to a timer that automatically pops on once during the early morning and once during the evening, and drips the pre-set amount of water onto the base of the individual plants. In the summer, it automatically waters our two large raised beds, several rows of vegetables, and one flower bed.
Gone are the days of lugging around watering cans and dragging hoses. Now watering my entire garden happens without any effort on my part (for those hot July days, we add an extra watering cycle with the push of a button).
These systems can be custom made to handle small container gardens, large gardens, or even hanging baskets and flower pots.
Here are a few of the benefits of installing your own drip system:
- It drips just the right amount of water at the base of each plant, cutting down on evaporation. I’ve read that drip systems are 90% efficient. You won’t necessarily see a huge difference in your water bill, but it is nice to know that you aren’t wasting water either.
- It helps prevent plant diseases that can result from getting the leaves, fruit, and/or flowers wet.
- It eliminates the need to pay someone to water your plants while you’re out of town.
- It keeps your plants alive even if you forget about watering them.
- It allows the rows between the plants to remain dry, increasing access and decreasing weed growth.
- It saves time previously spent watering by hand or with sprinklers.
Interested in installing your own drip system? Here’s how you do it!
Sketch out your garden/flower beds/pots.
It’s important to have a good idea of what plants you have, the length of your rows, etc. Some plants (like tomatoes or cucumbers) will use a button dripper right at the base. Other plants (like beans or corn) will use drip line along the length of the rows.
Take measurements.
This doesn’t have to be exact. Even my math skills were up for this one. I just grabbed a tape measure and got a general idea of the length of the rows, the distance between plants, the size of the entire garden, etc. This will help you know how much of the main line and dripper lines you will need to purchase.
Head to your local home improvement store.
Bring your sketch and measurements and head to the landscaping/sprinkler section. There you’ll find bin after bin with everything your little drip-line heart desires. My husband and I had never done this before, but it’s definitely possible for rookies to figure out and actually kind of fun. It felt like we were putting together a puzzle, and it totally tapped into my childhood Lego-building days. We estimate we spent between $50-$75 on our entire drip system. Depending on your needs and budget, you can go as simple or as fancy as you want.
Plant your garden.
You’ll want to know exactly where your plants will be located so you can run your line and drippers directly to the source. If you change your garden layout next year, no problem. You can cap off old lines and punch new ones.
Get to work!
We assembled our drip system in one afternoon. Again, I thought it was really enjoyable and definitely within my limited skills and our nonexistent experience. As they say in those dieting-hypnosis TV commercials, “If I can do this, anyone can.” (It also helps to have a very smart, handy husband.)
Still not convinced?
If you’re feeling like you need a little more assistance, check out some websites or talk to the guys at the home improvement store.
My husband and I are convinced that the small investment of money and time has totally paid for itself in the savings of labor and time. You can do this!
************************************************
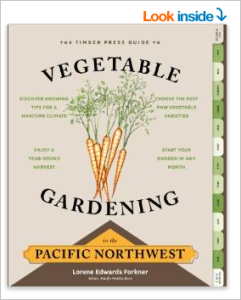
If you are looking for more information on gardening in the Northwest, check out The Timber Press Guide to Vegetable Gardening in the Pacific Northwest (Amazon). I own this book, and it is a great resource. Gardening tasks and tips are divided by month, so it’s easy to find information and track with the growing seasons. This would be a great book for a beginning gardener or resource for a seasoned one. If you live in a different part of the US, check out the other regional Timber Press Guides.
You might also like:
Find more gardening posts here.
* drip system illustration from here.
Follow Frugal Living NW on Pinterest!
Fantastic range of boards from best recipes and tips for frugal living to gardening and budgeting help.
This post may contain affiliate links. See the disclosure policy for more information.
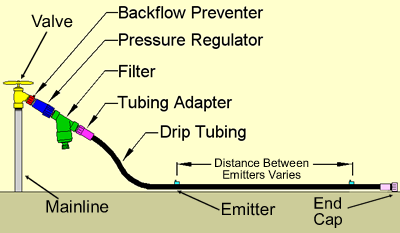
Another great irrigation system resource is Orbit Irrigation’s Sprinkler System Designer. It helps you to plan a system for any yard, complete with a list of parts you will need. Check it out at http://www.orbitonline.com/sprinkler-system-designer/