Water Bath Canning Equipment
Over the past six years, I have fallen hard for preserving produce. Water bath canning holds a special place in my heart. When I first started peeling tomatoes and pouring jam into jars, it was incredibly intimidating. I would follow along in the shadow of an experienced canner, making sure never to learn too much, because I was terrified of being left to my own devices. I was like a kid at summer camp, listening to scary stories around the campfire. Botulism! Exploding jars!! Lids that don’t seal!!! These things kept me awake at night.
However, with practice came confidence. It wasn’t long before I was ready to stand on my own two feet, armed with reliable recipes and good equipment. I wanted to try salsa and pickles and pears! I wanted to process jars while my kids were napping. Then into the night. And get up early the next morning to finish that last box of peaches. I was hooked.
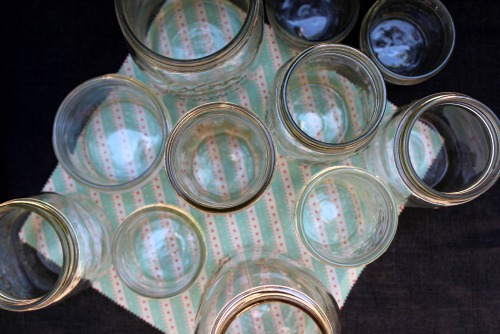
One of my big goals here at FLNW is to bring canning to the people! I want to walk you through the correct steps so you don’t feel intimidated about buying a canner or making jam or handling hot jars. Once you learn the techniques, you will gain the confidence needed to safely preserve (and serve) your own food.
To all the newbies out there, canning is not as scary as it seems. You can do this. I would highly recommend taking advantage of local resources, like an extension office or experienced canner, to help you get started. FLNW is one great community, full of knowledgeable home economists. To all the pros out there, I am excited by the things you have to teach the rest of us.
Canning season is here. Let’s get started!
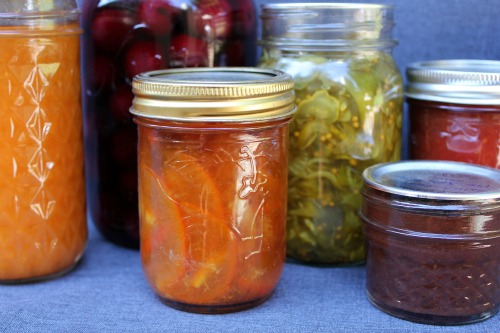
We have several Canning Guides, but this post will start at the beginning: the equipment needed to safely can your own food. While it may seem like canning is some crazy hobby that requires tons of specialized equipment, the truth is that you can get started for under $50. Many of the needed items are already in your kitchen drawers and most of the equipment can be reused each year.
I titled this post “collecting” because some items can be found at secondhand stores, garage sales, Craigslist, or your grandma’s basement. Obviously, you want to consider the source and use common sense, but if handled correctly, canning gear has a long and useful life.
Canning Jars
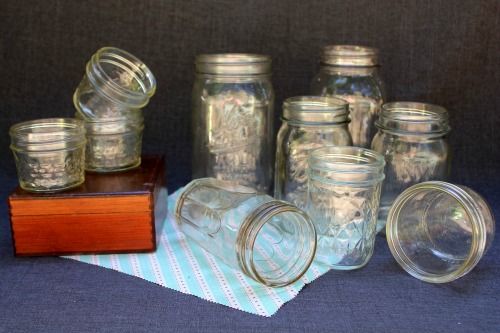
Jars can be reused and come in two sizes: regular and wide mouth. Wide mouth jars are a bit more expensive, but they are easier to fill, empty, and clean so they are my personal preference. I usually save my regular-mouth jars for foods that aren’t as fragile, like applesauce or whole tomatoes.
If you plan to can, you’ll need an assortment of jars (half pint, pint, quart, half gallon). Smaller jars are great for jams and sauces; larger jars are better suited for whole fruits and vegetables.
Take advantage of lower summertime prices combined with coupons to build up a collection that will hold the amount you can each year. Coupons are normally available in newspaper inserts, but they can also be found at farm stands. I picked up a stack of Ball & Kerr canning coupons at my local farmer’s market last week. Winco and Bi-Mart typically have the lowest prices on canning supplies. A case of jars will cost $7-10 (depending on size) before coupons and includes lids and rings.
Jars are often sold at secondhand stores or garage sales. Check them thoroughly before buying. If a jar is cracked, it will burst in hot water. If a jar just has a chip on the rim, it won’t seal correctly. You can just re-purpose these ones (I use mine for bulk food storage).
Lids and Rings/Bands
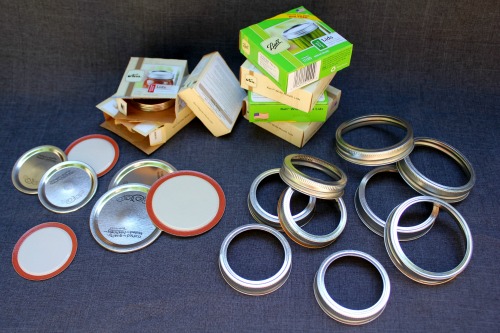
Canning lids also come in two sizes, regular and wide mouth, to match the jars. Lids can only be used one time, but rings/bands can be reused many times. Tattler makes reusable canning lids (Amazon) for less than $1/each which seems like it would pay for itself pretty quickly if you can every year.
Again, keep your eyes open in the summertime for great coupons or clearance on canning supplies. For brands, I buy Ball or Kerr interchangeably, depending on what’s cheaper. I try to pay around $2/box, before coupons, for lids.
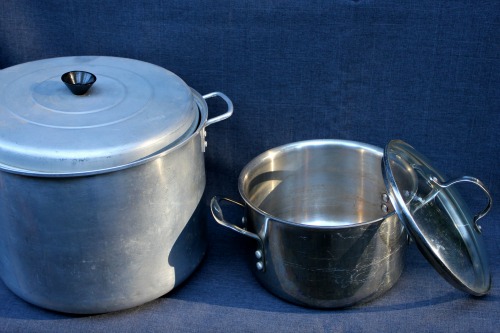
Water Bath Canner with Rack
It isn’t necessary to have a devoted canner for water bath canning. As long as you have a large pot that will cover your tallest jar with one inch of water and still have room for water to boil, you are good to go. A rack is needed to separate the jars from the heat source.
When working with tiny half-pints, I will often just use a pot that is wide and deep enough for the jars. Old canning rings or a silicone trivet (Amazon) in the bottom of the pot work great as a rack. If you are just getting started, doing this method with jam would be a great way to ease into simple water bath canning.
I find it easiest to use a canner for pints and quarts. A water-bath canner (Amazon) typically holds 8-9 pints or 7 quarts at a time and can be purchased new for less than $20. I have seen them at garage sales and thrift stores for $5-10. Whether you buy new or used, a good canner is a great investment.
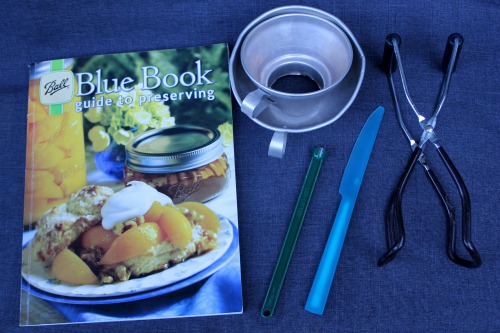
Canning Tools
I didn’t include standard kitchen items like a sharp knife, cutting board, clean cloth, ladle, or rubber spatula. All of which are needed to prep your food and jars are probably in your kitchen already. Food mills and food processors are also super useful, depending on what you are canning.
For this list, I am just focusing on basic canning-specific tools:
- Ball Blue Book Guide to Preserving – Everyone interested or involved in preserving food should own this book. The first time you read through a canning recipe, it will seem like a different language. Once you learn the terms, it will be a huge step toward confidence in canning. Following a recipe tested by a reliable source is key for food safety. Make sure to buy the newest edition available.
- Jar Lifter – As the name implies, this helps lift hot jars in and out of the hot canner. It is an inexpensive and indispensable tool.
- Magnetic Lid Wand – This tool helps get lids out of hot water (used to sterilize and soften the seals) and onto your jars. After burning my fingers far too many times, I finally broke down and bought one. For about $2. I’m either really thrifty or really dumb.
- Wide Mouth Funnel – Placed on a jar, this helps pour hot jams, sauces, or produce into hot jars without making a huge mess.
- Bubble Remover – You can purchase an actual tool to slide into your filled jars to remove bubbles. I just use a plastic knife or wooden chopstick.
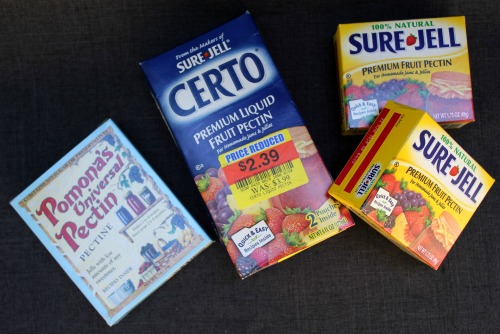
Fruit Pectin
Pectin is a naturally occurring substance found in fruit. Combined with sugar, it helps fruit gel and thicken when making jam or jelly. There are many different varieties available (no or low sugar, alternative sweetener, liquid, cook). Sometimes recipes will call for a specific pectin, but most of the time it is up to your own tastes and preferences.
Pomona’s Universal Pectin (Amazon), which is 100% citrus pectin with no preservatives, is more expensive but has the benefit of making jam or jelly with low amounts of any sweetener. I made Honey Apricot Jam with it last year. The texture is definitely different than using standard pectin, but I loved being able to skip the sugar.
Looking for more?
Leave a comment! What advice or equipment would you add to the list?
This post may contain affiliate links. See the disclosure policy for more information.

How do I find an extension office in spokane?
Check out North Portland Preserve and Serve, they loan canning equipment free to N pdx residents. They also have other things to borrow…
Alicia, I taught my self how to can a right a few years ago still not an expert but it can be so rewarding and yummy! I’ve used Tri- county for a couple of years. Great resource-check it out online or get a hard copy at New Seasons. A few things I’ve learned: Tip:Call the farm before you go pick your fruit and veggies and ask what is available and the cost of u-pick. Depending on our amazing summer weather produce may be ahead or behind schedule. It’s a drive- but Sauvie Island and places out near Hillsboro offer many fabulous options. Also, bed bath and beyond with a summer sale and coupons can get you some really great prices on canning supples. Keep your eyes peeled! hope this helps. Happy canning!
There is a paper called the Tri-county farm fresh produce guide. It has a list of farms in Clackamas, Multnomah and Washington Counties. They list each farm, what they grow, their phone number and location. I got mine at Bi-mart in the canning section. It really helped me find the farms closest to me that grew what I needed. I am new to canning too and this really helped me out.
Thanks!
I’m very new to canning, but really excited about doing more. I live in Clackamas county, I feel like I should be surrounded by farms with good prices on fresh produce, but seem to be struggling finding places. Can you share any of the places you get your produce?
For more ideas, check out this post: http://www.frugallivingnw.com/frugal-homemaking/u-pick-produce-9-tips-for-picking-success/
Thanks for the post! I look forward to reading more about canning. If anyone knows the best prices on fruit and veggies please let me know. I really want to can peaches and pears. My daughter loves them. Thanks.
Last time I took a water bath, my wife tried canning me. Next time I will lock the door.
I do my canning in my garage or outside using our propane camping stove. It does a great job regulating the heat and I’m not inside heating up my house!
That is a GREAT idea!
You should try the raspberry jam recipe that uses no pectin. It is truly delicious and does have a firm jell. It is only equal parts sugar and mashed raspberries so a bit lower sugar than some jams.
As far as equipment goes, I like to make sure I have plenty of clean, dark colored (so you don’t see the stains from the fruit) kitchen towels on hand before I begin canning. With the constant washing of hands, mopping up of spills, etc., this really helps. In order to have enough room on my stove for the canner, the blanching water and the pot that holds the lids, I always use a separate plug in electric burner to keep my syrup hot on the counter top. I keep a big bucket at my feet to put all of the waste in (peels, etc.) so I can give that stuff to the compost pile or chickens later. I also like to have freezer meals on hand during canning season. We eat off of paper plates at the picnic table outside because the kitchen table is always full of cooling jars.
Thank you for this post! I’ve been wanting to give canning a try, but haven’t felt brave enough to just go for it yet. It doesn’t help hearing ‘botulism’ every time I mention it to my mom. (I made freezer jam instead). It’s rather chaotic right now with an impending move and 2 young ones. Someday the more I read, the more doable it seems.
I have been canning jams, jellies and fruit for years. I have always been afraid to can other things. Just today I picked green and yellow beans and canned 6 pints of Dilly Beans.
It took me awhile because I read and re-read the instructions numerous times. I’m feeling more confident with all the great posts on canning !
My newest and now most favorite water bath canning equipment is my propane turkey fryer. At this very minute it is 102 degrees outside and my house doesn’t have A/C. Needless to say, the thought of a huge pot of water boiling on the stove for hours and hours (I’m a ‘go big or go home’ canner) is none too appealing. Last year my husband proposed using the turkey fryer so we could hopefully keep the house below the temperature of the surface of the sun. Now, we can outside all the time! TIP: When you’re done with the water, dip it out with a ladle & fill a watering can (not a plastic one!) with the scalding hot water. “Water” unwanted weeds to kill them almost instantly! No pesticides…no waste! DISCLAIMER: Be very careful with the hot water. It can scald if spilled or sloshed on skin. DO NOT let young children handle the watering can full of hot water and do not leave it unattended.
^Tracy – by the texture being different, she surly means “better” because you’ll never be sorry you chose the Pomona’s pectin! I have been using it for years and will now use nothing else. I believe this pectin really enhances the fruits own flavors and sweetness and even contributes to beautifully deep colors in the jams and jellies I’ve made. Never have I, nor anyone I’ve gifted my canned treasures to, ever breathed a word about texture. Pomona’s is really incredible stuff – one season of use will make you a convert too! Trust me
I just purchased a package of Pomona’s, how was the texture different. I want to make Blackberry jam, but I don’t want to be disappointed.
Yes, I just mean different, not disappointing! The color is bright and beautiful. I would say the consistency is more of a fruit puree, while traditional pectin is more of a gel. It’s hard to describe, but I don’t think you’ll be disappointed. It is so great to be able to pick the amount and type of sweetener. I plan to do more with Pomona’s in the future.
I make blackberry jam without pectin at all. Just boil the sugar and berries until it sets. I check it by putting a small plate in the freezer while I am getting everything ready. When I think it is close, I spoon a small amount on the frozen plate. I know I am done when the jam is the consistency I want after cooling on the frozen plate.