Planting tips for vegetable seeds and starts
Putting in a garden or planting a few small containers can be intimidating. No one wants to invest the time and money into a garden, only to be rewarded with seeds that don’t come up or plants that shrivel up.
If you are going to do this, you want to do it right. I totally get that. I grew up watching my grandpa grow a huge commercial garden. Acres of tomatoes and melons. I had a deep appreciation for thumping watermelons and picking cucumbers.
When I was a kid, I learned by being my dad’s sidekick in the garden. I loved the whole process — planning the layout, choosing the seeds, planting, watering, waiting. Time’s haven’t changed much. My husband and I put our garden in last weekend. I was so stupidly excited, I could hardly sleep. Who needs Disneyland when you have dirt? My garden is my hobby/happy place.
I still consider myself very much a gardening amateur, but here are a few planting tips and tricks I’ve picked up along the way.
Transplanting large vegetable starts
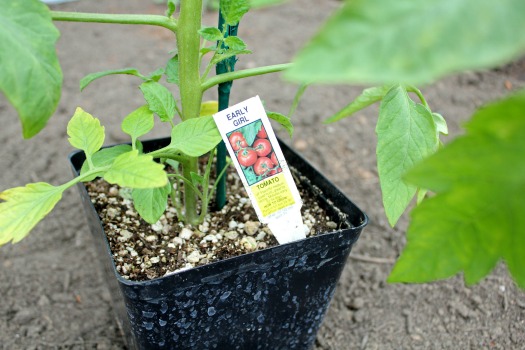
If you are new to gardening or just want a jump start on summer planting, vegetable starts are a good way to go. You don’t have to play the waiting game as you do with seeds. Starts are instant plant gratification.
While they are more expensive than seeds, they are still very reasonable. Most larger starts are around $2-4 each. I often buy larger starts of tomatoes, zucchini, cucumbers, and peppers. My favorite place to purchase vegetable plants are farmers markets and local nurseries, as they usually look healthier than what you can find at a home improvement store. Also, by buying what your local farmers are planting you have a good guarantee that it will do well in our growing zone.
Most plants will come with a smaller marker, containing some planting information. Pay attention to whether the plant likes full or partial sun, what time plants can be put in the ground, and how far apart plants should be spaced. The last one is important, as it’s easy to forget how large plants will be come August. Your garden area might look a little sparse in May-June, but that’s not such a bad thing; give larger plants plenty of room to grow!
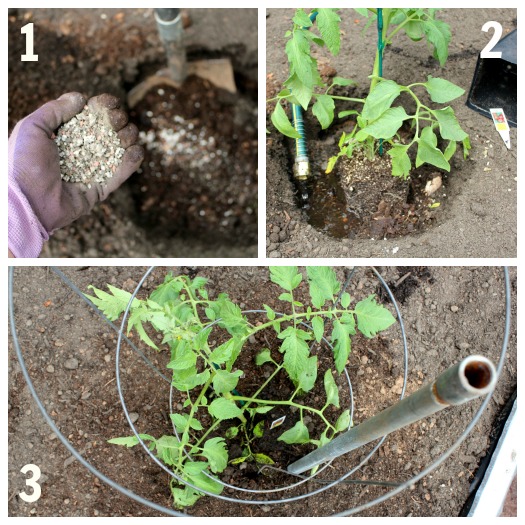
1. Dig a large hole, 2-3 times the size of the root ball. Loosen the soil, breaking up dirt clods and removing rocks. I amend the soil with several shovelfuls of compost, working it in with the existing soil. If you don’t have your own compost bin, you can buy compost by the bag or the yard at any local home improvement store or landscape supply place. I also add 1/4 cup of fertilizer that will release into the soil over time, giving the plant more nutrients to grow.
2. Slightly loosen the root ball and place it in the hole. Give the plant a nice, long drink by filling the hole with water. I prefer doing this before I fill the large hole back in with soil, as it soaks into the soil better.
3. Fill the hole back in with soil, pressing down with your hands to set the plant. Water again. For tomatoes, it’s nice to place cages around the plant to help it stay upright as it grown. You can buy them for $2-3 or, if you are like my husband, make your own with stakes and wire. We always stake our cages, as the weight of a full-grown tomato plant can easily topple the cage over.
Transplanting Smaller Vegetable Starts or Tray Packs
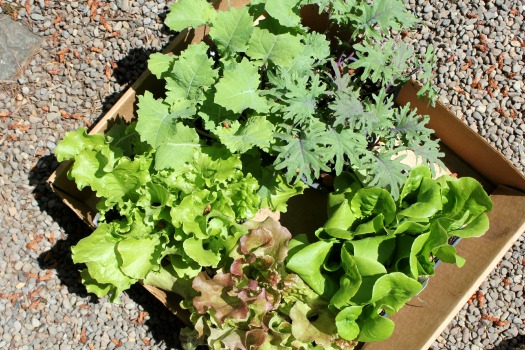
Next year, I plan to start create more of my own starts from seed. The last few years, I blinked in February and it was suddenly May. Not sure what happened there. Thankfully, tray packs (usually six smaller plants) are around $2. When you consider the fact that one bunch of kale (on sale) is usually $2, it’s a great deal whether you start with seeds or plants. This year, I bought several varieties or lettuce and kale, as well as onion sets already started for me. Thank you, friendly local nursery.
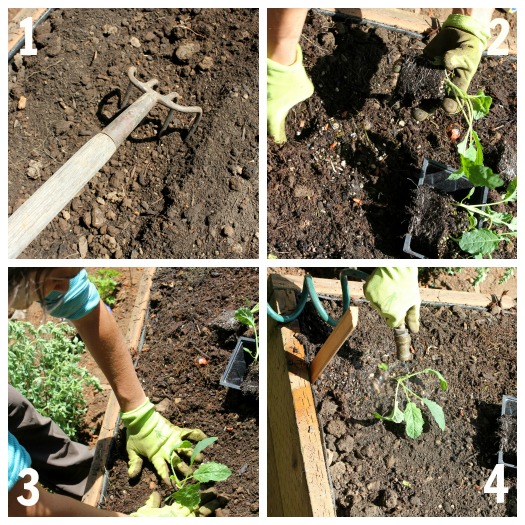
1. Work up the soil where the plants will go. I use a claw tool to create wide rows of good soil. Again, I amend it with generous scoops of compost and a little fertilizer.
2. Gently break apart the plants. It may feel strange to rip apart the roots, but as long as they have a little root ball, they should be happy in their new home. Using your hand or a small trowel, create a small hole for the plant.
3. Place the plant in the hole and fill in the soil around it. Gently pat around the plant to set it in the ground.
4. Give it a nice long drink.
Starting Plants from Seed
Starting plants from seeds may seem like the hardest option of the three. If so, just stick with starts until you are comfortable with that process. Then next year move on to seeds.
Some colder-weather crops, like greens, beets, cauliflower, broccoli, or carrots, can be sown in early spring after threat of frost is past. Plants that love heat like corn, beans, or basil can have their seeds sown straight in the ground in May or early June. Of course, you can also use seeds to start your own plants in old tray packs or seed pots.
RELATED: Spring garden planting lists

Again, all information about seed and row spacing can be found on the back of the seed packet.
1. Using a rake, level the ground where you plan to plant.
2. Put in stakes, evenly spaced, to create rows. If your rows are long, you can tie string between two stakes to keep them straight while you are sowing the seeds.
3. For seeds that need to be sown 1/2-1″, create a straight, shallow trench for the seeds. Seeds that only need to be covered by 1/4-1/2″ of soil can be dropped on top. Then I just sprinkle soil over the seeds until they are covered but not buried.
4. Gently cover and pat the seeds with your hand. Water lightly.
************************************************************
If you are looking for more information on gardening in the Northwest, check out The Timber Press Guide to Vegetable Gardening in the Pacific Northwest (Amazon). I own this book, and it is a great resource. Gardening tasks and tips are divided by month, so it’s easy to find information and track with the growing seasons. This would be a great book for a beginning gardener or resource for a seasoned one. If you live in a different part of the US, check out the other regional Timber Press Guides.
You might also like:
Find more gardening posts here or follow our garden board on Pinterest for more garden tips and tricks.
This post may contain affiliate links. See the disclosure policy for more information.

Thanks for such a great article! I grow starts that I sell at the farmers markets in the Portland area. I love when people want to grow their own food. I would also encourage people to be aware of temperatures in your area before you transplant your starts out and don’t feel like you have to plant everything at once. Cucumbers, basil, eggplants and melons love warmer soils and nighttime temperatures.
Have really enjoyed your series (I envy your raised beds 🙂
Few tips I have learned along the way.
My best one is to plant tomato plants very deep-bury the first one or two stems (lay them out sideways & cover)-this gives them a much stronger support-as these will grow roots too. I have had very good success with this & have done it now for years.
I buy cucumber plants already started, as the slugs tend to eat my plants & they have a better chance of surviving if they are larger. IF you don’t have slug problems (is there anyone so blessed?) they would grow well by seed.
Squash of any type, corn, basil & beans I would plant by seed-they grow very easy & very fast. If you have children this is fun for them to help with. I would encourage you to try seeds right in the garden (I don’t do tomatoes or egg plant for our area-pacific NW)-I tried starts early a few years, but actually didn’t have good success transplanting them. Also like you time speeds past me before I notice how late it is getting!
Plants-as you say- tend to take much more space than you imagine-so give plenty of room-if you use seeds they give an idea how close to plant together on the package. My tomatoes & squash get huge.
This year I planted a cantaloupe (supposed to be an early bearer, so I am giving it a try)-I have a small garden, so my plan is to run it around the side of the garden. The cucumbers I have climb up a pole. One of my poles is a neat curled metal pole, which works great-my other one is just a straight pole-that one may need the vines attached to it as they grow a bit.